Showing posts with label Spring. Show all posts

Stacked with Mother's Love


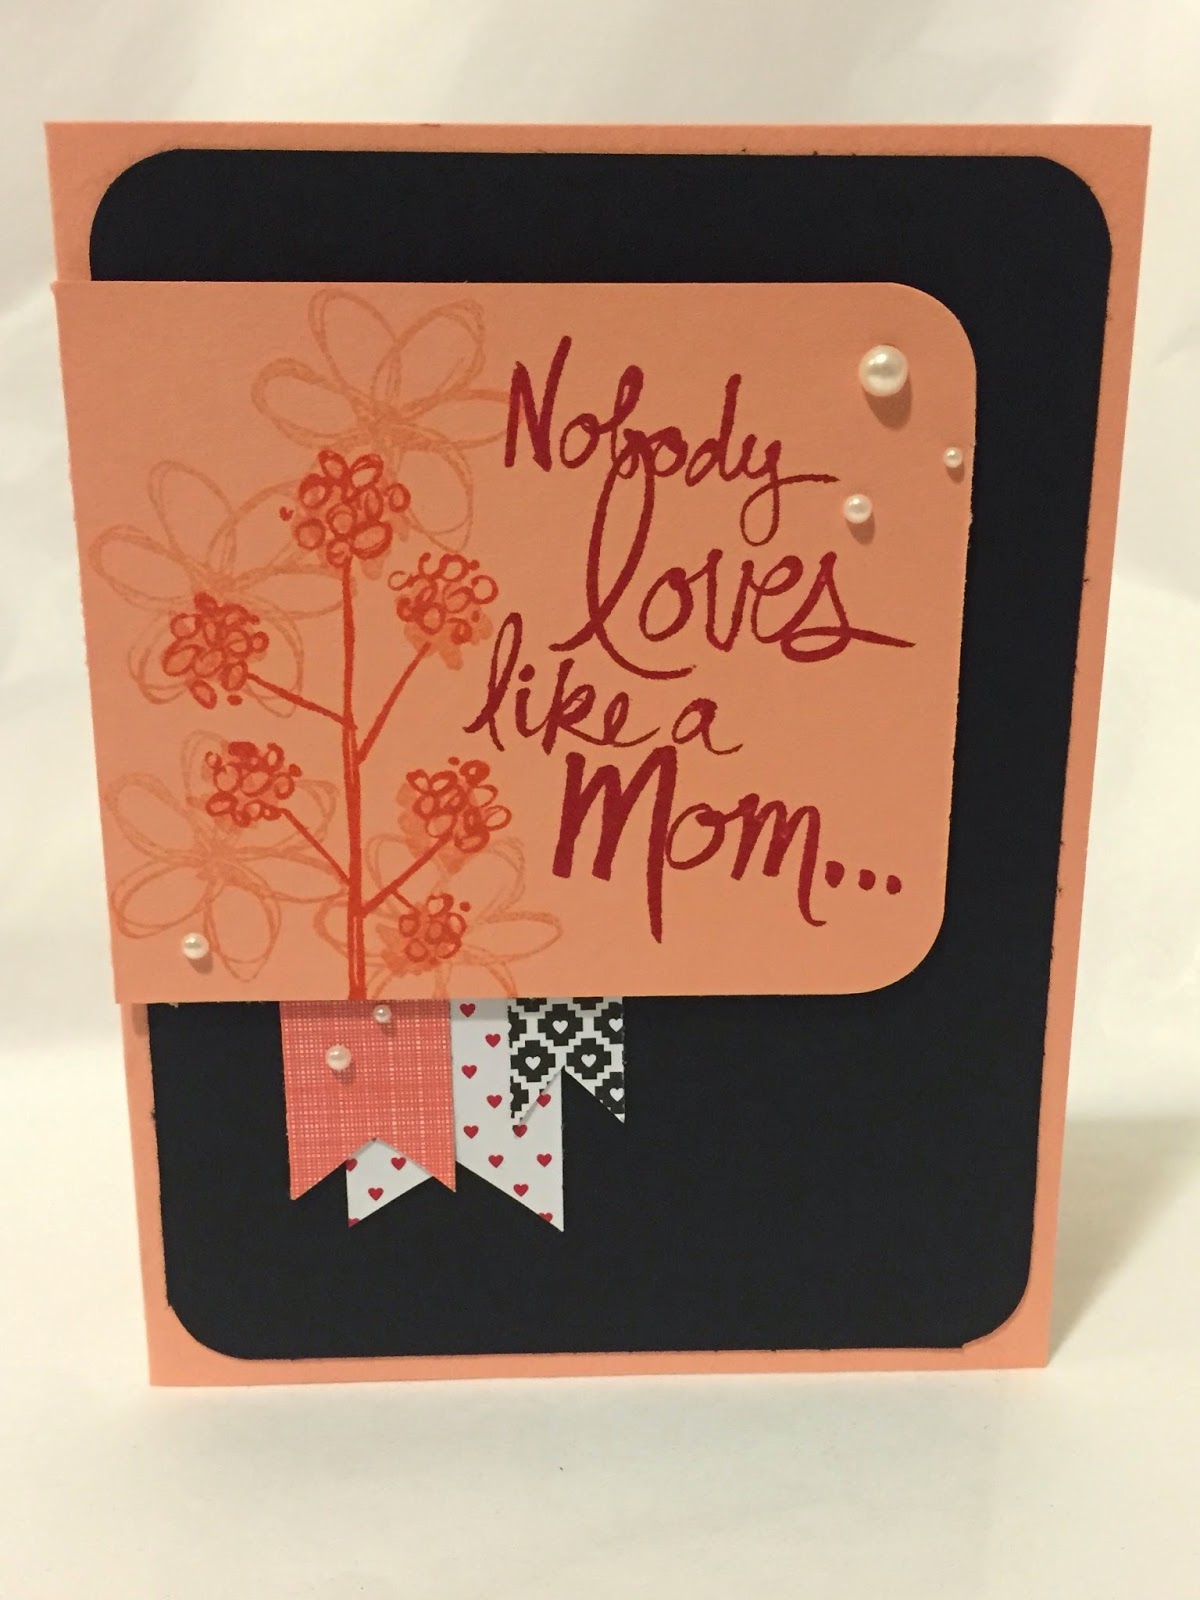
Stacked With Love Mother's Love Stampin Up MidnightCrafting.com
Stacked with Love Designer Series Paper Stack and Mother's Love Stamp Set
in Calypso Coral, Crisp Cantaloupe, and Basic Black
Isn't it kind of cool that they made the Stacked with Love Designer Series Paper Stack a seasonal yet versatile paper set?! It's in the Spring Occasions 2015 Catalog, like the Mothers Love stamp set. You can use the papers all year for your love cards, for anniversary or wedding cards, or even just add a modern pop of black and white to any occasion. If you have any of that stack left, the scraps make bright little accents for cards. I might even get another stack to have on hand, the love patterns are pretty classic!

Stacked With Love Mother's Love Stampin Up MidnightCrafting.com
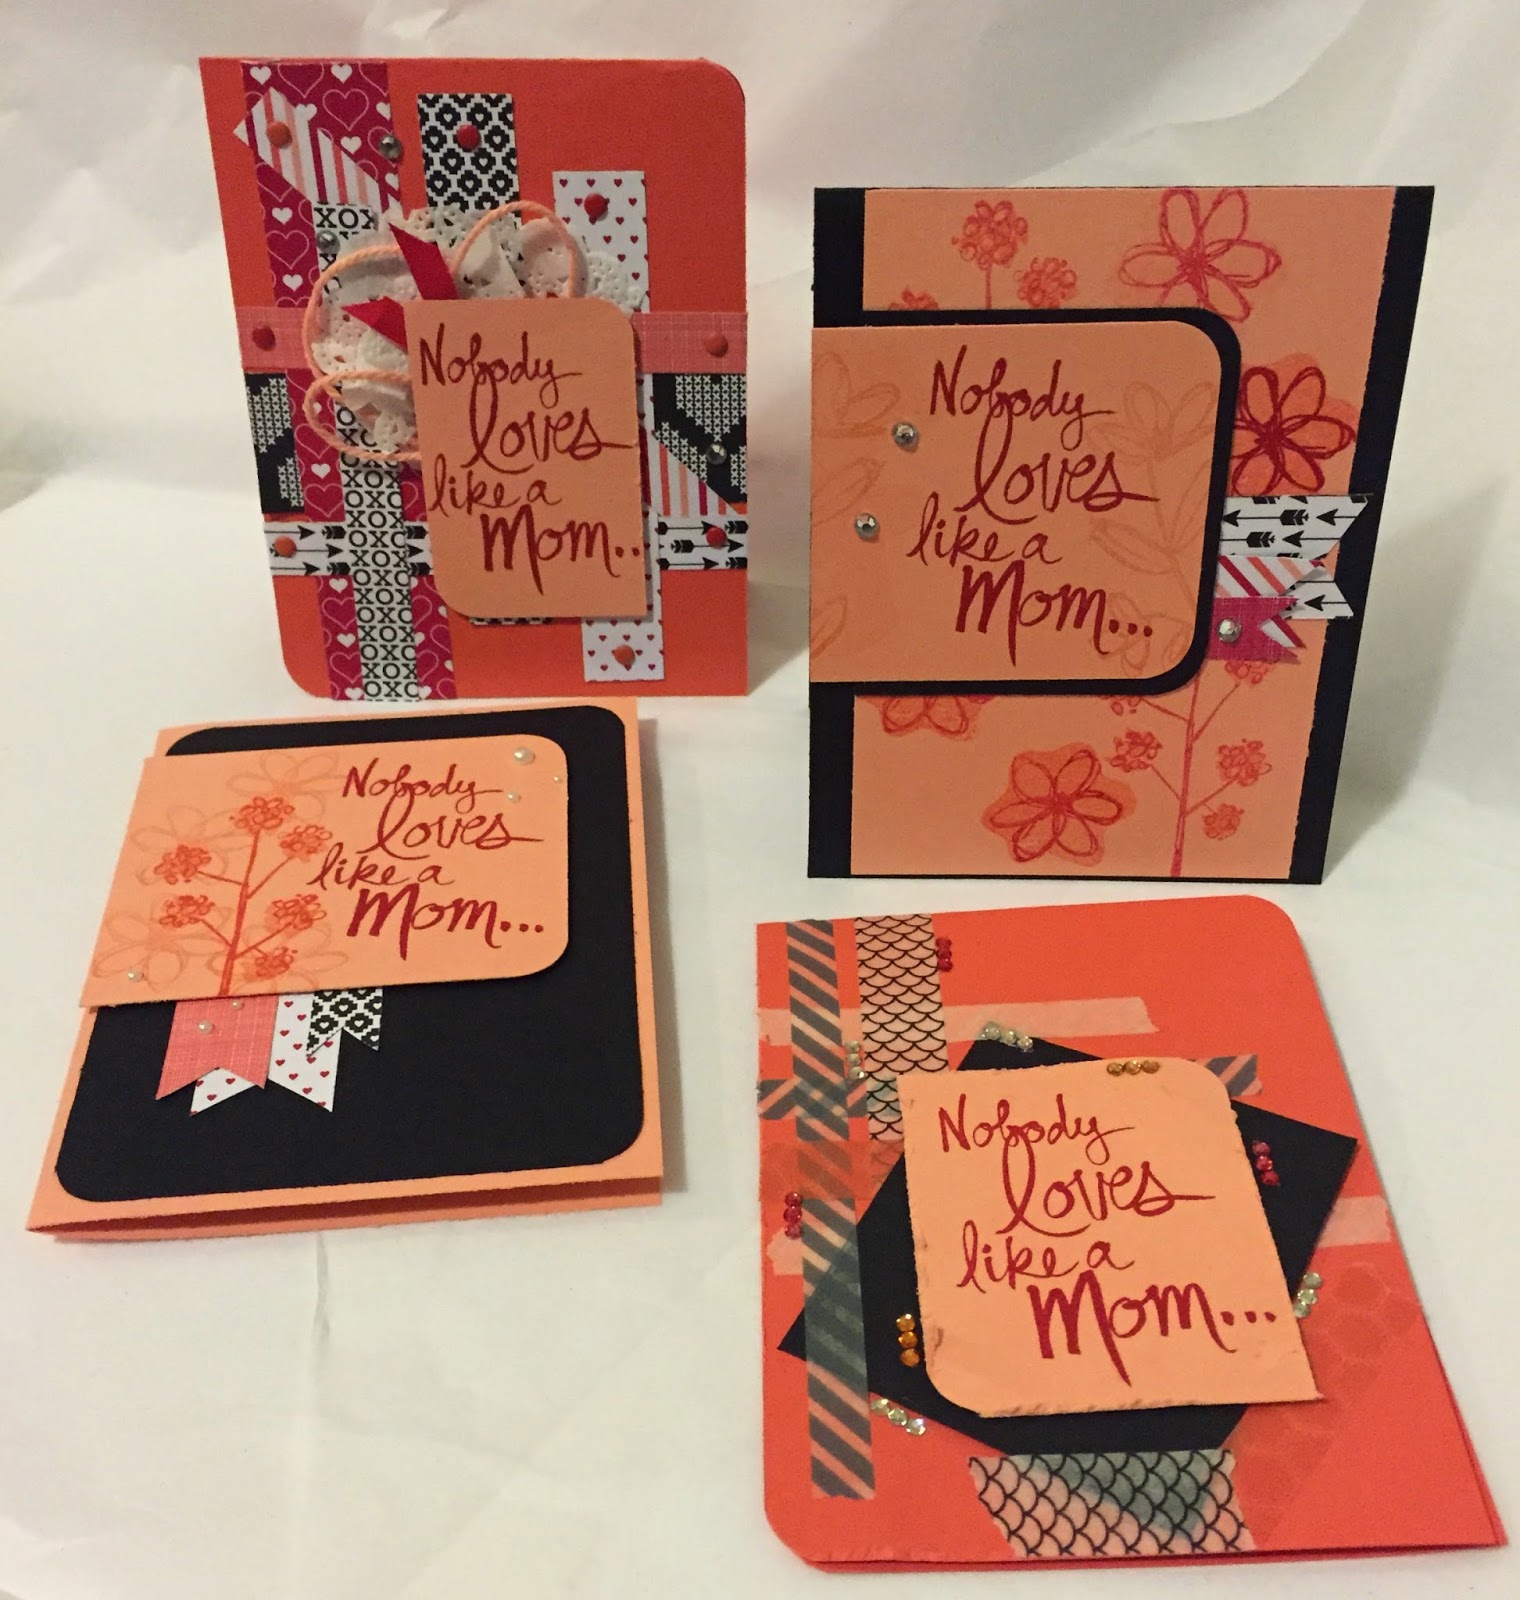
This card has a Crisp Cantaloupe base with the Mothers Love stamps in Real Red, Calypso Coral and Cantaloupe. The contrast between the black layer and the DSP and stamps is pretty, yet bold! Just like Mom, right?

Stacked With Love Mother's Love Stampin Up MidnightCrafting.com
The second card I used the same layout, but swapped the colors. I was able to use more of the stamps on this, and I tried a technique Patty Bennett mentioned was shown at Leadership: I stamped the BACK side of the polymer stamp (the one that you usually stick to the block) in Crisp Cantaloupe and then used the FRONT side to stamp over it in Real Red. It creates a nice background for the darker color. If you didn't have a 2-step stamp, this would let you get that effect. It does NOT work well with the clear stamps!! Don't ask how I know - and don't look at my terribly inked up hands, table, and paper in the circular file... Just trust me when I say: They are talking about the POLYMER stamps for this technique! LOL
Stacked With Love Mother's Love Stampin Up MidnightCrafting.com
I also added some of the Stacked with Love paper to the inside of the Black base for a writing spot. A card as pretty inside as it is outside. Just like Mom, right?!

Stacked With Love Mother's Love Stampin Up MidnightCrafting.com
For this third card, you can see I took a break from the stamping. (I had to wash my hands several times during that previous card session!) I got to use a good chunk of my scraps to create the background of this card. I like how it came out, its so hard for me to DO random, but using the paper sets really helps with a random yet matching layout! Woven and stacked layers, accented with Candy Dots and a few rhinestones give a really eye catching backdrop for the simple sentiment. The Calypso Coral base and the Crisp Cantaloupe layer have only two corners rounded, to add to the eclectic look. Behind the sentiment layer, I have a Tea Lace Paper Doily, some Crisp Cantaloupe Thick Bakers Twine, and Real Red 1/4" Cotton Ribbon. Woven together with vibrant love, eye-catching soft and sharp layers. Just like Mom, right?!

And then there is the last card.
Stacked With Love Mother's Love Stampin Up MidnightCrafting.com
Washi Tape. I am trying to use it on more than envelopes and my calendar!! The Black, Grey, Coral and Cantaloupe fit my color scheme of the day, and let me try the eclectic layered look with a different feel. I used tape from the Sweet Sadie, and Epic Day, Designer Washi Tape sets. I colored those little strips of Rhinestones with Cherry Cobbler and Pumpkin Pie Blendabilities and scattered little trios around the card. Fun, coordinated, yet a little crazy in its own way. Just like Mom, right?!

Just Like Mom. There is a card to fit every Mom, and every mom deserves a card - even if its NOT on Mothers Day! I like this set because you will use the flower images all year, and you can also send Mom notes through the year, because

Nobody loves like a Mom.
#Truth

Happy Crafting!
-Angie

Paper Pump-kin, Paper Pump-kin, Pa-per Pump-kin, Paper Pumpkin!! 

(Sung to Ride of the Valkyries ((forgot that one? You know it - listen HERE)) for emphasis)
Paper Pumpkin ships out after the 10th, so SIGN UP today and don't miss another month!!
Read More »

Blessed Painted Blooms

MidnightCrafting.com Blessed by God and Painted Blooms Cardmaking Ideas
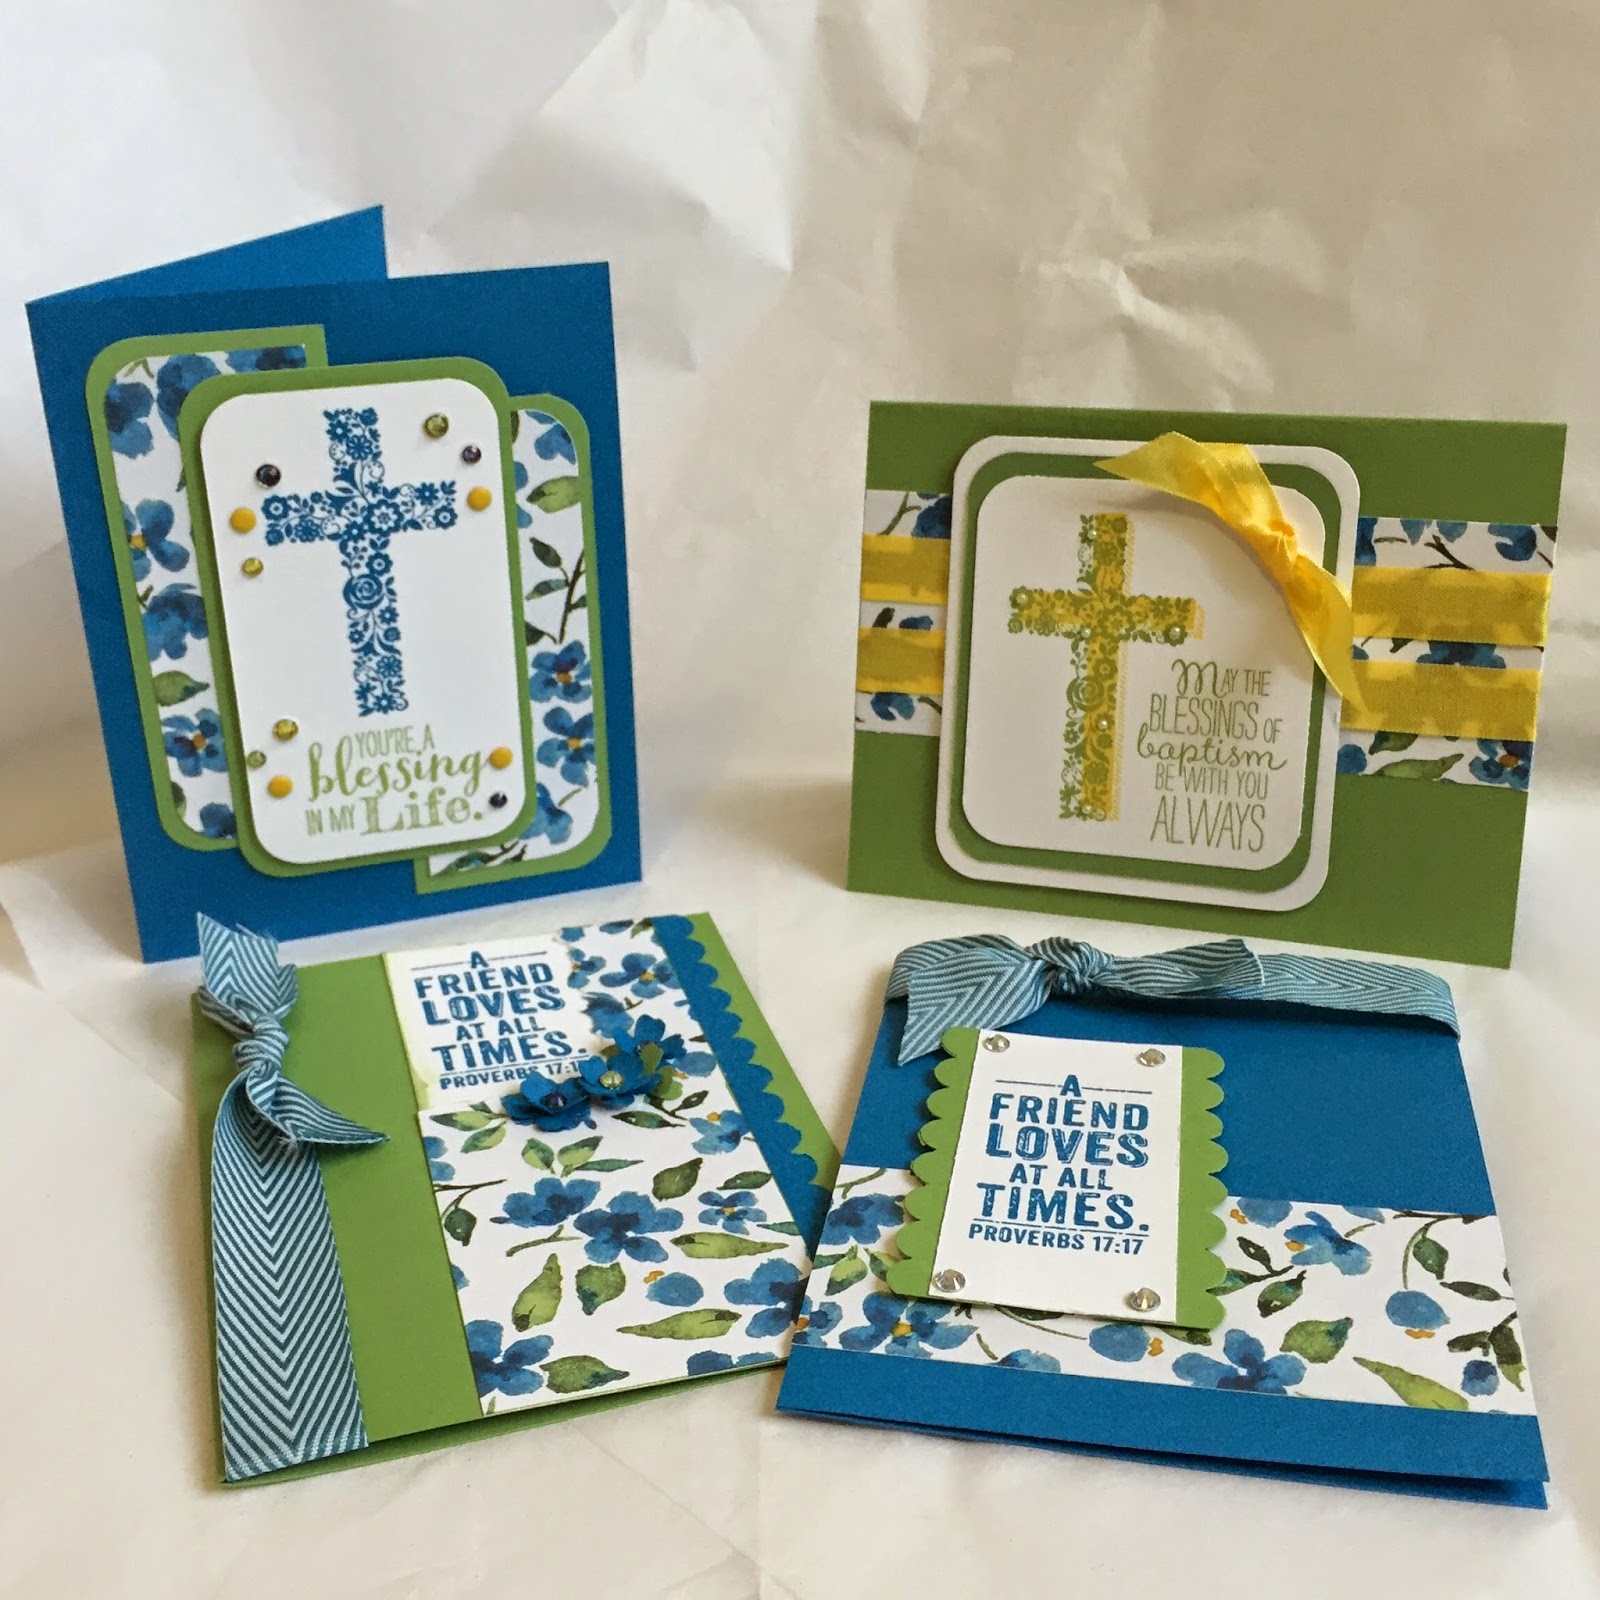
Blessed by God paired with Painted Blooms DSP
using Pacific Point and Wild Wasabi
Isn't it funny when you look at color combos in your life and think, wouldn't THAT be nice on a card?! OK. I might be one of the few that actually thinks that, but I'm sure you know what I mean! I was giving my daughter her snack a while ago, and my bright blue sweatshirt with her green snack bowl really caught my eye.
MIDNIGHTCRAFTING COLOR INSPIRATION
I got up to Craft Central at nap time, and made these cards using Painted Blooms Designer Series Paper and the Blessed By God stamp set. The colors pop together, and are incorporated into the blue flowered print in the paper set! Blessed by God stamp set is in the Annual Catalog, and is a good set for weddings, baptism, friendship and a variety of other occasions. (Anniversary, retirement, congratulations - it works, look at the set!)


MidnightCrafting.com Blessed by God and Painted Blooms Cardmaking Ideas
For the first card, I used a Wild Wasabi base, a strip of Pacific Point punched with the Scallop Border Punch, and some of my Island Indigo Chevron ribbon. Yes, it does match mostly because of the shades of blue in the flowers. I ripped out a section of the Painted Blooms DSP and tucked a white piece stamped in Pacific Point, sponged on the edges with the Wild Wasabi.


MidnightCrafting.com Blessed by God and Painted Blooms Cardmaking Ideas
The second card has a Pacific Point card base, with accent panels of Wild Wasabi, and some added Candy Dots and colored rhinestones. I used the Corner Rounder punch to add some focus to the center panel.


MidnightCrafting.com Blessed by God and Painted Blooms Cardmaking Ideas
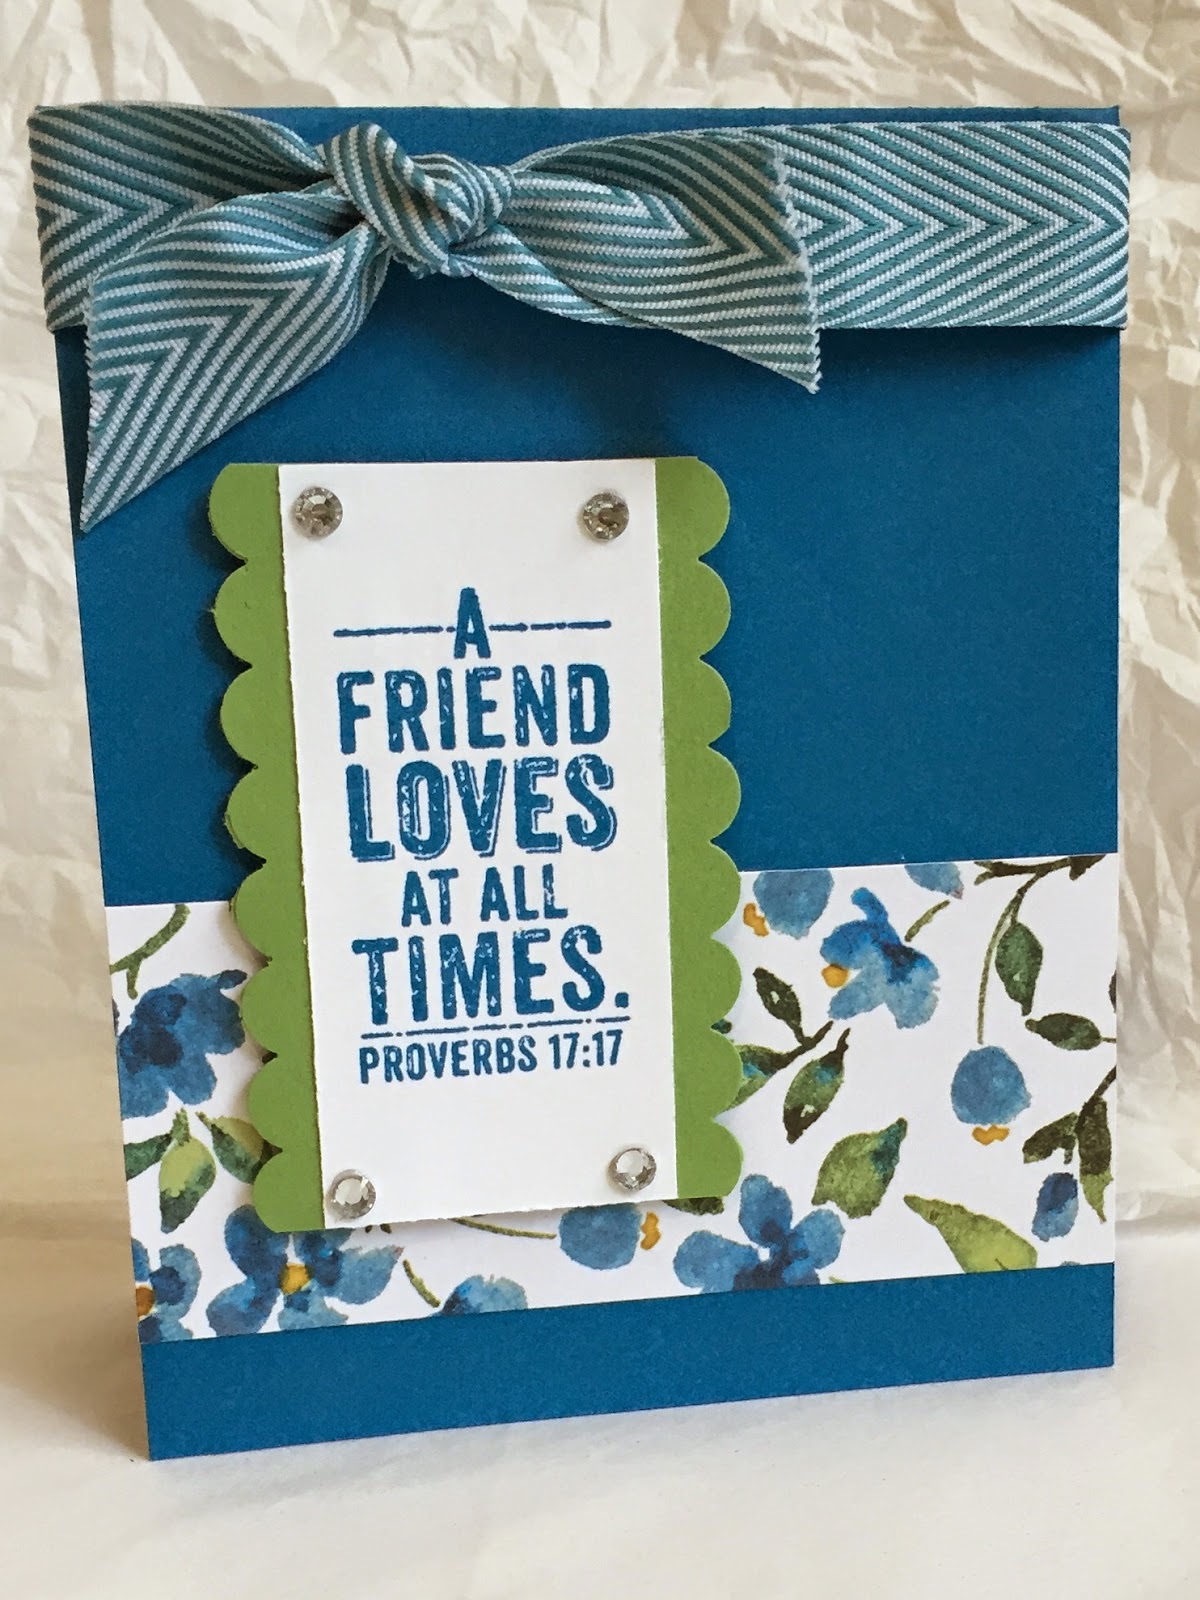
The third card also has the strong blue Pacific Point base, with more scallop border punches this time in Wasabi. I used more of the chevron ribbon, and accented with some rhinestones.


MidnightCrafting.com Blessed by God and Painted Blooms Cardmaking Ideas
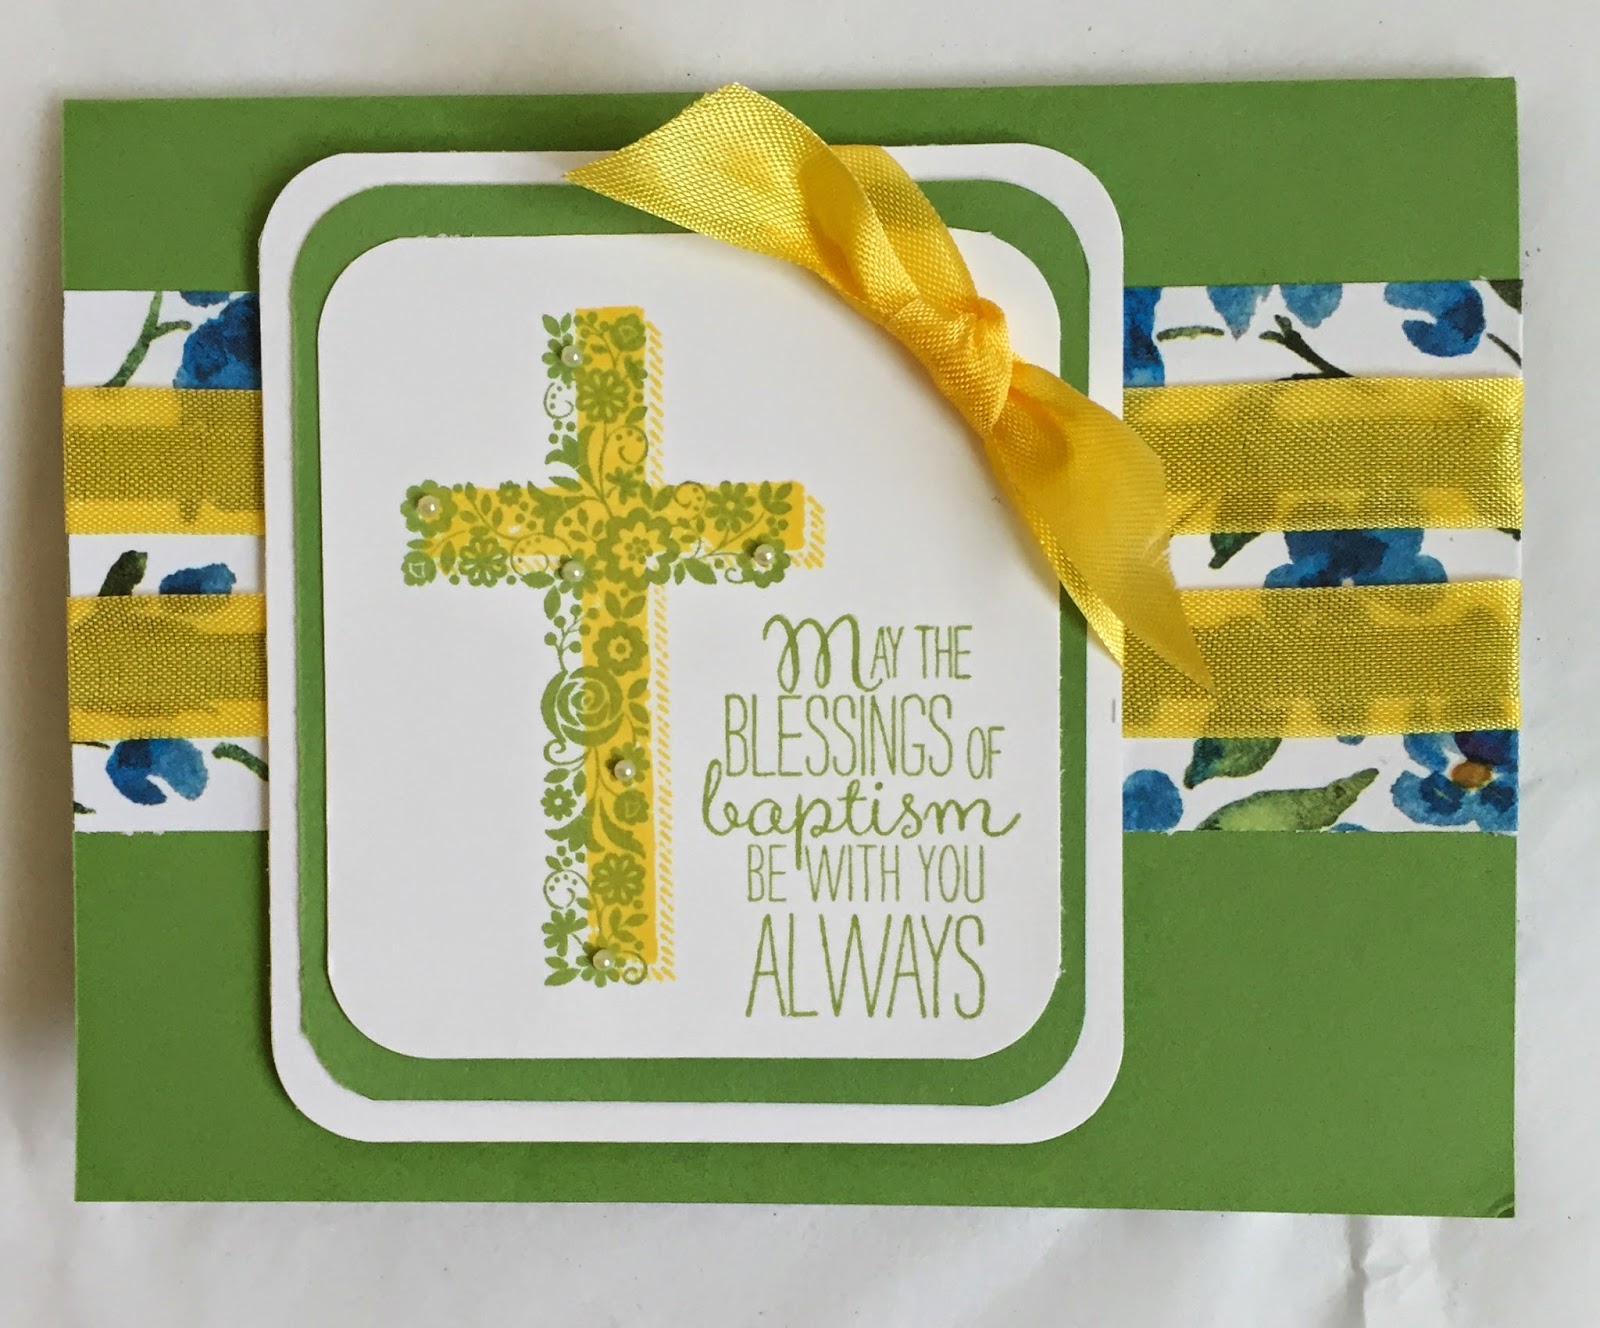
The last card I tried a 2 step stamping style with the crosses in the set. I stamped the solid cross in the lighter Daffodil Delight, and over it stamped the flowered cross in Wild Wasabi on a triple layer panel. I used 3 strips of the Painted Blooms DSP across the Wild Wasabi card base, and wrapped the space between the strips with some Daffodil Delight 1/2" Seam Binding.


I think these are bright and happy cards, a perfect way to send someone your special wishes. What do you think of the color combo?

Happy Crafting!
-Angie 

Sign Up today - Paper Pumpkin Kits ship out after the 10th for subscribers! 
Read More »

Here Comes Peter Cottontail

Easter Bunny Treat Bag MidnightCrafting DIY party favor baby shower spring brunch

Easter is early this year! You'd better HOP to it if you want to get all those cute Pinterest projects completed! lol Today I'm sharing a cute treat bag, to hold some sweet Easter treats. These would also make cute little favors, for a baby shower or spring party, maybe your Easter Brunch. Easy for a class party, too! The Polka Dot Tag a Bag is a versatile (and economical!) little treat bag. Darling with the Tag a Bag Accessory Kit, it also lends itself to many other tag creations for just about every holiday or event. Perfect to have on hand for a quick gift card holder or other small gift.

Easter Bunny Treat Bag MidnightCrafting DIY party favor baby shower spring brunch

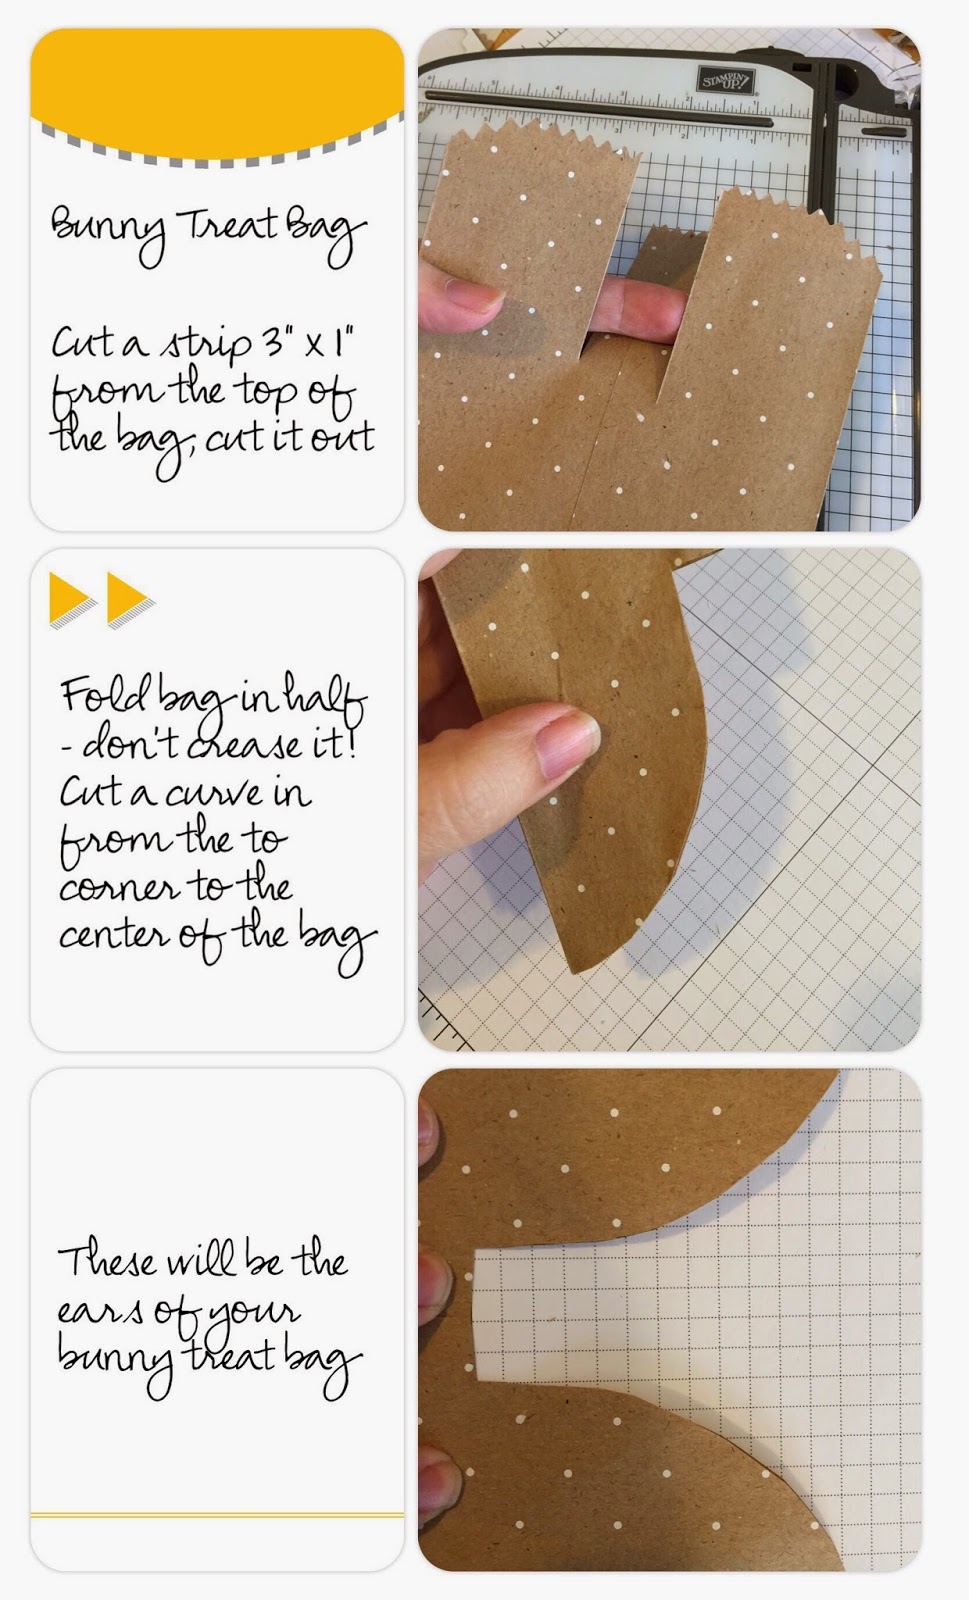
To make these, you need to cut a rectangle out of the center of the bag. This is about 3" down from the top, and about 1" wide. Then, bring the edges of the bag together, and cut a curve for the ears that will match exactly.
Easter Bunny Treat Bag MidnightCrafting DIY party favor baby shower spring brunch

Fill your bag with goodies! Taste-test a few for quality!!
Then, gather the bag at the bottom of the rectangle space you cut, and fix the ears so they are looking like... ears. You could totally tie them up here and leave it like this -very cute! But for more "realistic" styling ;-) you can trim two pieces of card stock, or paper of your choice, and adhere them into the ears. Tie off the gathered piece with some pretty ribbon and...

Voila!!
Pretty party favors, or class treats!

Easter Bunny Treat Bag MidnightCrafting DIY party favor baby shower spring brunch


I used the Polka Dot Tag A Bag; Crisp Cantaloupe Card Stock; Pumpkin Pie and Crushed Curry Chevron Trim, Natural & Old Olive Two Toned Trim.

Happy Crafting!
-Angie
Read More »

Countless Sayings Cupids Wreath

Countless Sayings Cupid Wreath Stampin Up MidnightCrafting
Cupids Carnival Wreath


You know, Carnival Art. Those 'cool' shirts you can get at the fair or a carnival, all airbrushed and stylized? LOL Yup. I was going more for a cool graffiti look... but whatever.

I saw this really cool door decor on Instagram, and I loved the idea. But. I did not have the awesome wooden angel wings Kelley has, so I used what I had on hand. Which kind of adds to the crazy feel of it, I guess. (Insert merry-go-round music here) I used this pair of Angel Wings I've had forever, and the Valentines Day Heart Wreath I made (see it HERE). For the sign, I wanted something bright and about Love...

ANYHOW... Despite the mixed reactions I got when I showed it around here, I LIKE IT!!
Countless Sayings Cupid Wreath Stampin Up MidnightCrafting 1

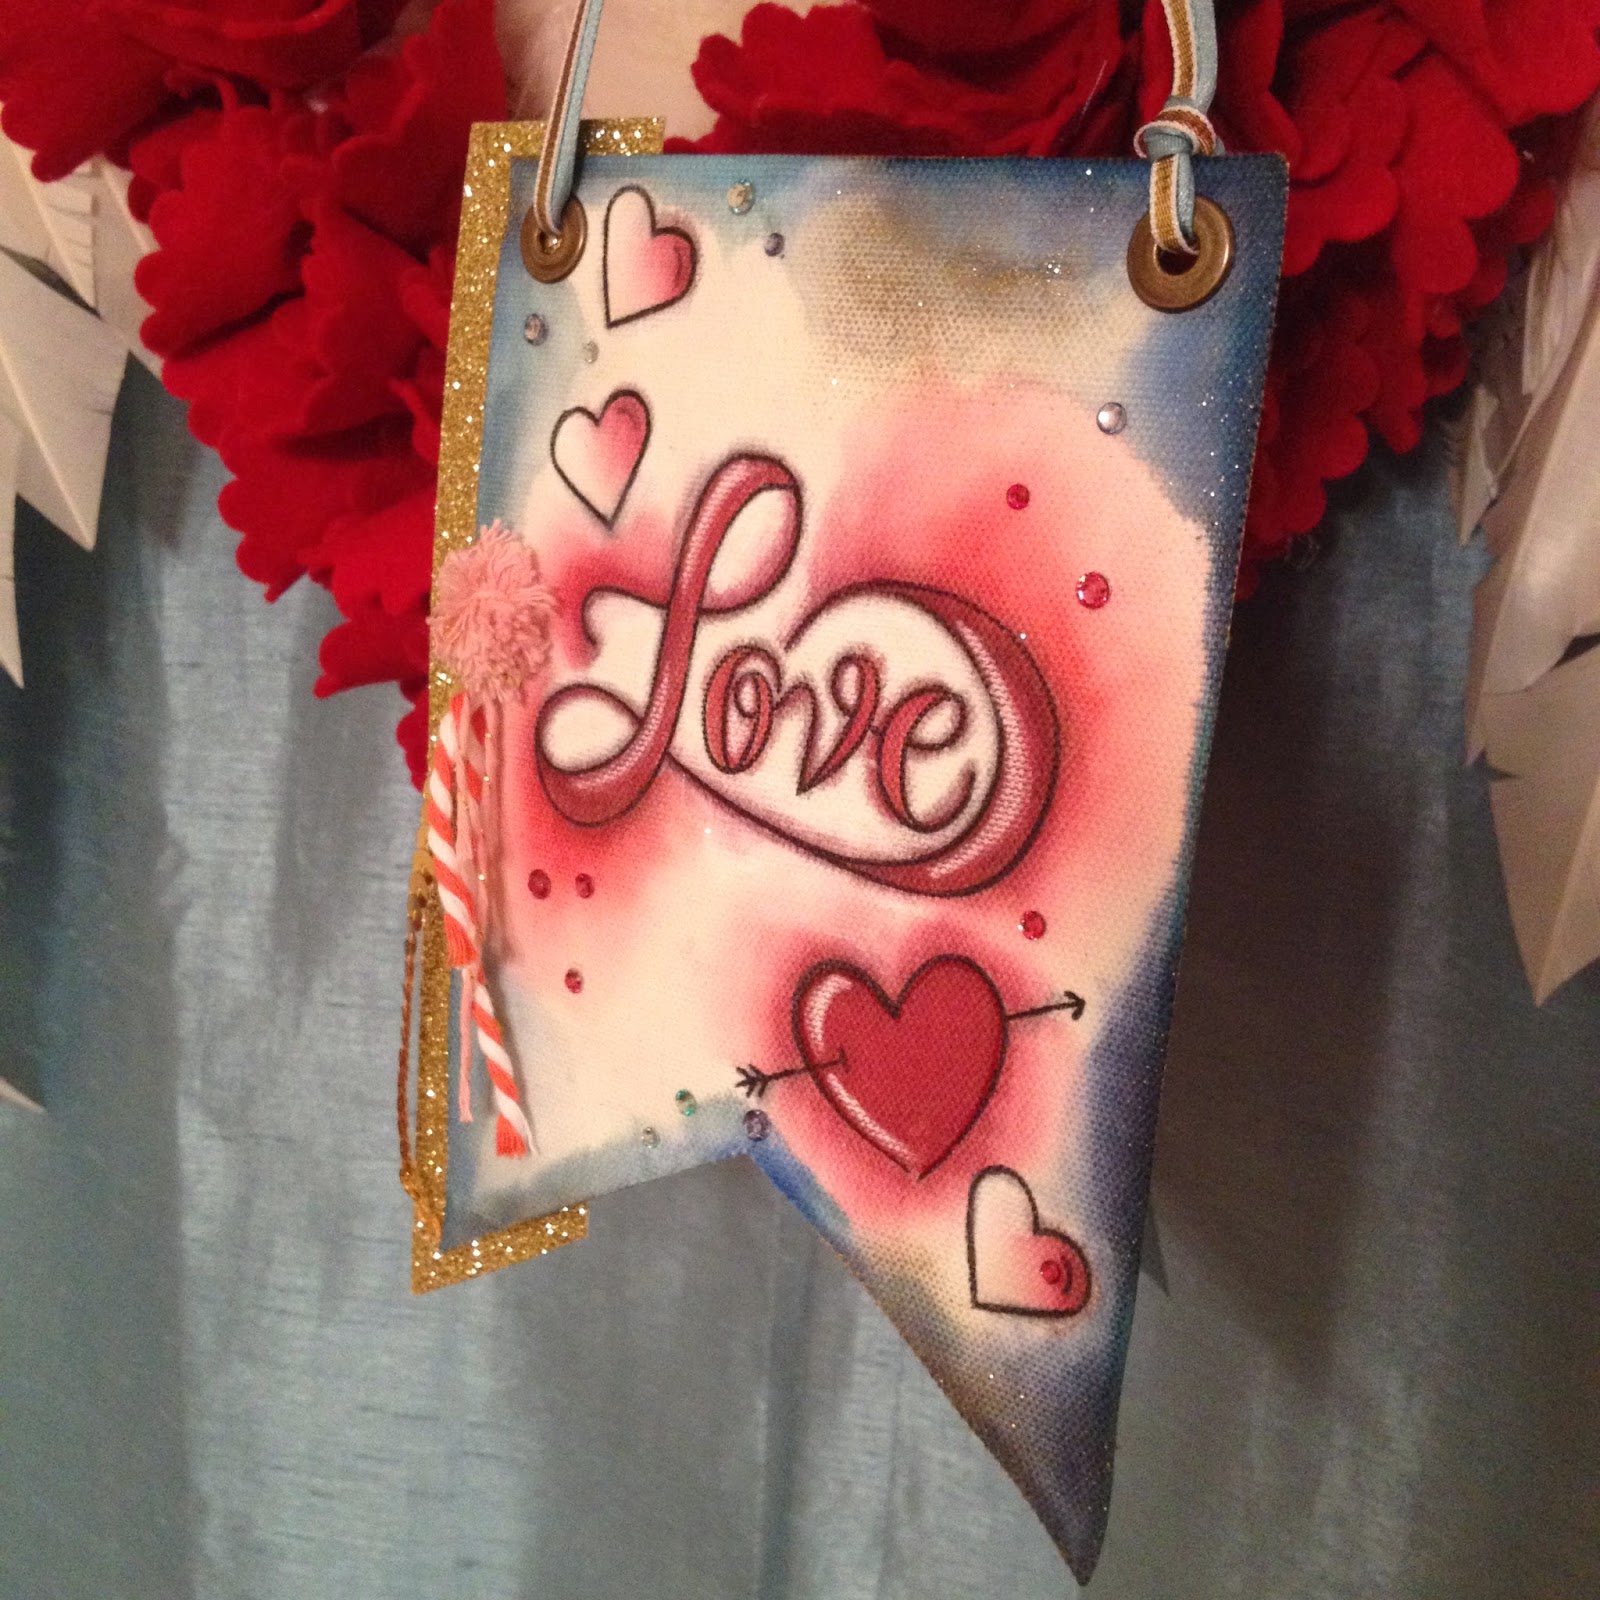
I used the Countless Sayings I set to stamp Love in Staz-On ink onto a pennant from the Simply Created Banner Kit. I also used the heart from Countless Sayings II and the one from the January Paper Pumpkin Kit, Filled with Love. I wanted to use my Blendabilities to give it a really dark look, permanent and all... but when I added the first stroke, it kind of bled out into the canvas of the pennant. :-/ hmmm.

So, I figured I would just keep playing with it, maybe I could find a way to use the Blendabilities that would work on the canvas. I don't know why I was stuck on the canvas. I suppose I could have used cardstock and been done! But the more I played with it, the more I liked it! I used the Coastal Cabana, Night of Navy, and Cherry Cobbler Blendabilities. It was neat to see the colors just seep out into the material, how they blended together and changed shades. FYI, the Color Lifter does NOT lift any color, it makes it bleed out more. And, I think I used all the 'ink' in mine playing on this piece. It does nothing at all anymore! The material just sucks up alot of ink.
Countless Sayings Cupid Wreath Stampin Up MidnightCrafting 2

To clean up some of the bleeding and give it some details, I used the Stampin' Write Chalk Marker to go over some of the faint shadows to lighten them and give a crisper edge, and then I added the accents to the hearts and swooshes. Just like a real artist! Carnival artist, I guess, but I think for as poor as my coloring usually is, I could get some decent results not being so fussy and line-obsessed. LOL

To finish it off, I added a strip of Gold Glimmer Paper, and I tried swiping some of the Gold Encore Ink, but it just shows up as a brown-ish smear, dangit, so I rubbed some scraps of the glimmer paper over it and it achieved the gold sparkle I was going for! I added a pom-pom I made using the gold and pink bakers twine from the Paper Pumpkin kit, and some Gold Sequin Trim, a little of the White & Tangerine Tango Two Tone Trim. I colored in some Rhinestones with the Coastal Cabana, Night of Navy, and Cherry Cobbler Blendabilities. The hangers are some Lost Lagoon and Gold ribbon.
Countless Sayings Cupid Wreath Stampin Up MidnightCrafting 3

I really love how it came out, and I'll probably hand it up on the mantle, rather than my front door - it gets pretty dusty around here. If you want to try something similar, perhaps try the Memento ink, or try letting the Staz-On dry more, I didn't wait :-) #impatientCrafter and it bled out a little too, but I worked it in...


Happy Crafting!
-Angie

Read More »

Filled With Love - Alternate Project - Love Ya!

Paper Pumpkin January 2015 Alternate Card Ideas MidnightCrafting.com
Love to Love Ya Baby! - Valentines Day Cards
And HAPPY FRIDAY to you!!!
Its been a wild week for me! Not really physically - an at home kind of week - but emotionally and mentally. Lots of learning, planning, listening, dreaming, discussing. January is just that kind of month. I am so ready to veg out and enjoy this weekends Big Commercials!! LoL OK, ok. Commercials, and the great food and friends!! Hah - maybe even some football.

Today's projects are made with the awesome January Paper Pumpkin Kit, Filled With Love. Beautiful colors, gold accents, 24 great little treat bags, and an awesome stamp set - what's not to love about this months kit!! If you missed out on your creative escape, go HERE and JOIN TODAY! Don't wait - next months kit will be out before you know it!!

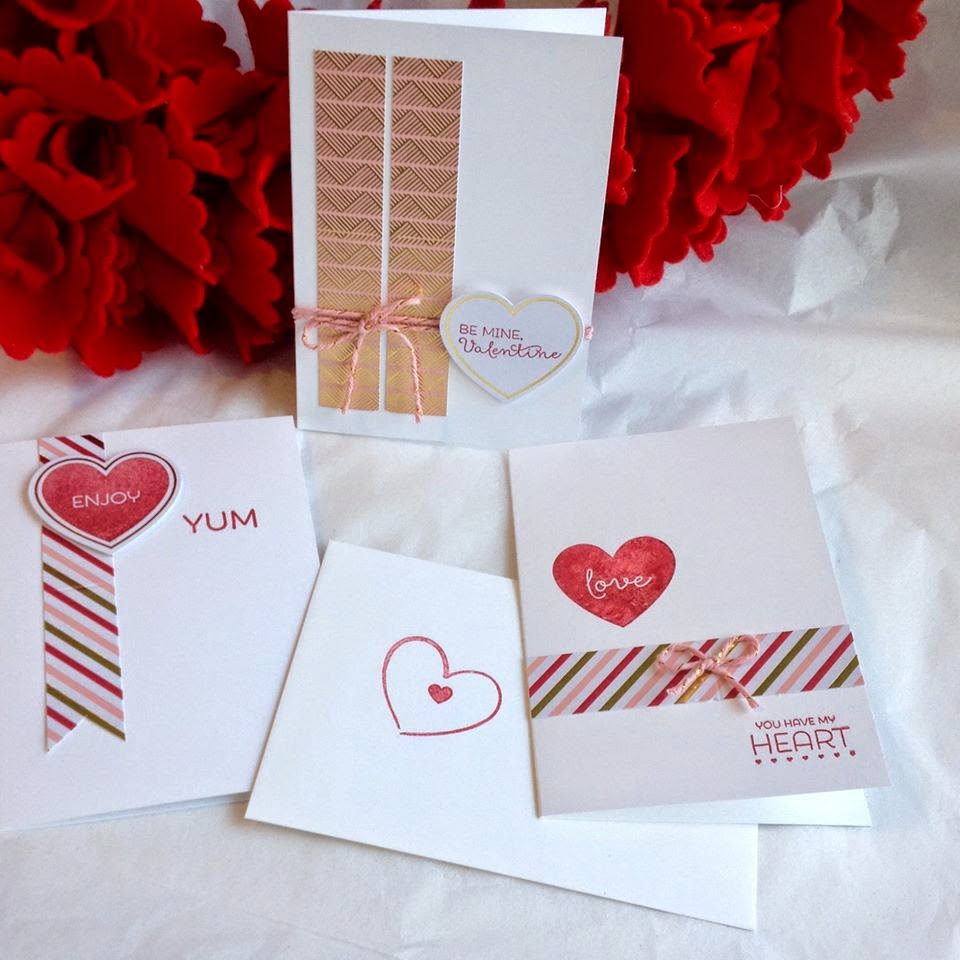
Today I used some pieces from the kit to make Valentine's Day cards. The kit this month had treat bags, but the stamp set works perfectly for some sweet Valentines, or general 'love' themes. I used 3 colors for my card bases, Blushing Bride and Real Red which match the color scheme, but also Strawberry Slush. I really appreciate the Cut and Ready Card Bases when I want to put together a quick card. I always find it helps to have one color already decided for me in the creation process! But really, having a nicely cut and scored base really makes starting easy. Linked to these at the bottom of the post, worth a click through!


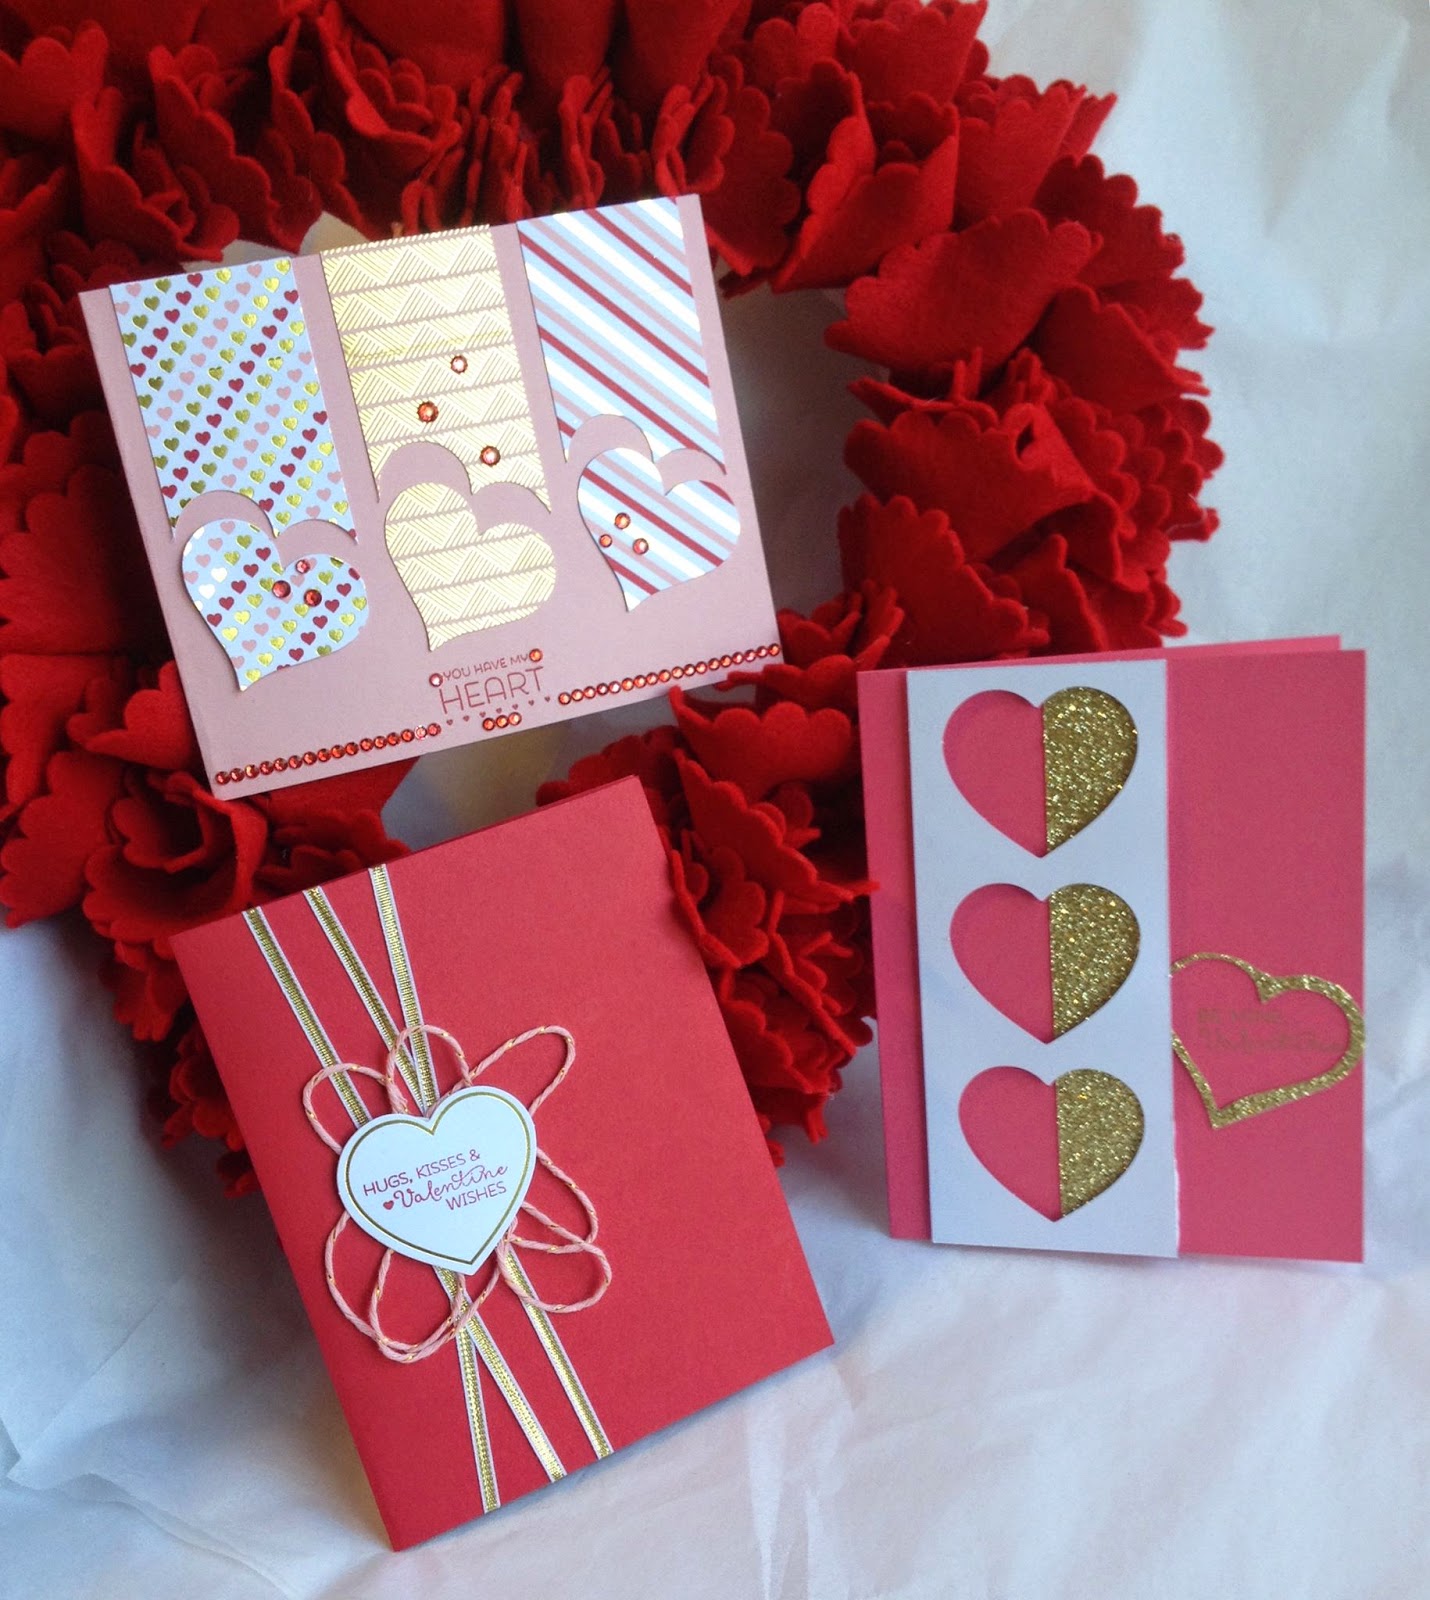
For my first card, I cased a popular punch layout. Three columns of paper with a decorative punch - the Sweetheart Punch, in this case - offset at the bottom. This is a fun layout because it shows off your pretty paper so well. Its fairly easy, no tricky cuts or fiddly layers. The hardest part is lining up your punch, and honestly here's the tip:

Punch one, then insert that one AND the next back into the punch to see where to line up. It will punch through 'two' because one is already punched. Repeat with the last piece. Works for me every time.
Paper Pumpkin January 2015 Alternate Card Ideas MidnightCrafting.com
How to use up all those long strips of rhinestones! Aha!!

The fold-over topper cardstock from the kit is perfect for this layout! Its already cut to the right width - 1.5" - and its really pretty paper!! I love the shimmer of the gold. For this card I also used my Blendabilities and painted up some pretty bling to coordinate. The "You have my Heart" stamp lends itself well to my heart card.
Paper Pumpkin January 2015 Alternate Card Ideas MidnightCrafting.com
This card is pretty as is, or could be stepped up
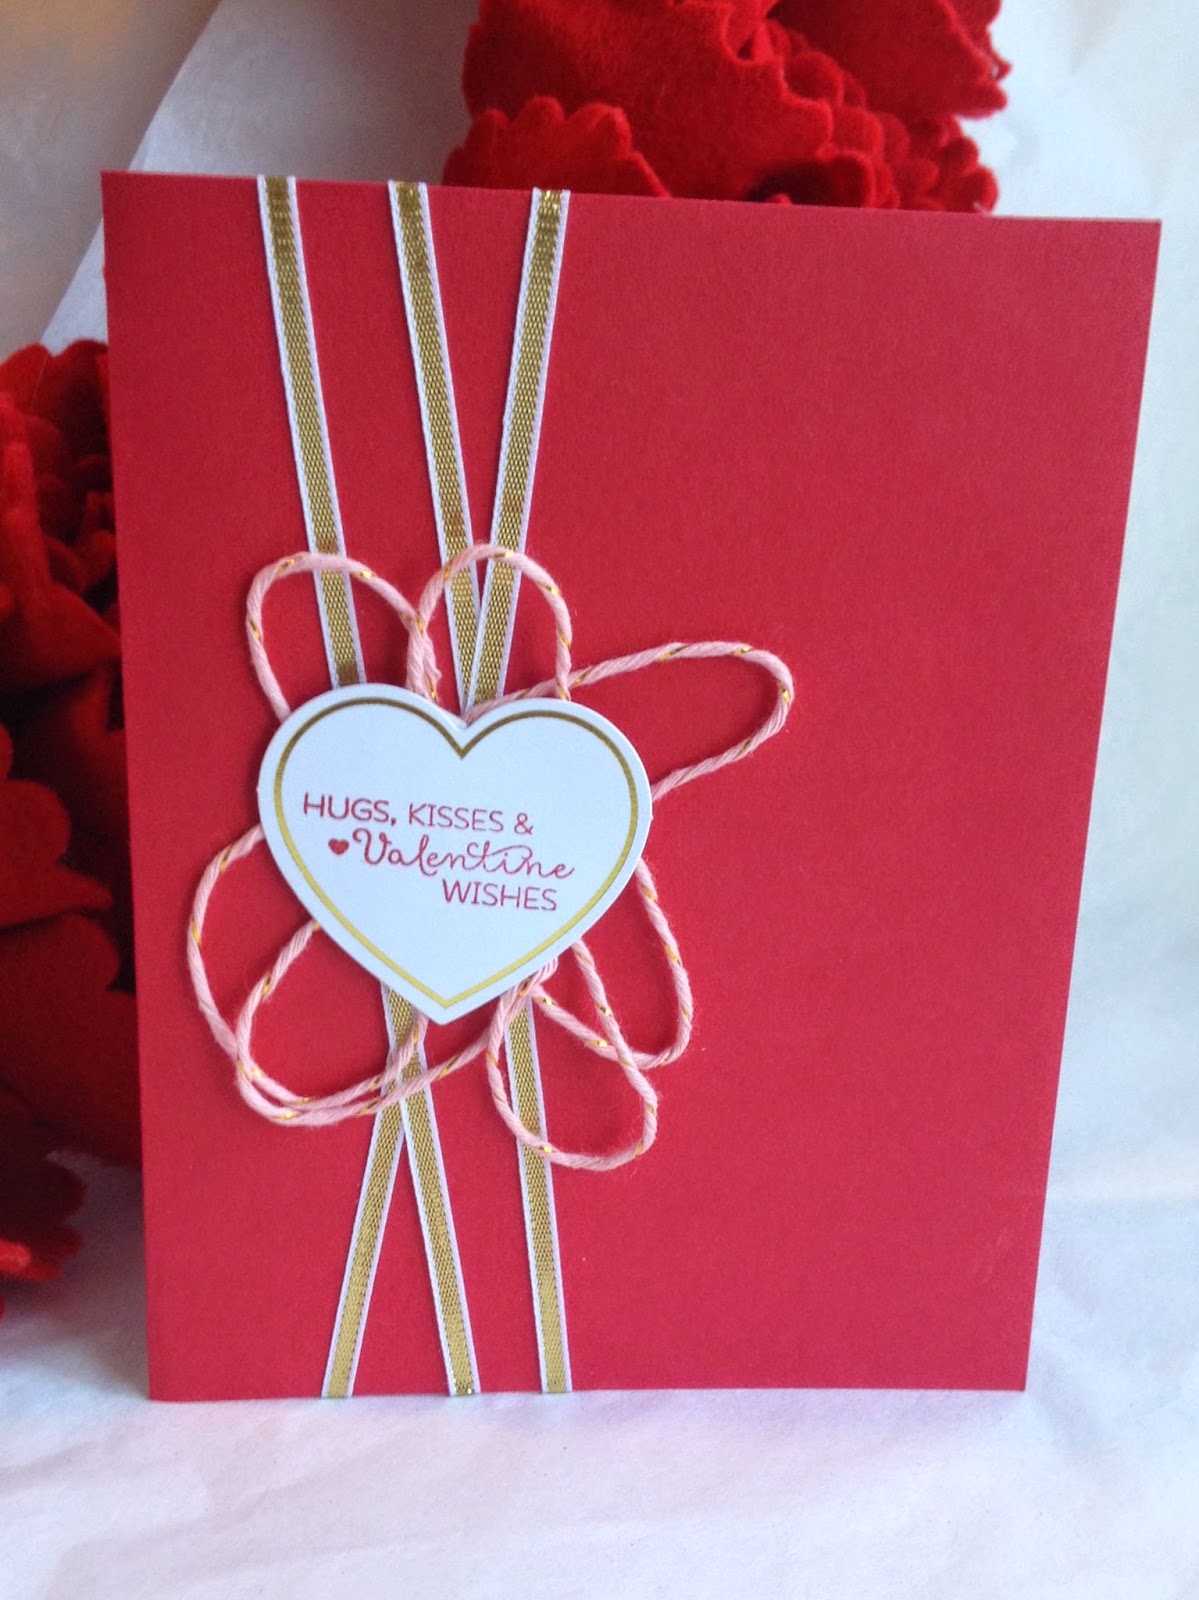
The second card is really a sparkling, clean and simple card. Gold 1/8" ribbon, some of the pink and gold bakers twine from the kit, and a little gold embellished heart stamped in red. This is the poster card for a quick card. I know, very elementary, but a wide open space on a card holds a lot of love. :-D That's my story and I'm sticking to it!!

Paper Pumpkin January 2015 Alternate Card Ideas MidnightCrafting.com
Trash To Treasure - upcycle those leftover bits!

The last card I have to share uses what many consider to be the 'trash' of the kit: the paper that held the die cut hearts. If you look through my Paper Pumpkin Pinterest Board, you'll see that tons of great alternate projects use those 'trash bits' to make some crazy cool cards and projects! Don't toss ANYTHING till you check out the alternate projects!! ((Tip #2, if you're counting!))

I trimmed the die cut cardstock to fit my card, and slid a piece of Glimmer Paper in gold behind it against the Strawberry Slush. I had a few cards made already using the gold with the heart punch, so I grabbed one of those outlines and trimmed it up to accent the sentiment. Which would have been more impressive if I'd stamped it in black or red, but I wanted to be all "GOLD" and used my Gold Encore ink pad. Totally forgot that the gold doesn't show up very well using delicate stamps. That gold ink pad is for big bold stamps, where the color just lays down all shimmery... On this card, Meh! Next one will be better! In person, you can read the sentiment just fine, but it just doesn't photograph very well or pop as much as it could have with a darker ink. ((ahnnnd, Tip #3! #yourewelcome))

Making more than the provided Paper Pumpkin project.
Just one more way to have fun with your kit!!
Paper Pumpkin kits will ship out after the 10th, 

Thanks for stopping in! Enjoy your weekend, and make time to make stuff!!
Happy Crafting!
-Angie
Click any image below to find out more, and to purchase, 
any of the products used in today's projects.
Built for Free Using: My Stampin Blog
Read More »

Filled With Love - Alternate Project - Love Notes

Filled with Love alternate idea Paper Pumpkin January 2015 Stampin Up
Alternate Project Idea - January 2015 Paper Pumpkin Kit

I'm really just smitten with this months Paper Pumpkin kit!!
If you aren't a member and haven't seen this months kit, check out this video that shows the Filled With Love kit! Darling!!

Today I'm sharing some alternate projects for the January kit. I think the stamps will be perfect for Valentines treats or for love notes to your sweethearts. I have 3 little sweethearts - I can just see tucking some notes in lunches or their back packs! You could also use these for gift cards for weddings or anniversaries, or just sweet nothings for your special someone... Can't go wrong with Love!

Filled with Love alternate idea paper pumpkin stampin up 2015
Economical idea: Cut the Note Cards in HALF and the envelopes too!
If you are a Paper Pumpkin subscriber, I totally recommend ordering a pack of note cards to have on hand. They will work great with extra supplies, or just the stamps, in most kits! Once you've gotten a couple months worth, you'll be able to mix and match colors and stamp sets to make even more great cards! I've included them in the product links at the end of the post, check it out - you get 20 cards and envelopes in a pack!!

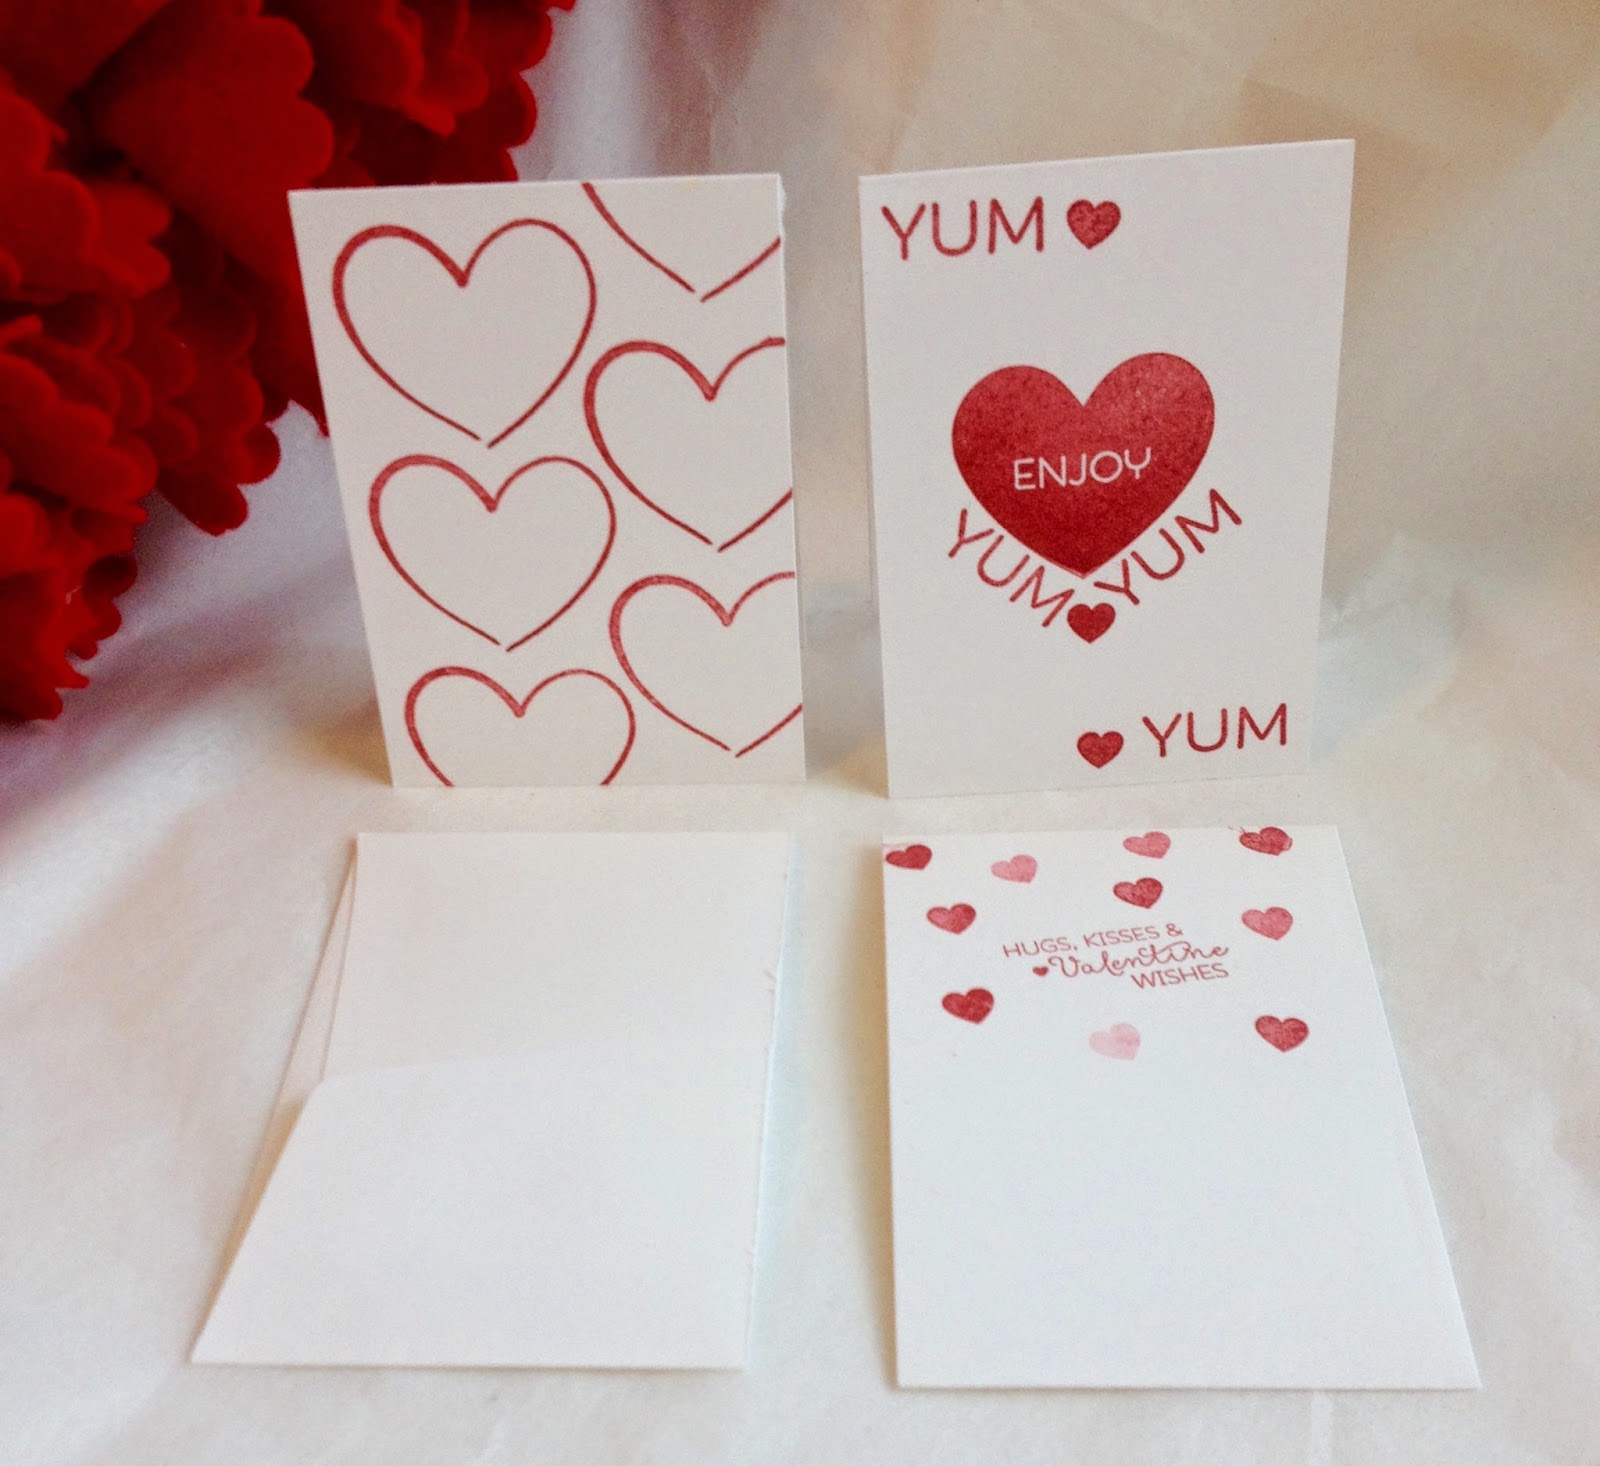
For sweet little gift enclosures, or lunch notes, or gift tags, I love that you can cut the note cards in half!! This doubles your fun, as it were! ;-) For the two cards above, I cut the note card in half, creating two top-fold notes, and I cut the envelope in half as well creating two pocket envelopes. You can just seal the edge with a piece of tape. I show the back side of the envelope above, but I did decorate both fronts. The cards are made with just the stamps from the kit!! Perfect for a little sweet treat, plate of cookies, or a seasonal thank you. You can really step these up by adding some bling, maybe ribbon or washi tape to the envelopes, or adding other elements from past Pumpkin kits. But for today, the basics are pretty beautiful! Sweet and simple. ((obviously too small to mail, but perfect for little love notes or gifts!))

Stamps only create a CAS love note from Paper Pumpkin January 2015 kit
Clean and Simple Love Note

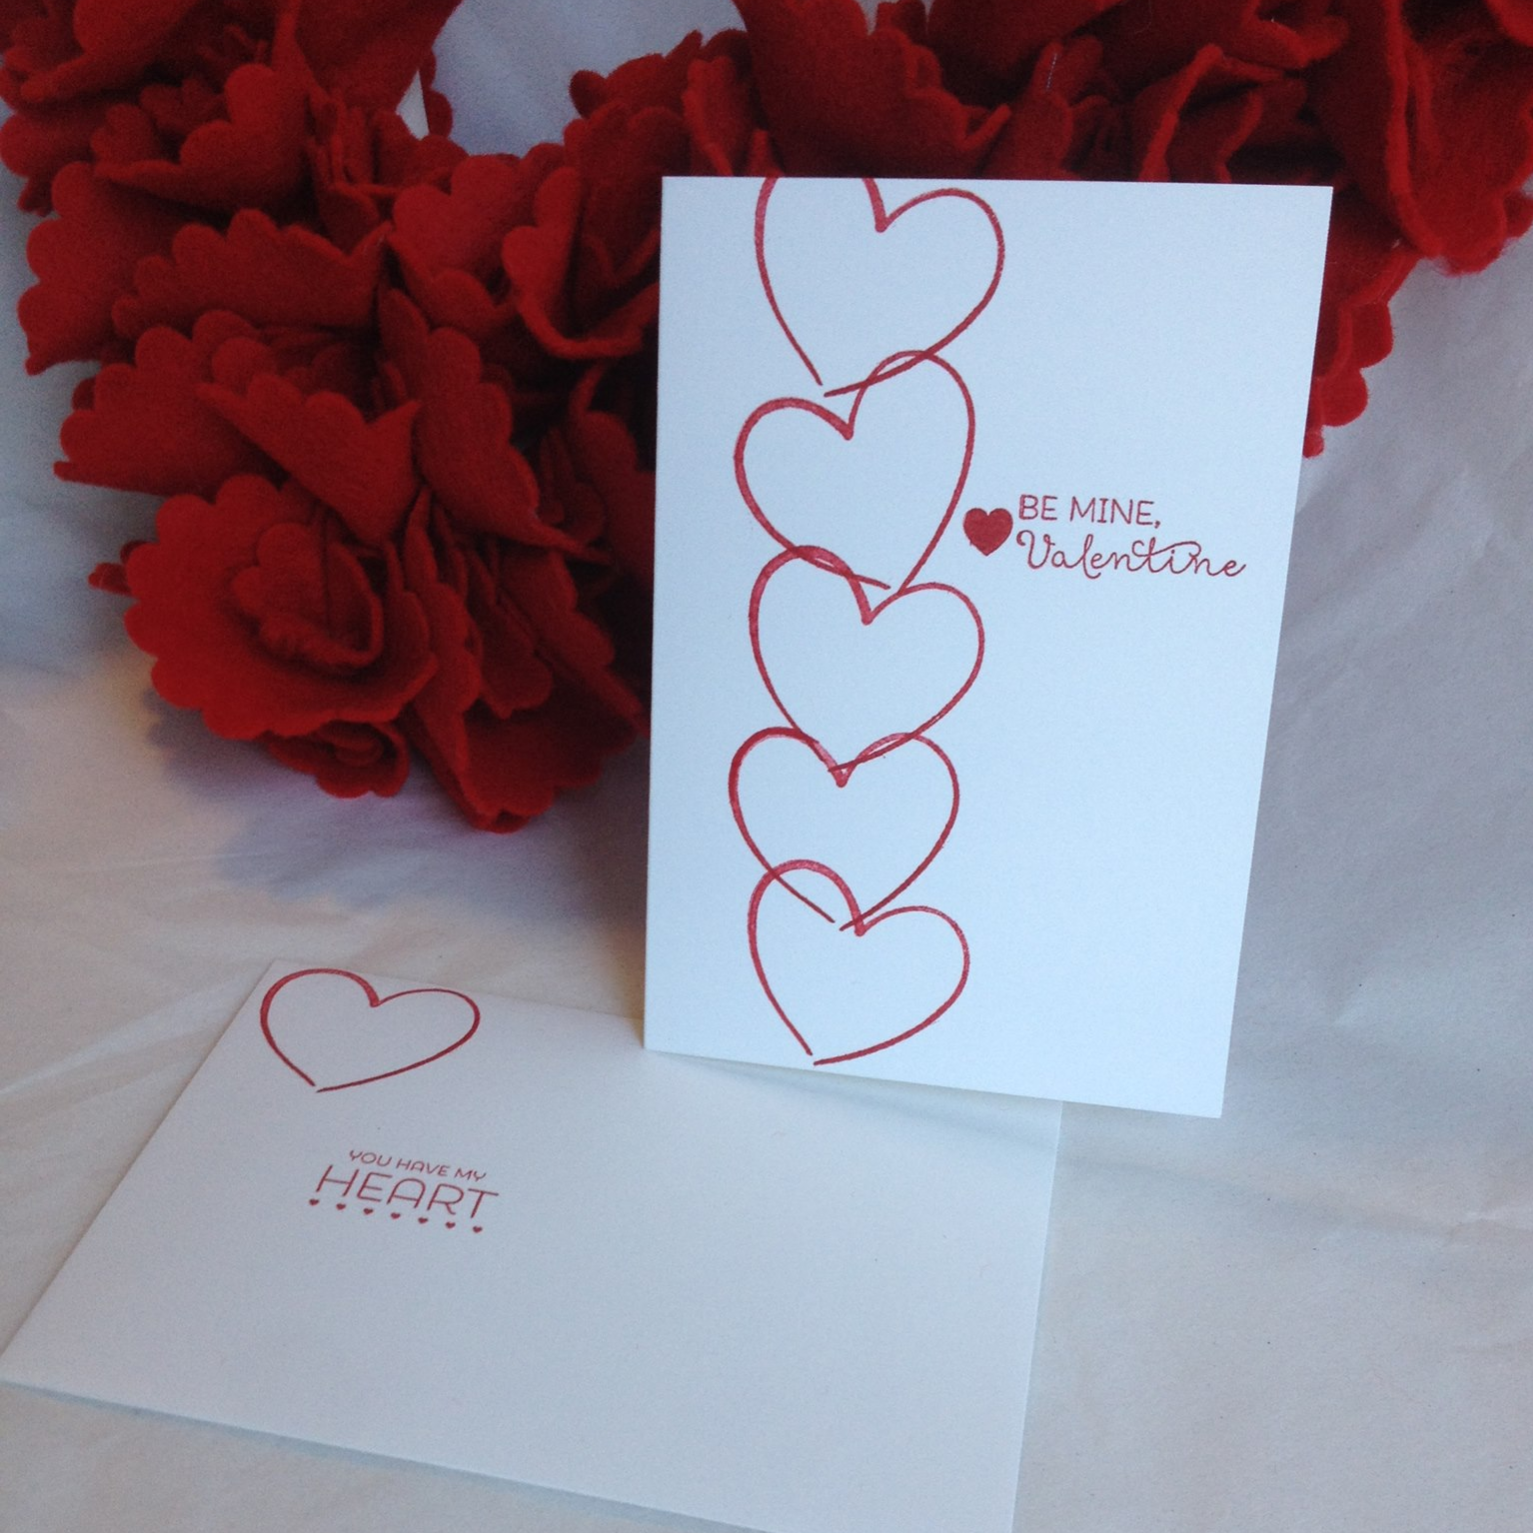
So, you don't have time to make Valentines? BAM - this note card was done in UNDER 5 minutes!! It might even have been under 3 minutes, but the heart chain is a little tricky to line up. Its pretty sweet though, am I right? The envelope I stamped with the heart in the return address area, you enter your name here. Then next to the address I put the stamp that says "You have My Heart". See what I did there? 'You have my heart', then your name in the heart? ;-) I crack myself up. Ahem...

If you have extra supply pieces from the kit; or you order two kits to play around with (like I do); or you realize how cool the alternate projects are for a particular kit and order a Refill Kit ((Available exclusively to subscribers!!))... Then you can use them to make other projects!

Alternate idea for Filled with Love Paper Pumpkin Stampin Up January 2015
Note Cards - small in size, but can still handle the big feelings! 
For these cards, I used the fold over bag toppers from the kit, cut lengthwise in half. On note cards this will give you a nice chunk of pretty paper!! And for every tag, you'll have a die-cut heart, so you can use those too! Or, when you run out, use the stamps! Don't forget to decorate your envelopes!

You can see the beautiful Decor Pennant / Gift Bag Tag I made HERE.
Friday, I will also be sharing some more alternate card ideas using additional products with the January Kit stamp set. Check back, or catch them on my Pinterest Board for Paper Pumpkin ideas from around the web!

Be sure to sign up for your own Paper Pumpkin subscription - the Prepaid 3 month subscription is on sale during Sale-A-Bration AND you'll get to pick a FREE Sale-A-Bration item too!! #winning 
Don't miss out! Take a look at the options here, and sign up today!

Happy Crafting!
 -Angie


Built for Free Using: My Stampin Blog
Read More »

Filled With Love - Alternate Project - Love Pennant

Paper Pumpkin Alternate Valentine Pennant 2015 Jan
I 'love' this months Paper Pumpkin Kit! It has everything you need (but for the candy or treats) to make 24 little sparkly treat bags!! A sweet gift for your kids class, neighbors, friends or coworkers. With little gold clips, and pretty pink and gold bakers twine, and... well - lots of great stuff!!

If you haven't joined Paper Pumpkin, now is a great time to try (or GIFT) a 3 month subscription! 
Its on sale, AND there are more holidays coming up -- you CAN make the projects in these kits!! 
Find out more HERE. #yourewelcome

Paper Pumpkin Alternate Idea January 2015
Love Pennant to decorate your Love Nest 
Today's project is a little love pennant. It can hang on a door knob, on the edge of a frame, or from a hook by your door so you can see it sparkle every time you head out or come home. I added a paper heart to the back for a little love note for Mr Man, and I plan to add it to his Valentines Day gift. *awwwww*
Alternate Paper Pumpkin Project - Use the stamps and one set of treat toppers.
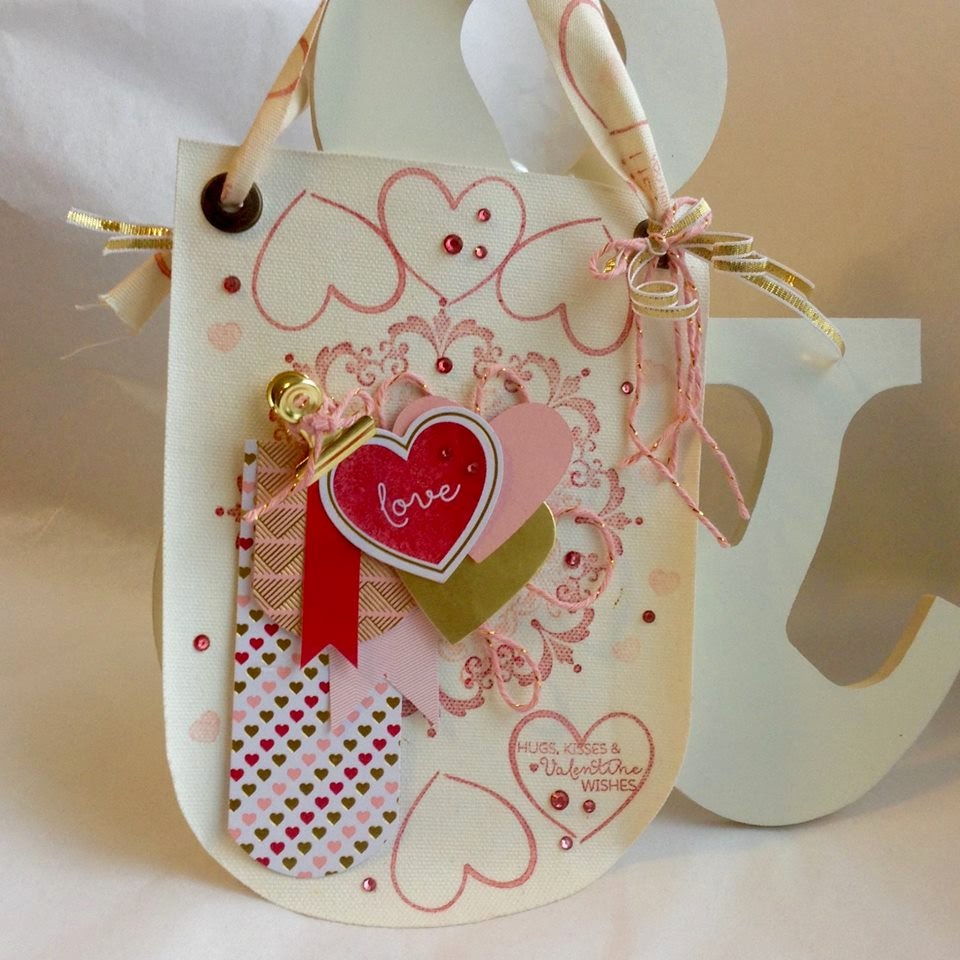
I used a pennant from the Simply Created Build a Banner set, they're canvas with grommets and already to decorate. I stamped two of the Daydream Medallions in the center, using Real Red and Blushing Bride. Around the edge of the pennant I stamped the heart outline in red, and very small heart in pink, using the stamps from the January Paper Pumpkin kit.
Heart Framelits Build a Banner Alternate Paper Pumpkin Jan 2015
Love Note space created on the back of the pennant.
The note space I added to the back will have a little sweet note to Mr. Man, but you could use this as a gift tag on a pretty bag or add notes to your loved ones, maybe a memory of your favorite Valentine's Day. This note also gives a little strength to the canvas banner, and it will hang perfectly flat on its own. When you use them in banners, they hang fairly flat on the long cords, but as a singleton they tend to curl in or out depending on how your thread them. I cut hearts using the Hearts Collection Framelits, some Blushing Bride Cardstock, and the white is actually the cardboard backing from my Designer Series Paper sets. I save it because its easy to cut, but still sturdy, with framelits.
Glittery gold accents, and red sparkle, with pink and cream - classic Valentine colors!! 
For the front of the pennant I also cut out a heart from Gold and Blushing Bride to add color and oomph to the gold outline heart from the kit. I used one of the Paper Pumpkin stamps for the center, and then in the bottom right I added another stamp - Hugs, Kisses & Valentine Wishes. I used two of the kits banners, the hearts and the gold and pink diagonal prints. I cut both using my 1 3/4 Circle punch. I added to that a hand trimmed Blushing Bride Pink banner, and one of the little red banners from the kit. To make this stack of banners a little more stable, I used the handheld stapler to hold them all together - its hidden behind the heart! The Gold clip actually holds the top heart on, but I stuck the other hearts, string, and banner bunch on with the Jumbo Sticky Rounds - these work REALLY well with the canvas banner material and give more area to stick than just Sticky Tape.
Stamped Ribbon Build a Banner Alternate Paper Pumpkin Jan 2015
Love is in the details.
For the ribbon hanger, I stamped some of the kit stamps onto our Natural Ribbon, and tied it with some pieces of the kit's pink twine and some gold ribbon. I used my Blendabilities to color a bunch of rhinestones to match the red theme and sprinkled them liberally over the front.

I think This will make an excellent decoration - once I steal it back from Mr. Man! LoL But really, very pretty in person ((If I do say so myself!!)), you should try it!!
Valentine Build a Banner Alternate Paper Pumpkin Jan 2015
Add a little Love to your Life

Sign Up for Paper Pumpkin today - February's kits will ship out after the 10th, 
and if you're not on the list you will MISS OUT!! 
Exclusive and Limited Quantities of these kits are available only to members. 

Happy Crafting!
-Angie
Projects used today are shown below.
Click on any image to view more information, or to purchase your own, in my online store:


Built for Free Using: My Stampin Blog
Read More »

Countless Sayings Masculine Valentine

Masculine Valentine 

You & Me. Forever.
"Short, sweet, says it all." the man in your life comments! LOL

But really. This chevron pattern just makes me think 'manly'. Looks kind of like diamond-plate, which makes me think of my Love's toolbox, and the garage, aka "his space". I think you could give this to your Mr. Man and he'd be OK with displaying it proudly. In the garage.

I had an extra chevron embossed Brown Sugar card front, and I looked in my handy dandy Color Coach to find a color that would stand out nicely against it. Brown Sugar is one of those colors that really goes well with almost everything, but one of the suggestions was Cherry Cobbler! Perfect for a luvvvv card. So I got out my heart punch and made a nice heart. then I couldn't decide how to set it off on the card base. I had wanted to use Gorgeous Grunge and CASE a card I liked, but the chevron base really didn't work with that. Plan B. I stamped the Forever stamp from the Countless Sayings 2 polymer set, and while I was putting it back I saw the You & Me stamps, and woo-hoo!! Card layout decided. Gah, that's always the longest part for me. Color and layout.

I laid out the stamps on my D clear block and stamped them in Cherry Cobbler on Very Vanilla. I trimmed the vanilla out to roughly the same size as my block. I added the cut out heart scrap because it framed the You and added more emphasis there, balancing out the Forever heart by Me. ;-) Don't want it to be all about ME...

Happy Crafting!
-Angie
You can make this card with the supplies below, click on any image to see more info in my Stampin' Up! Online Store:


Built for Free Using: My Stampin Blog
Read More »

Masculine Valentines Stacked with Love

Masculine Card Ideas Stampin Up MidnightCrafting Handmade
Stacked with Love Designer Series Paper Stack - Masculine Card Ideas
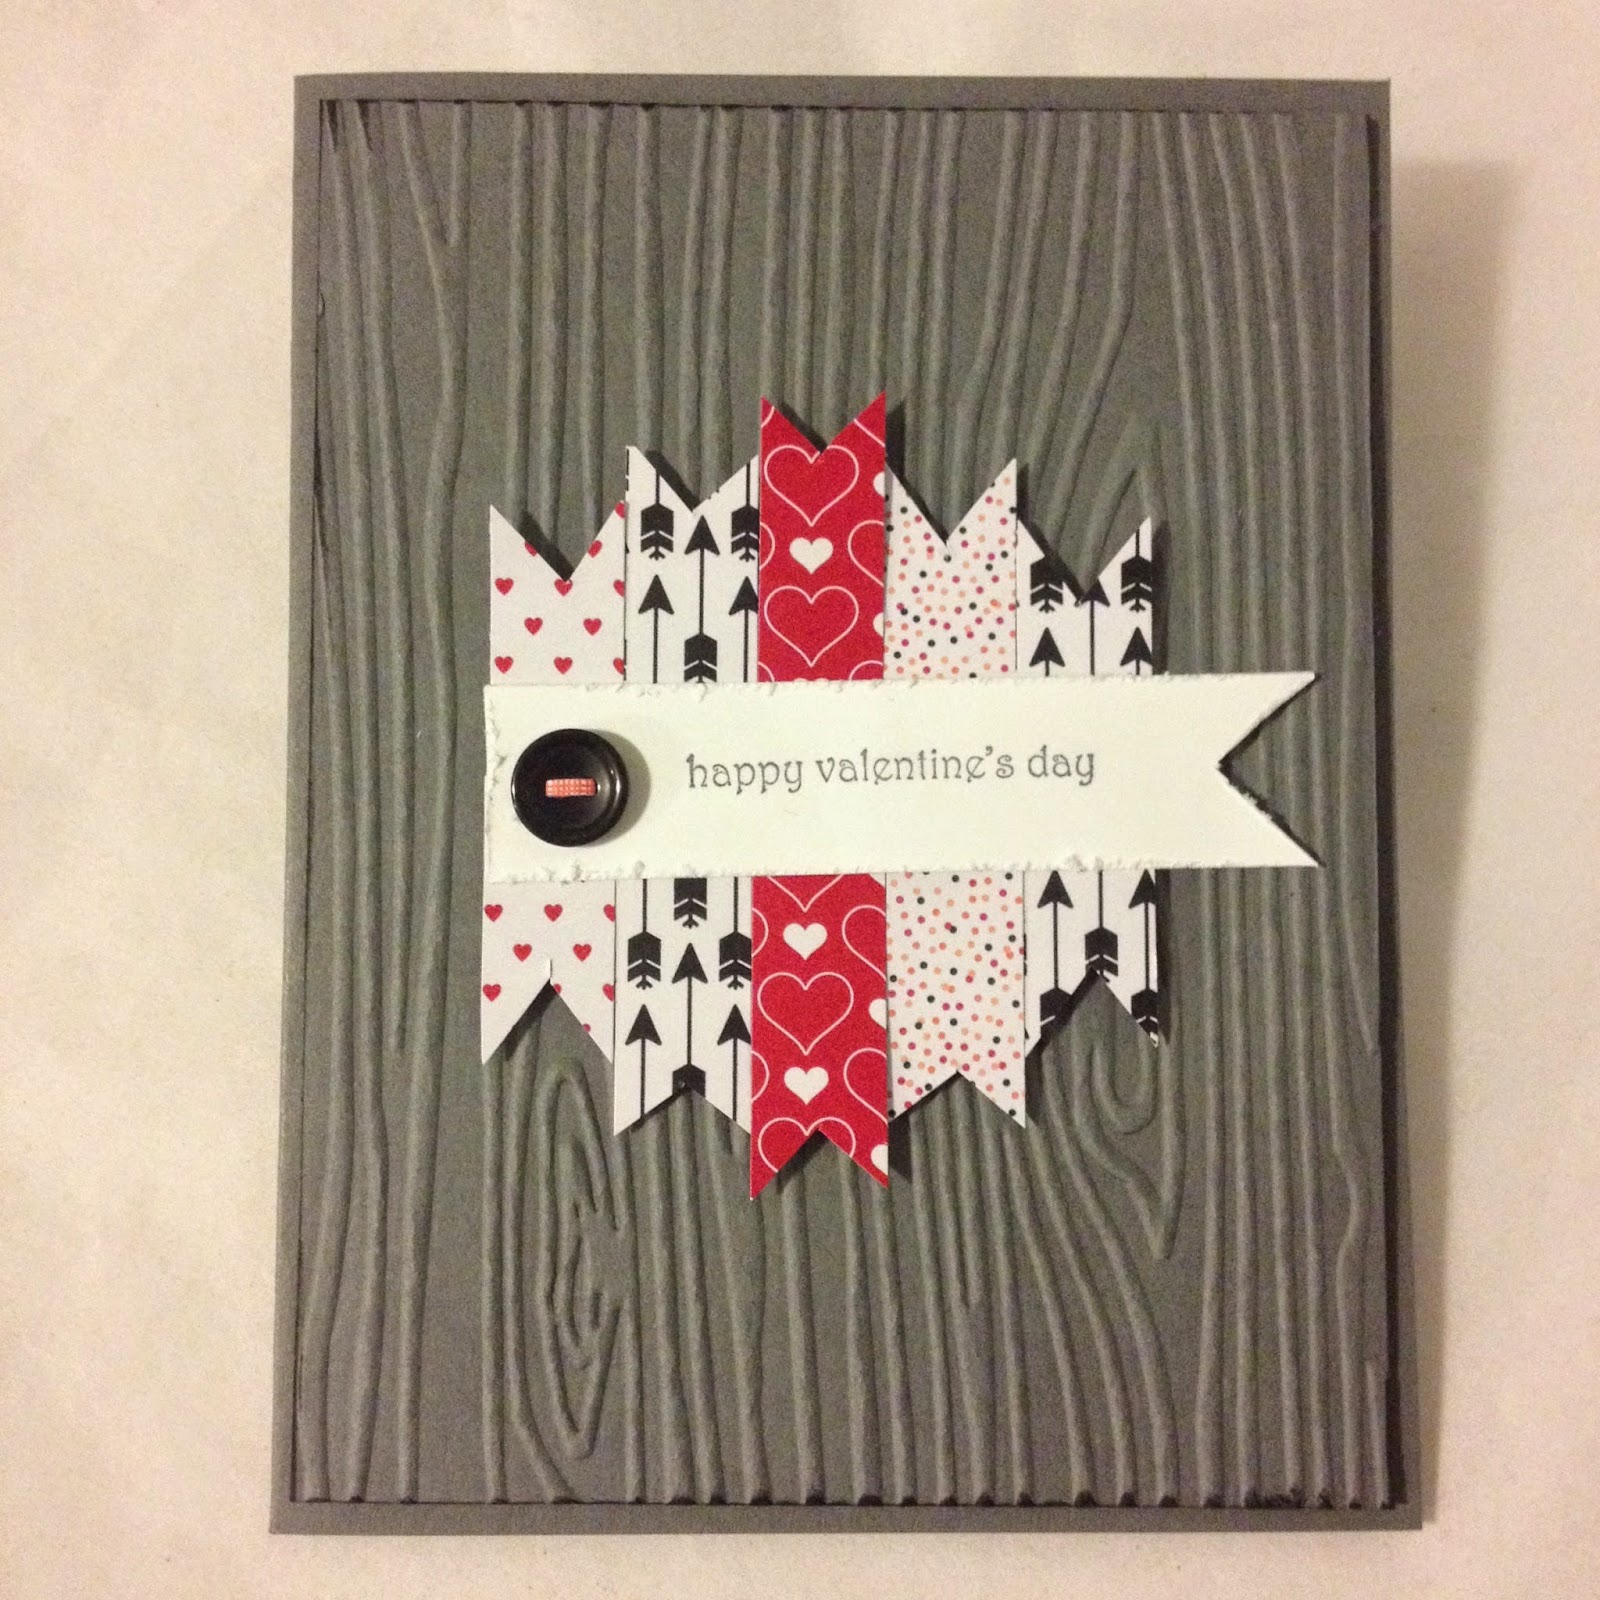
The new paper stack, Stacked With Love, in the Occasions 2015 Catalog is perfect for Valentines Day! And the modern black and white patterns will carry you through the year too! Nice thing about Double-sided paper!

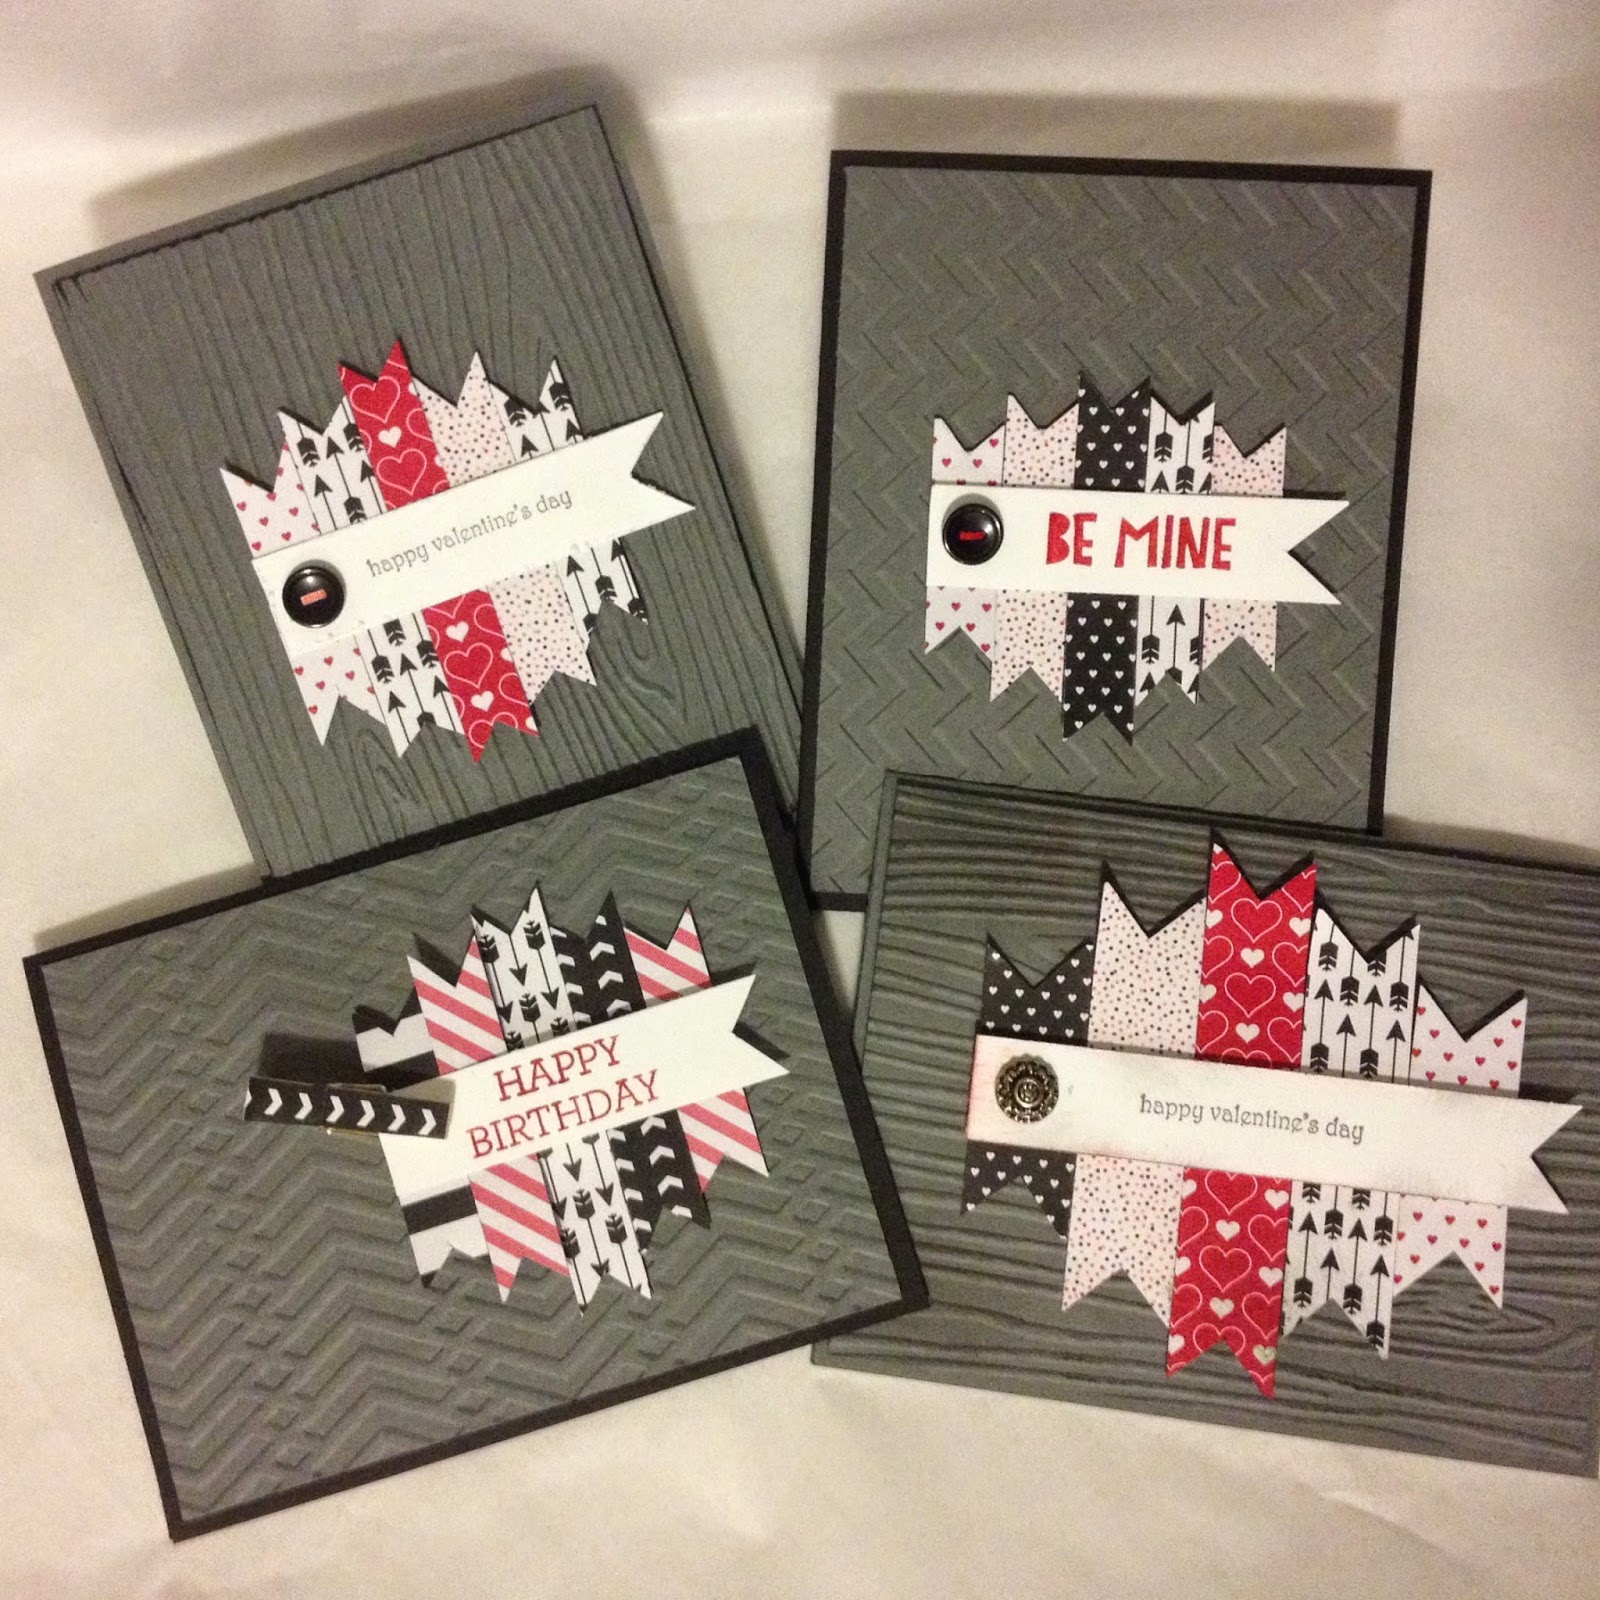
Today I used it to make some masculine Valentine's Day cards. I say masculine, because they are not all frilly and white and pink, but they could be used for the ladies as well! They are striking in the black and white with a pop of red. If the layout is familiar, I cased my Masculine birthday card HERE. Once you get the measurements, and remember to cut long strips in stead of individual tags, it goes pretty quick!! Still, a little bit involved, if you're just looking for a quick card this is not it! #justsayin
Varying the size of the pennants would work better on larger cards.
On this A2, they were a leeeetle large.

On the first card, I forgot to check my measurements and cut the pennants, all 10, into 0.75" wide by 1"-2" length. It made for a very large accent piece over the Woodgrain embossed Basic Grey panel. I used Teeny Tiny Greetings stamp, which certainly lives up to its name on this banner. Ummmmm. Next!!

Masculine Card Ideas Stampin Up MidnightCrafting Handmade
Back to the layout this time. Measure twice, Cut once, right?
Ok. This is more like it!! The pennants are only 0.5" wide, for a total width of 2.5" - much more manageable on an A2 card! I cut the STRIPS this time, longest in the center is 3", then two at 2.75". and then the last two at 2.5". To assemble them, I used a scrap of card stock with a strip of snail adhesive, cut it to 0.5" x 2.5", and carefully lined up my strips over it. The banner is 0.75" x 3" and I added a button instead of a brad. The faux thread is a sliver of paper through the button holes. I used the Woodgrain Embossing folder again, and I think this card came out much better. What do you think?

I still had lots of paper to use from the pages from the Stacked with Love pack, so I decided to try two more cards.
Masculine Card Ideas Stampin Up MidnightCrafting Handmade
The Chevron Embossing folder kind of
looks like that metal Diamond Plating, very manly! LoL
I used the Chevron Textured Embossing Folder on Basic Grey cardstock, I like the pattern against the Basic Black card base. I changed the order of the strips to give more of a black and white emphasis, with only small amounts of red in the pennants. The bolder sentiment - from You Plus Me stamp set - really stands out on this card.

Birthday Themed, the colors still work for more of a manly look.
For the last card I went with the Zig Zag Embossing Folder, over the Basic Black base again. I changed the layout to landscape, and added a Clothespin covered with a bit of the Stacked with Love paper. Using just the Non-Valentine themed paper (I do like the arrows though, and had them point down to the sentiment) I went with the black and white with red theme. I used the sentiments from Crazy About You stamp set - such a great size for the words!
Masculine Layout ideas Stampin Up MidnightCrafting

I still love this layout. I'll have to try it with some softer papers, and see how a more feminine take on it comes out.

Happy Monday!! I hope you'll partake in the spirit of the Martin Luther King holiday, and volunteer in your community, or at the very least, do some small acts of kindness for others today. :-) Together we can make a difference, just as working together Dr. King and his followers made a difference. We may not change the world as they did, but even small acts have ripples into eternity.

Happy Crafting!
-Angie 

The products used today are shown below, 
click on any image for more information in my Online Stampin' Up! store. 
Secure shopping and direct shipping are available 24/7 from my site.

Built for Free Using: My Stampin Blog
Read More »

My Digital Valentine - Click and Print Custom Sweetness

Digital Downloads For Valentines Day
Stampin' Up! has offered Digital Downloads for a few years now, and the sweetness gets better and better each year! These downloads were created to be used in our digital software program, My Digital Studio. With MDS you can get almost all of our papers, embellishments, Project Life collections, and stamp sets (plus quite a few Digital-exclusives) in digital format to make your own creations - we even offer professional printing services. This is a great option for creating multiple family gifts like Calendars and Memory Books of special occasions, but you can also create cards, gift tags, and party decor!

There is a whole My Digital Studio Blog / Community / Video & Class site that can help if you'd like to get into it. If you own an eCutter its really awesome to be able to get some of your favorite stamps in SVG format! Plus, they do have some Digital exclusives. Fun stuff! This is a link to how you can use your Silhouette to cut Stampin' Up! SVG files - Stampin' Up! Tutorial: How to Print and Cut...

If you'd like to explore more of the options, you can visit the Digital Download section of the store and see all the different downloads available!! **Please note, some of the older downloads are NOT in SVG format and will NOT work with your eCutter, so be sure to read the description to note if it is an SVG file.**

I'd love to share a few of my favorites - these are the super easy one, naturally! ;-) Most you can just print at home and run with!!
Count Down the Love digital download by Stampin' Up!

The first, to celebrate my Countdown week, is the Countdown the Love Template!!
This cute set has notes and activities you can put in the 14 envelope templates to share with your sweetlings. From "Draw a happy picture for someone", to "Reasons I Love You" cards, its a really fun set! It includes nine 8.5" 11" pages to print, fill out or fold, and use for your countdown. Then there is ALSO a 56-piece SVG stamp brush set, 5 Designer Papers, and 6 embellishments you can use to create party invitations, scrapbook pages, or whatever you can dream up! You can have alot of fun with this set, year after year.
Be Mine Frameable by Stampin' Up! 
Then there is this Be Mine Frameable Designer Template. Love!! You just Print, Frame, and Gift! "...for the quickest Valentine yet!" Sweet music to my ears!! 33 of the images in the 8.5 x 11" print are also included as stamp brushes, so you can customize colors and use the pieces in other creations. A great deal at only $1.95!! All Digital downloads are immediately available after purchasing, so this is perfect for last minute gifts or decor.

Valentine Love Ensemble by Stampin' UP!

 The last one I'll share is perfect for those class parties or to decorate your home. The Valentine Love Ensemble has six easily printable 8.5 x 11" decor pieces, and a bunch of other element pieces to create your own mini-banner, treat toppers, name cards, valentines, and more! A good versatile set to get!

These products are shown below, just click on the image to view it in my Online Stampin' Up! Store.
To view the entire Digital Download section of my online store, CLICK HERE. 

Purchase any of these digital sets and you can download them immediately. They will work with most digital image software, but we also offer a FREE 30 Day Trial of My Digital Studio if you'd like to see how easy and capable this program is!

I hope you find these Digital pieces useful, sometimes its nice to be able to customize and print your own personalized and custom stuff, made beautiful with these Stampin' Up! elements.
Happy Crafting!
-Angie


Built for Free Using: My Stampin Blog
Read More »

Twitterpated - Yes, its a real word!

Owl Builder Punch Gold Soiree DSP Stampin Up You Plus Me Occasions 2015
My owls aren't nearly as grumpy as the owl in Bambi! 
Bambi. That's where you know it from. Disney's movie Bambi. The Owl, telling the young Bambi and Thumper why everyone is acting all lovey-dovey. Don't try and say you haven't seen Bambi... its from 1942 and still as cute as ever!
But the word is actually older than that, I won't bore you with my love of historical romance novels, but I can tell you its circa the late 1600's from the words "Twitter" meaning tremulous excitement, and "Flutterpated" frivolously excited... Ahem. Lots of excitement packed into that word. Today though, nobody uses such an old-timey word commonly. t its still cute! :-) Twitterpated. Defined as: "Excited or overcome by romantic feelings; Smitten. "

Anyhow, now that the vocabulary lesson is over, and I'm hoping you'll forget the mention of my reading habits, here are the cards that I was inspired to make. Ever since I saw this set, I pictured that old owl in Bambi! LoL
Owl Builder Punch Gold Soiree DSP Stampin Up You Plus Me Occasions 2015

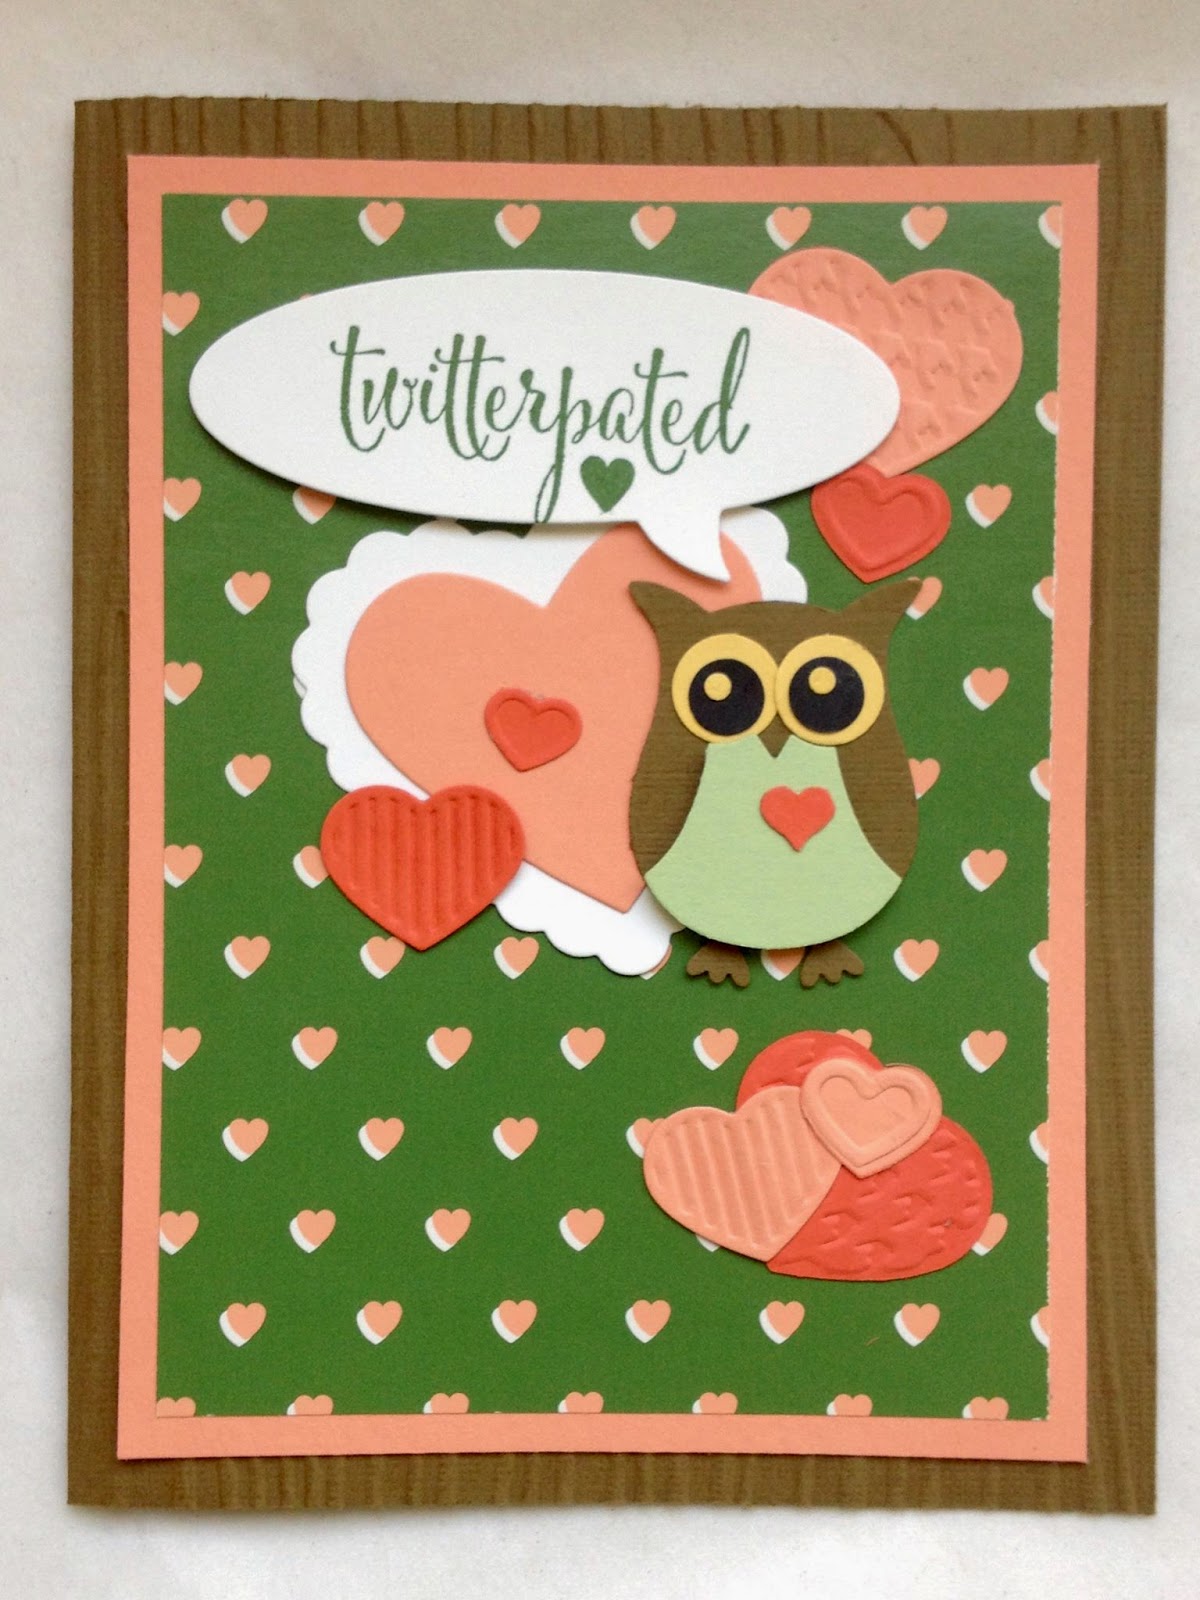
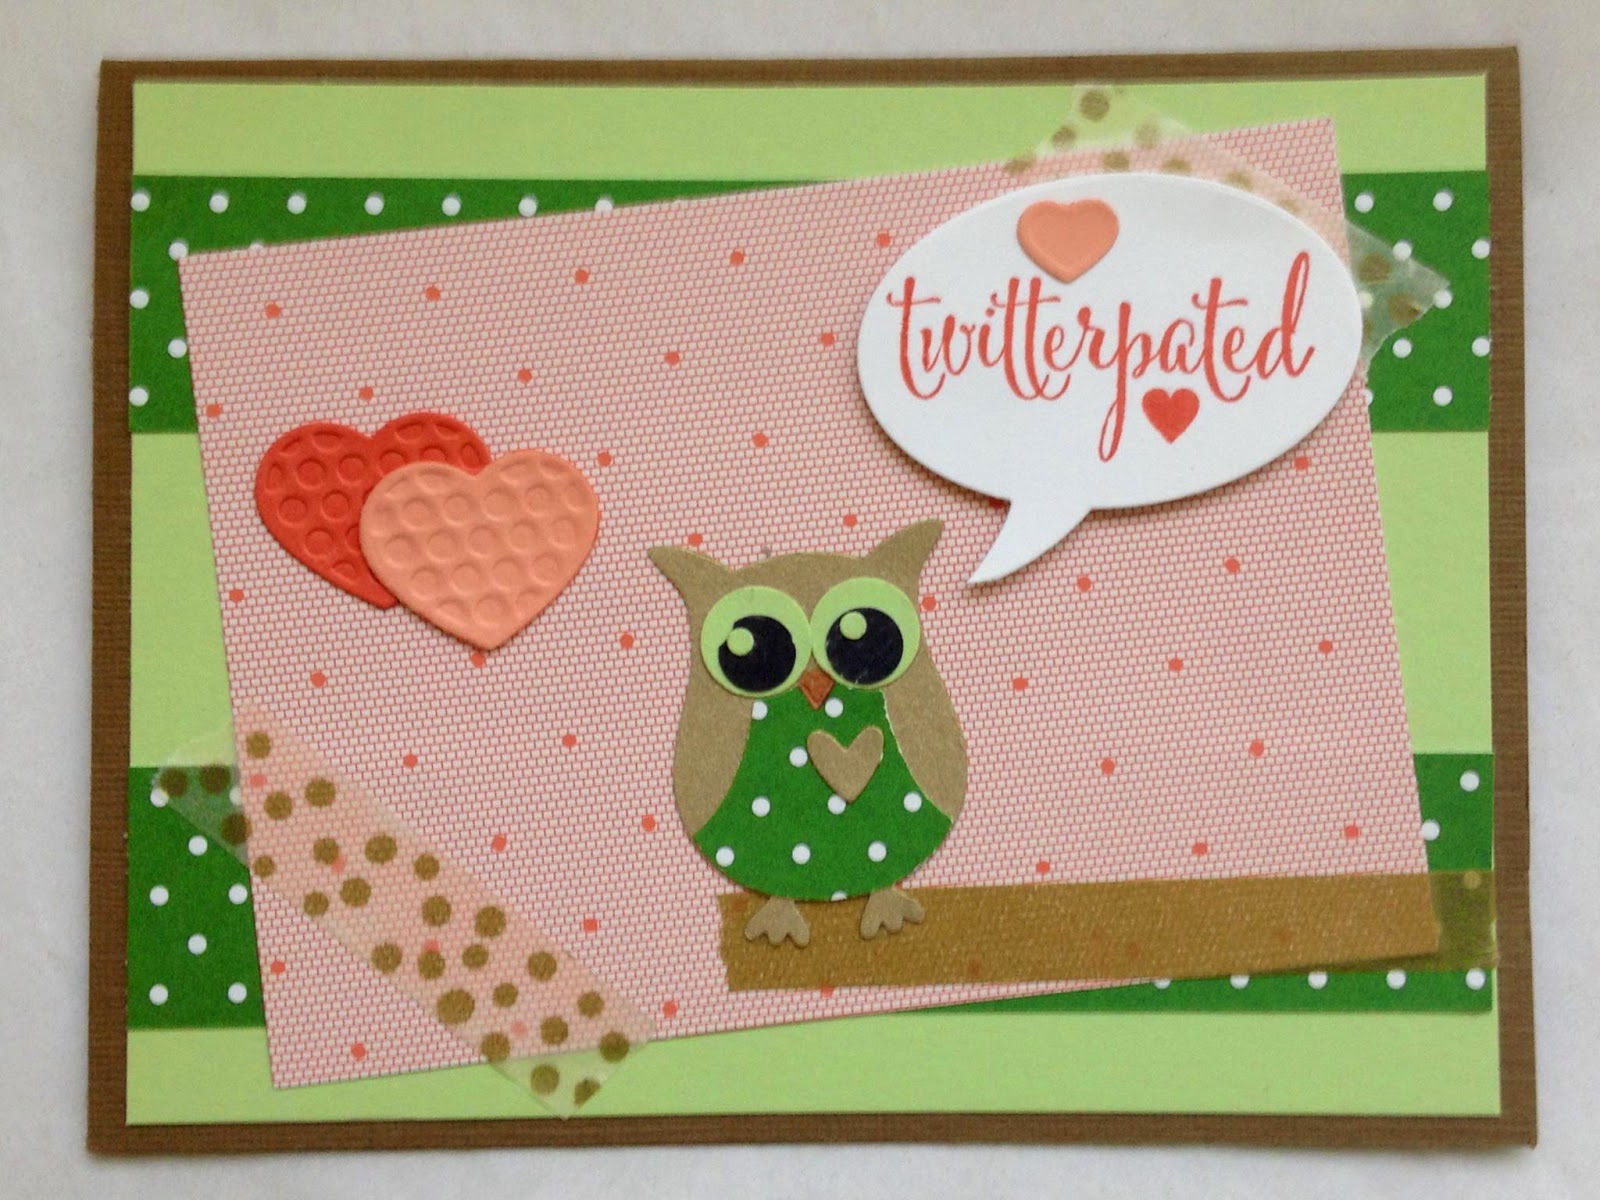
I'm not about to try making Bambi Punch art, but the Owl comes together quickly with the Owl Builder Punch! The card base is Soft Suede, the front embossed with the Hardwood Embossing Folder. I layered Crisp Cantaloupe on the suede, and a piece of the Gold Soiree Designer Series Paper over that. For the Owl body I punched Soft Suede, the vest is Pistachio Pudding, the eyes are So Saffron and Black. The heart is actually from the Confetti Heart Punch, I have a ton of that confetti! I die cut the Twitterpated, stamped in Garden Green, out with the Word Bubbles Framelits. I added some hearts, die cut in Calypso Coral and Craisp Cantaloupe, using the Hearts A-flutter and Hearts Collection framelits, and some little embossed hearts from the Fashionable Hearts Embosslit. The Big Shot is getting a work-out and earning its keep, this Valentine's season!

Owl Builder Punch Gold Soiree DSP Stampin Up You Plus Me Occasions 2015
Going dotty! 

The second card has the same base, Soft Suede, but I didn't emboss it. I layered Pistachio Pudding, some Garden Green background DSP, and a piece of the Gold Soiree Specialty Designer Paper. I "taped" down the coral dotted piece with some of the Watercolor Wonder Washi Tape, and I used a piece of that for the "perch" the owl is sitting on. The owl is unched from the Brushed Gold Cardstock, though I really did not get a better photo of it. Its soft and pretty in person, trust me! I went with a dotted green vest, and pistachio green eyes, and to finish the card off I added some of the Fashionable Hearts Embosslits.

I have had this card on my mind, and I think it came out well. I might look up some Bambi punch art, but then again... might be too fussy for me! :-)

Linking up to the Stampin' Up! Only Challenge #114!

The supplies used in these projects are shown below, 
if you click on any image you will see more info in my Stampin' Up! Online Store. 

Happy Crafting!
-Angie

Built for Free Using: My Stampin Blog
Read More »