DIY Banners - Easy Peasy

Loving the new Simply Created Build a Banner set! Its a different style of crafting than I'm used to, I'm not a banner girl. But whoa!! Its easy, pretty fast, and you can get pretty crafty with these things!! And the possibilities are almost endless - totally customize it as you need! ((More exclamation points needed in that paragraph, right? LOL)) But seriously, really impressed with how easy this is!

The kits come with most of the supplies you need, you'll just have to have pick out some inks, and your embellishments. - but wait!! Hahaha, no really - But wait!! We have embellishment kits available TOO!!
More later....

So, you get these cool canvas pennants, pre cut and already including some nice Antique Brass grommets. You get 6 of each banner shape in 3 designs, 18 pieces total. Natural Jute twine to hang the banner(s), 3 background stencils, 26 letter alphabet stencils, 1 background masking stencil, and a Stampin' Spritzer.

You will also need ink in your color choice or choices, I used the Stampin' Up! Ink Refills, some rubbing alcohol. Spritzing is messy, use newspaper under your pennants for easy clean up. I also used the sponge daubers and a classic Ink Pad to sponge on the letters, I found this to be a little less messy than spritzing, though not as fast. So for the background, spritz; for your letters, sponge. You'll also want some embellishments - I used ribbon in the examples I'll share, ribbon or paper, punched pieces look really nice - flowers, butterflies, some rosettes/lollies or buttons... you can get really wild with the embellishing.There are also some fun kits available to add on, a Halloween and a Christmas one! (take a peek at the link)

Once you've decided on your banner saying - you get 18 pieces, so you can easily do "Happy Birthday" or "Congratulations" or "Class of 2014" or any number of phrases or sayings... but anyhow, once youve decided, set up your pattern and put the pennants in the order you want them to be. Each pennant has a coated side and an uncoated side, or notice the brass grommets have a nice side and a back side. You want to spritz on the uncoated, nice grommet side.

To mix your spritz, you can use plain water and ink, but an alcohol and ink mix will dry faster - a plus! You want to fill your spritzer about 3/4 with alcohol, and then add your ink. Now this part is a little tricky, but have some plain paper to test a spritz and see how your mix looks. I went with a mix a little stronger than I would use for a card or paper creation, 20 drops of ink to the alcohol. It seemed like a pretty true color spritz, and it didnt take more than 10 spritzes per pennant to get nice coverage.

Place the stencil down on the pennant, getting your placement for the blank letter space as you like. And give it a spritz from about 12" up, but directed down and across the pennant and stencil. Don't over saturate the pennant!! You can always go back and spritz more when it dries, but if you add too much at one time it will cause your image to start to really seep and spread. Your lines will be a little fuzzy as it is, don't over do it on the spritz!

Pick up the stencil carefully, the spritz will puddle up on the stencil, and move it off the pennant. Place your pennant to the side to dry and carefully wipe off your stencil.

You can repeat the process with the spritz to do the lettering, just use the background mask and the letter stencils. Or, I used the sponge daubers, and just placed my letter stencil on my dry pennant and sponged on the ink. It doesn't have the spread like the spritzing does, and I thought it gave the letters a little darker and crisper look. You could also sponge using the background stencils, but I'd recommend using a light coat of spray adhesive on the background stencils so that you don't get any unintended slippage. The letters don't need that spray adhesive, they are very easy to stabilize with your hand as you sponge.

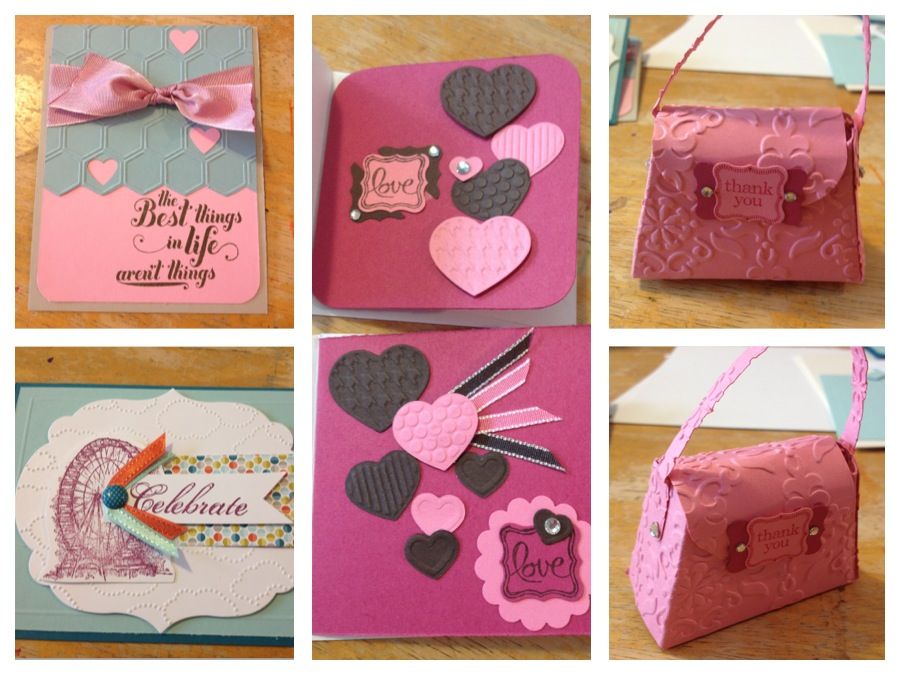
So here are the banners I've made so far, I'll have more photos on my Facebook page once I add some more embellishments, but I thought I'd start off simply and they are actually pretty festive! If you'd like to order your own set to try, I have a suuply list after the photos. Please enter my August Mystery Hostess Party for a chance to win $30 in Free product, place an order over $25 at my online store with the Hostess Code EWPVQFWW by 8/28/13 and you'll be entered to win.

Photo Op, Anyone? Cute banner for my cute little one...

August Banner Class banner - come make this one with me!!
 
My first banner, to be embellished for my craft room. More pics on FB.

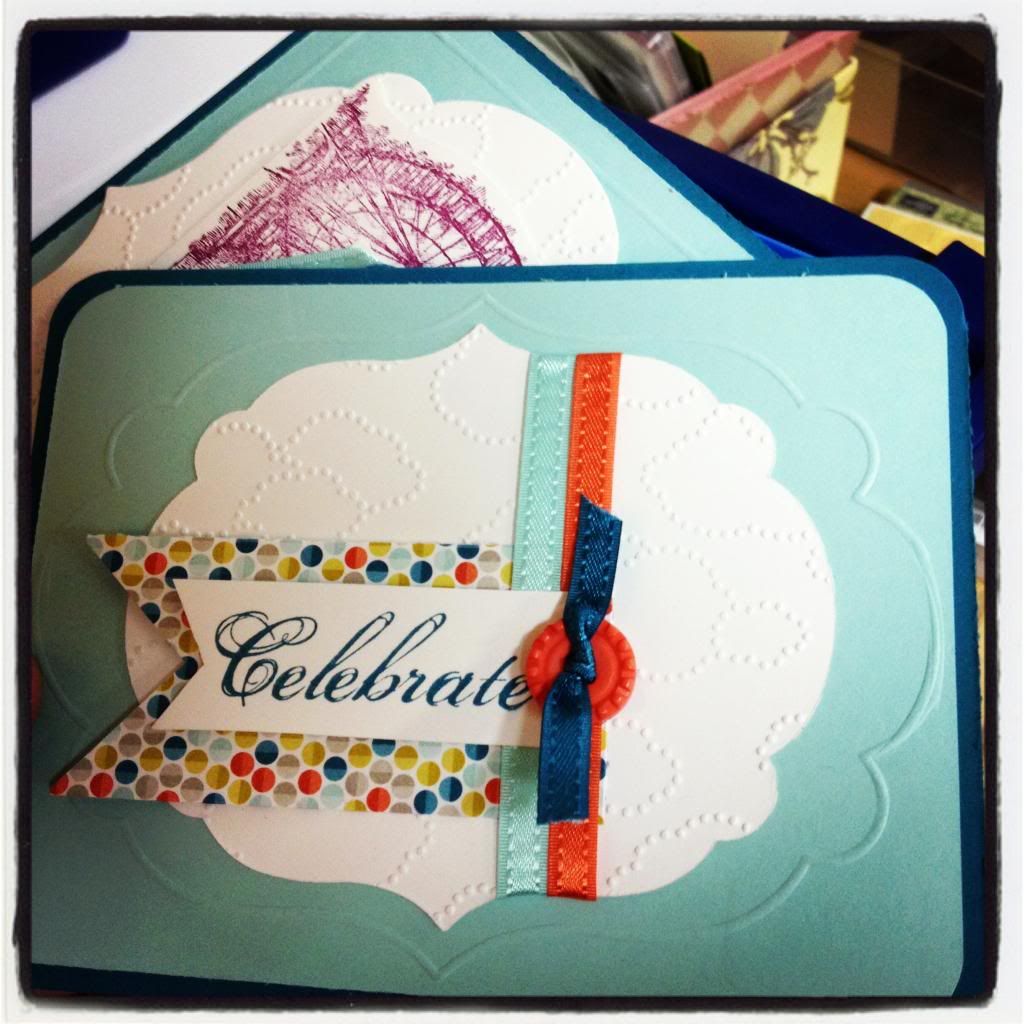
Let me know if you'll join me next weekend 8/24 at 10am to make your own banner, I'll order your supplies by Wednesday, so the deadline to sign up is Noon on Wednesday 8/21! We will make the Celebrate banner shown above, I'll have 4 colors to choose from, and include everything you need - you'll even get to take home your extra stencils and a spritzer so you'll be set to keep crafting!

If you can't make it but you'd like to give this a try (it does come with a set of instructions, and I'm happy to give you some more tips!) you'll want to order:

133507 Simply Sent Build a Banner Kit - $19.99
Ink Refills - choose 2 or more colors - $2.95 ea
Ribbon - choose matching or complimentary colors - $5.95  to $8.95
102892 Sponge Daubers - $10.95 for 12 (optional, use with your Ink Pads for lettering or stencils)

Remember to use the Hostess Code EWPVQFWW when you order by 8/28! Enter it in your cart before you check out to be entered to win Augusts Mystery Hostess bonus $30 Free Product! And, make sure you create an account so I can send you the latest catalogs! Beautiful and inspiring stuff for the holidays, great ideas and easy gifts for everyday!
Enter Hostess Code EWPVQFWW for a chance to win!

Happy Crafting!!
~angie

Pin It
Read More »

Paper Pumpkin Sale!

Sweep away the mundane - your creativity carriage awaits!

I'm Paper Pumpkin . . . a Stampin' Up! Monthly Kit Program

I come to your door each month (a fully decked-out creativity carriage). I'll help you to escape your life with some paper fun, perfect for a beginner or those short on time!I come in a sweet box, but you'll really love what you find on the inside:All the stamps, ink, paper, and accessories to create pinable projects. Create stuff like cards, journals, décor, and more!

The kits are perfect those short on time (a date with a 30 minute creativity break), new stampers as well as those (think gifts!) who would like an introduction (gifts) to paper crafting.  Subscribe here.


PAPER PUMPKIN ON SALE!  NOW through Aug. 31, you can sign up for Paper Pumpkin Monthly Kits for just $10 a month for 2 months.  After 2 months the price will return to $19.95 a month (with the option to cancel your subscription). 
To start your Paper Pumpkin subscription, click HERE and find "Join Here" under "Get it!"  To get 2 months for $10 each, please be sure to use the Promo Code:  PUMPKINDEAL


Paper Pumpkin Welcome Kit

A FREE GIFT IN YOUR VERY FIRST KIT
The Welcome Kit is the very first Paper Pumpkin Kit you will receive in your first month of membership.  The Welcome Kit includes a free gift-a clear acrylic "D" block!
TO GET STARTED
It's so easy to get started. To sign up for the program through me, please CLICK HERE and choose "Get It!"
Use the promotion code PUMPKINDEAL to join Paper Pumpkin before August 31, 2013, and pay only $10 a month* for the first two months. *plus tax, where applicable. Shipping included!  

Every month a new, surprise project kit arrives at your doorstep. Just think of the anticipation of creating a fun project to pin, showoff, and share with your friends and family-every month!

Of course, you'll want to know more. So here's the nitty gritty:
  • Each month you'll receive a unique, surprise kit with project-cards, journals, décor, and more! Everything is color-coordinated, measured, and cut just for you!
  • Each kit includes stamps, ink, paper, and accessories - everything but adhesive.
  • Each kit takes about 30 minutes to complete. 
  • Stampin' Up! will ship your Paper Pumpkin on or around the 15th of the month.  
  • You need to sign up for a kit by the 10th of the month to get that month's kit. If you sign up on the 11th of the month, your first kit will come the next month. For example, if you sign up on August 10th, Stampin' Up! will send your kit around August 15th. If you sign up on August 11th, they'll send your first kit around September 15th.
  • A Paper Pumpkin membership is $19.95 per month (and shipping is included!)
  • There's no commitment, you can cancel your monthly Paper Pumpkin at anytime. You also have the option to skip a month if you want.

FEELING LIKE YOU DON'T WANT TO COMMIT?
Paper Pumpkin Try Me Kit


You can order the Try Me Kit through my on-line shopping store by clicking here.
QUESTIONS?  Check out these FAQ's or customers may email me at:  MidnightCrafter@gmail.com

Happy Crafting!

~angie

Pin It
Read More »

Arrived at Convention!

I arrived to balmy weather here in beUTAHful Salt Lake City. 
Stampin' Up! Convention kicks off this afternoon, and if you're like me last year - combing the interwebs for every convention tidbit ;)- you'll want to tune in as they stream live from Opening Session! Look for me! LoL
 

 Also, TAG along with me on Instagram and Twitter on my adventures at Convention - its a 25th Anniversary celebration, so it's sure to delight, amaze, and overwhelm... I can't wait!! 
#convention2013 #framethedifference #suconvention2013 #swaps #stampinup


Make it a great day!,
-Angie
Pin It
Read More »

Memorial Day Blog Hop 2013 - OWH


Thank you for celebrating this Memorial Day weekend by participating in the BEST BLOG HOP on the interwebs! Operation Write Home is a valuable organization, made possible by caring and crafty people from all over our great nation. They collect hand made cards here in the states and ship them to our armed forces stationed across the world, where the cards are distributed for the men and women serving there to send home to their families and loved ones. You can find out more about OWH by visiting www.OperationWriteHome.org if you are not familiar with the wonderful support they provide our troops and their families.
I have made cards for OWH for several years now, and I love thinking of the special messages that my cards carry between loved ones. Every card I make includes a wish for a safe return and a virtual hug to those who send and receive it.

The card I've made was inspired by Sketch #73 ::
 Operation Write Home offers a ton of great sketches for inspiration, and they always have a challenge or tutorial or featured cardmaker to get your mojo flowing! My card says "So Grateful For You", and I really and truly am grateful for the service of our troops. Thank you!! This will be included in my next box of cards for OWH, an Any Hero card to hopefully brighten someones day.


All Stampin' Up! supplies: Apothecary Art stamp set; Labels Collection Framelits, Honeycomb Textured Impressions Embossing Folder; Tea for Two Designer Series Paper; Baja Breeze and Very Vanilla cardstock; Stampin' Write Markers.

To visit more stops on the hop, click on the blog hop logo above or go to http://operationwritehome.org/starsandstamps and find a WHOLE WEEKENDS WORTH of card inspiration!!


Happy Crafting & Thank You for hopping by!
~angie

Read More »

Q&A - This & That : New from Stampin' Up!

New This Á That Product Line by Stampin' Up!
 This & That Journals ~ Smashing through creative blocks!


Q: The new This and That journals look cool. In what ways are people using them?

This and That Product Line by Stampin' Up!

A: Our latest This and That product line is based on a growing trend of smash books. They go back to the roots of scrapbooking when people created memory books filled with photos and mementos. Today’s scrapbooks can truly be a work of art to be cherished as a family heirloom, but some scrapbookers prefer to go back to a simpler and faster way of capturing what is happening in their lives. So, are you still wondering what it’s all about?
  • Do you remember doodling in your school notebook? It’s like that!


  • Have you ever created an Imagery Board for your wall or collages of magazine pictures that you like or places you want to go? It’s like that!


  • Have you ever had a journal you kept in the past and stopped because you just wanted to add a journal entry when you felt inspired instead of chronologically? It’s like that!


  • Have you ever collected ideas and inspiration from several different sources for a school project, a home renovation, a wedding, a party, or maybe a garden? It’s like that!


  • Ever wanted to have a place to add your favorite quotes when you hear them? It’s like that!


  • Need a place to collect all your love notes, recipes, or funny quotes from your kids? Yeah, it’s like that, too!

I could go on and on because, as with most crafting products, the only limitation for using This and That journals is your imagination! But, I will leave you with this last idea - basically, it’s Pinterest on paper. 


This and That Product Line by Stampin' Up!


This and That Product Line by Stampin' Up!


This and That Product Line by Stampin' Up!


As you can tell, this would be a great product for teens, Tweens, mothers, planners, would-be artists, collectors of pretty things ... the list goes on and on. Take a look at this video and then give it a try and see what inspires you!


© CraftyPerson Production. Images © Stampin' Up!
Read More »

Free Shipping Weekend and Mystery Hostess

Free Shipping April 6-8 at www.midnightcrafter.stampinup.net

Shop this weekend and get your shipping for FREE!!

all Orders April 6th - April 8th, 2013 

Plus, as a special BONUS from me, if you order from my online store
(make sure Angela Bodas is shown as your Demonstrator in the upper right corner)
and enter the Hostess Code
KHYKGTMU at checkout
for every $20 ordered, you'll be entered
for a chance to win Half the Hostess Benefits from the weekend!

*All orders must be placed by 7:00 pm Monday April 8th at my online store using the Hostess Code KHYKGTMU  at checkout
*Every $20 ordered will be one entry in raffle for Hostess Benefits, multiple entries per order allowed (Order $60 = 3 entries)
*I must be able to get a hold of you by 8pm if you win, please provide a valid phone number and email when ordering, and have a Wish List ready!
*Amount of Hostess Benefits will depend on total of orders placed over the 3 days using the Hostess Code

Shop Now! http://www.stampinup.com/ECWeb/default.aspx?dbwsdemoid=2110890


Pin It
Read More »

More Amore Designer Fabric Valentines Shirt

I admit it, I spend alot of time on Pinterest. :-)
I found this adorable tutorial for a Valentines Day shirt a while ago, and I knew if I could make peace with my stupid challenging sewing machine that it would be just too cute for the girl this year! Then I saw the More Amore Designer Fabric that came out in the Stampin' Up! Spring Catalog, and whooo! There it was. Had to make it. So, I did.

Perhaps you will too!


More Amore Designer Fabric - Stampin' Up!
The amount of fabric they give you in this set is generous, 3 extra-wide fat quarters, 18x27". I have more than enough to make a few of these cuties - and since I'm early this year maybe I will make some giftables...The tutorial was pretty easy to follow, though I did the flowers a little differently, more of a modified yo-yo type flower than the sewn ones in the link.
(arguing with my sewing machine, Me: 0 - Sewing Machine: 1) 
Amore Mio 
Have you had much luck making Pinterest crafts, or are you just collecting ideas? I find that a good tutorial is all it takes, though I am partial to "figuring it out" as well... I try to pin stuff that has links to How it was done, not just a pretty picture. The pretty pictures I just collect in my "when I have a spare weekend" collection. ;-) AKA : Never Will. Sigh. Maybe when I'm older...

Happy Crafting!
~angie
Read More »

Heart Felt Wreath - I did it!

Yes, Pinterest... All ideas and no execution, right??
Well, most of the time... But not today!!

My crafty group is getting together later this month to make these cool felt heart wreaths found on Pinterest, full tutorial online there... and I happened to be gathering the supplies so I had the felt on hand here. I am waiting on the 12" foam wreaths to come in stock ((call before you go, #justsayin)) but I did manage to pick up a little 9" one I thought I would make for fun.

And fun it is!
I am not big on hand cutting felt, and this project calls for ALOT of felt circles. I knew I had a circle die cut for my Big Shot.. (now, it IS retired - but you could totally use the current one, its a smooth edge 3" die, which would actually give you the look of the Pinned project) but I used Scallop Circle #2 and went to town cutting felt. I used just over a yard of a 72" bolt of felt, and with my crafty cutting I got two sizes of felt circles, just under 200 pieces each. The die has a 2" scallop circle, which I used on the wreath I'm going to show you, and it has a 3.5" scallop circle which I will use for the group craft and the 12" wreath.
I folded my felt to 4 layers - 4 is good! 5 is tough - Dont do six!
The Big Shot really did fine with the felt, I cut 4 layers at a time, and it took about 1 hour. Not bad - no tracing circles, or hand cutting with scissors... Yay! Time- saver!! Which was good, because the next step also took an hour!
The tutorial calls for pins to attach your felt to the wreath form, and I have no idea how that would work - I didnt get pins, and had planned on using hot glue. The hot glue worked just fine, and actually gave me some help in forming the look of the felt on the wreath. I think with the pins I probably would have needed more circles to get more coverage, but perhaps its the same idea... I followed the tutorial, with the exception of the scallop edge felt circles and the hot glue instead of pins.

It was easy, but it does take time. Plan a couple hours of work. I've also seen this with tissue paper, and wow - you could cut a zillion of those with the Big Shot! But the felt is a really neat texture, kind of warm and soft, like love should be... :-)
Looks like little roses! Love it!!
And don't worry about being too fussy about perfect scallops - I folded the "bad" edge to the inside, then used that as the glue edge for attaching to the wreath. Once on, you can't even tell!
(Ignore the boy's teeth marks there, he was "helping" me carry the form... sigh. Boys! lol)
I attached the hanger with hot glue also. When I was gluing pieces onto the front of the wreath I did about 3 across, sometimes 4, you just want to eyeball it - you definitely dont need to do alllll the way around the wreath. When its hanging it totally gives the illusion of being complete. You would need a bajillion more circles, and it would take twice as long... but you could, if you really wanted to.

And Voila!!! Beautiful (if I do say so myself) and easy to make!
Read More »

Best Of... 25th Anniversary Stamp Sets

And the exciting 25th Anniversary celebration continues with this news::


Best of 25 Years Stamps

As part of the Stampin' Up! 25-year anniversary celebration, we're bringing back some of our favorite stamp images from the last quarter century and combining them into 12 sets, which will release-one set per month-during 2013. Even better, along with some great classic images, each "Best of" set will also include a never-before-seen image!

Some things to remember: 
  • All Best of stamp sets will include 3-5 images, including a never-before seen image, and will be priced at $14.95.
  • While we are releasing just one Best of stamp set per month (with a new theme each month), all of the Best of sets will be available until March 31, 2014.
  • A new flyer will be released every month for each new Best of set.
  • All Best of stamp sets are available in Clear-Mount only.
While we are releasing just one Best of stamp set per month, all of the Best of sets will be available until March 31, 2014.

As a special incentive to collect the Best of stamps, starting in February we're including a collector's card and 25-year proof of purchase sticker with every Best of set. Collect six stickers, and send it in to redeem a FREE set of your choice valued up to $14.95! Free sets must be redeemed no later than April 30, 2014.


Here is January's collector set: 

Pin It
Read More »

Paper Pumpkin Creative Project Kits

Sweep away the mundane-your creativity carriage awaits!
NEW It's Paper Pumpkin . . .
Right to your door each month (a fully decked-out creativity carriage).
To help you to escape your life with some paper fun. I come in a sweet box, but you'll really love what you find on the inside: All the stamps, ink, paper, and accessories to create pinable projects. Create stuff like cards, journals, décor, and more!

Paper Pumpkin by Stampin' Up! is a new monthly kit program that anyone (even you) can enjoy! Get Started It's so easy to get started. Simply sign up for the program starting Monday, January 14 by visiting www.mypaperpumpkin.com and click Get it. Every month a new, surprise project kit arrives at your doorstep. Just think of the anticipation of creating a fun project to pin, showoff, and share with your friends and family-every month!

Of course, you'll want to know more.
So here's the nitty gritty: Each month we send you a unique, surprise kit with a project-cards, journals, décor, and more! (We've even color-coordinated, measured, and cut everything for you!) Each kit includes stamps, ink, paper, and accessories-everything but adhesive. Each kit gives you a 30-minute creativity escape.

We will ship your Paper Pumpkin on or around the 15th of the month. You need to sign up for a kit by the 10th of the month to get that month's kit. If you sign up on the 11th of the month, your first kit will come the next month. (Let's say you sign up on May 10th, we'll send your kit around May 15th. If you sign up on May 11th, we'll send your first kit around June 15th.)

A Paper Pumpkin membership is $19.95 per month (and shipping is included!) There's no commitment, you can cancel your monthly Paper Pumpkin at anytime. You can also skip a month if you want.
Starting in early March, we'll offer a Try-It kit if you'd like to try Paper Pumpkin for one month.

Here's How You Order
Sign up for your monthly Paper Pumpkin starting Monday, January 14 by visiting www.mypaperpumpkin.com
and click Get it. Make sure you list me as your Demonstrator - Angela Bodas.
Starting in early March, you can try Paper Pumpkin for one month by visiting our online store.

A Free Gift in Your Very First Kit
The Welcome Kit is the very first Paper Pumpkin you will receive in your first month of membership. The Welcome Kit includes a free gift-a clear acrylic block!

Pin It
Read More »

Spring is Here! { the 2013 Occasions Catalog, anyhow! }

Its still a little cold to be thinking "Spring" right? But ohhh, that Stampin' Up! 2013 Spring Catalog has come out - and its a BEAUTY! Some great new items I'm just be thrilled about!
I spent some time last weekend with my upline (and her upline, and a bunch of great ladies) crafting at a shoebox swap - and oohing & ahhhing over the Spring Catalog products and the Sale-a-bration items soon to follow (January 22nd!!). Crafting, conversation, and cool new stuff?! :: It was such a great day! ::

Here are the cards I took to share:


This one uses the sentiment stamp from the Sale-a-bration set Feeling Sentimental, with a banner of paper from the SAB Sycamore Street Designer Series Paper, as well as ribbons and a button from the Sycamore Street Ribbon & Button Pack. The white layer is embossed using the Textured Impressions Embossing Folder Cloudy Day, page 28 of the Spring Catalog. I cased the card from there, you'll notice. I die cut the embossed layer with the Labels Collection Framelit, and then used the new Simply Scored Borders Scoring Plate, page 26 of the Spring Catalog, to frame my die cut layer. The colors are Island Indigo, Pool Party, and Tangerine Tango.


This one is all Spring: it uses that already-popular Honeycomb Textured Impressions Embossing Folder, page 6, with some of the 1 1/4" Two Tone Ribbon in Pink Pirouette/ Rose Red, page 13, and the sassy stamp is from Feel Goods, page 21. I punched out one heart from the bottom of the honeycomb, then added a couple Pink Pirouette hearts I had punched out onto other spots. The ink is Always Artichoke, and I used Baja Breeze for the honeycomb layer, Pink Pirouette underneath, all on a Sahara Sand base. The two-tone ribbon had me a little confounded, I was expecting the ribbon to have both colors - Rose and Pink, one on each face of the ribbon... but that was wrong, the two colors are woven together (as it states in the catalog, d'oh!) so that the ribbon is a really rich color, not quite one or the other, but it goes well with both. Crafty! Its a nice feeling and substantial ribbon at 1 1/4".

And, I'll post a couple more later, these were my favorites of my shares.
I hope you're inspired to check out the newest catalog, you can download or view a digital copy HERE ( www.midnightcrafter.stampinup.net/catalogs )

Happy Crafting!
~Angie

Pin It
Read More »

Q&A Chalkboard Technique

Chalkboard Technique
 Q&A


Q:  I love seeing new techniques used for stamping. Can you tell me more about the Chalkboard technique?

Chalkboard Technique - To You From Me Designer Template - Digital Download #132811 A:  You hit right on a very popular trend in the papercrafting world! The Chalkboard or Faux Chalk Art technique is a fun twist on the basic resist technique. It creates the vintage look of old chalkboards, chalkboard art, and advertising.  Here’s how you can create the Chalkboard Technique...

Supplies:  
     Card Stock:  Basic Black (or use Garden Green or Not Quite Navy for the look of old green and blue chalkboards)
     Ink:  VersaMark, Whisper White Craft ink, ink matching the color of your card stock
     Other:  Heat Tool, White Stampin’ Emboss Powder, Embossing Buddy, Watercolor Pencils (White Pencil), Stamping Sponges, ruler (clear is best)

Step 1:  Rub card stock with Embossing Buddy. Stamp images with VersaMark ink. Heat emboss with White Stampin’ Emboss Powder. (Try stamps such as: Amazing Family (#129189 wood, #129192 clear) pg. 7 of Spring Catalog or Forever with You (#126725 wood, #126727 clear) pg. 132 of Annual Catalog.

Step 2:  Sponge edges of card stock with matching color to create contrast. Wipe off excess ink with tissue.  Lightly sponge around embossed images and in blank areas with Whisper White Craft ink. Sponge some areas darker and some lighter to create the look of chalk dust.

Step 3:
  Use a ruler or freehand draw lines through or above and below stamped images with the White Watercolor Pencil. Draw a border 1/4" from each edge of the card stock with the White Watercolor Pencil to create a frame around the chalkboard. Remember this is all “chalk” drawing on a board so being perfectly neat isn’t necessary!

OPTIONAL:
  If desired go back and shadow stamp over embossed images with Whisper White Craft ink. By stamping over, but slightly off center of the original image you create a blurred shadow effect. Allow craft ink to dry.

Step 4:  Embellish with vintage items such as bits of Doily, ribbon, Delicate Details Lace Tape (#130966), Paper Doilies (#129399), Linen Thread (#104199), Baker’s Twine, buttons, or pieces from the Artisan Embellishments Kit (#129328).

© CraftyPerson Production. Images © Stampin' Up!
Pin It
Read More »