Best Day Ever - Thanks for the Memories, 2014


Stampin Up Sale-a-Bration 2015 MidnightCrafting Best Day Ever
Best Day Ever - Sale-A-Bration 2015 set - Thank You Cards
Today's Thank You goes to YOU. You made my day - many of them, in fact! I've challenged myself to create a card every day over the last few months. Its been difficult, as most challenges are meant to be, but the response and support from you have meant so much. Thank You!!

This is another set that will be available January 6th, as part of the Sale-A-Bration brochure. For every $50 purchase, you'll be able to add on a product from the brochure for Free! These limited edition stamps, papers, and embellishments will be available only until March. Great stuff, wait till you see it!!
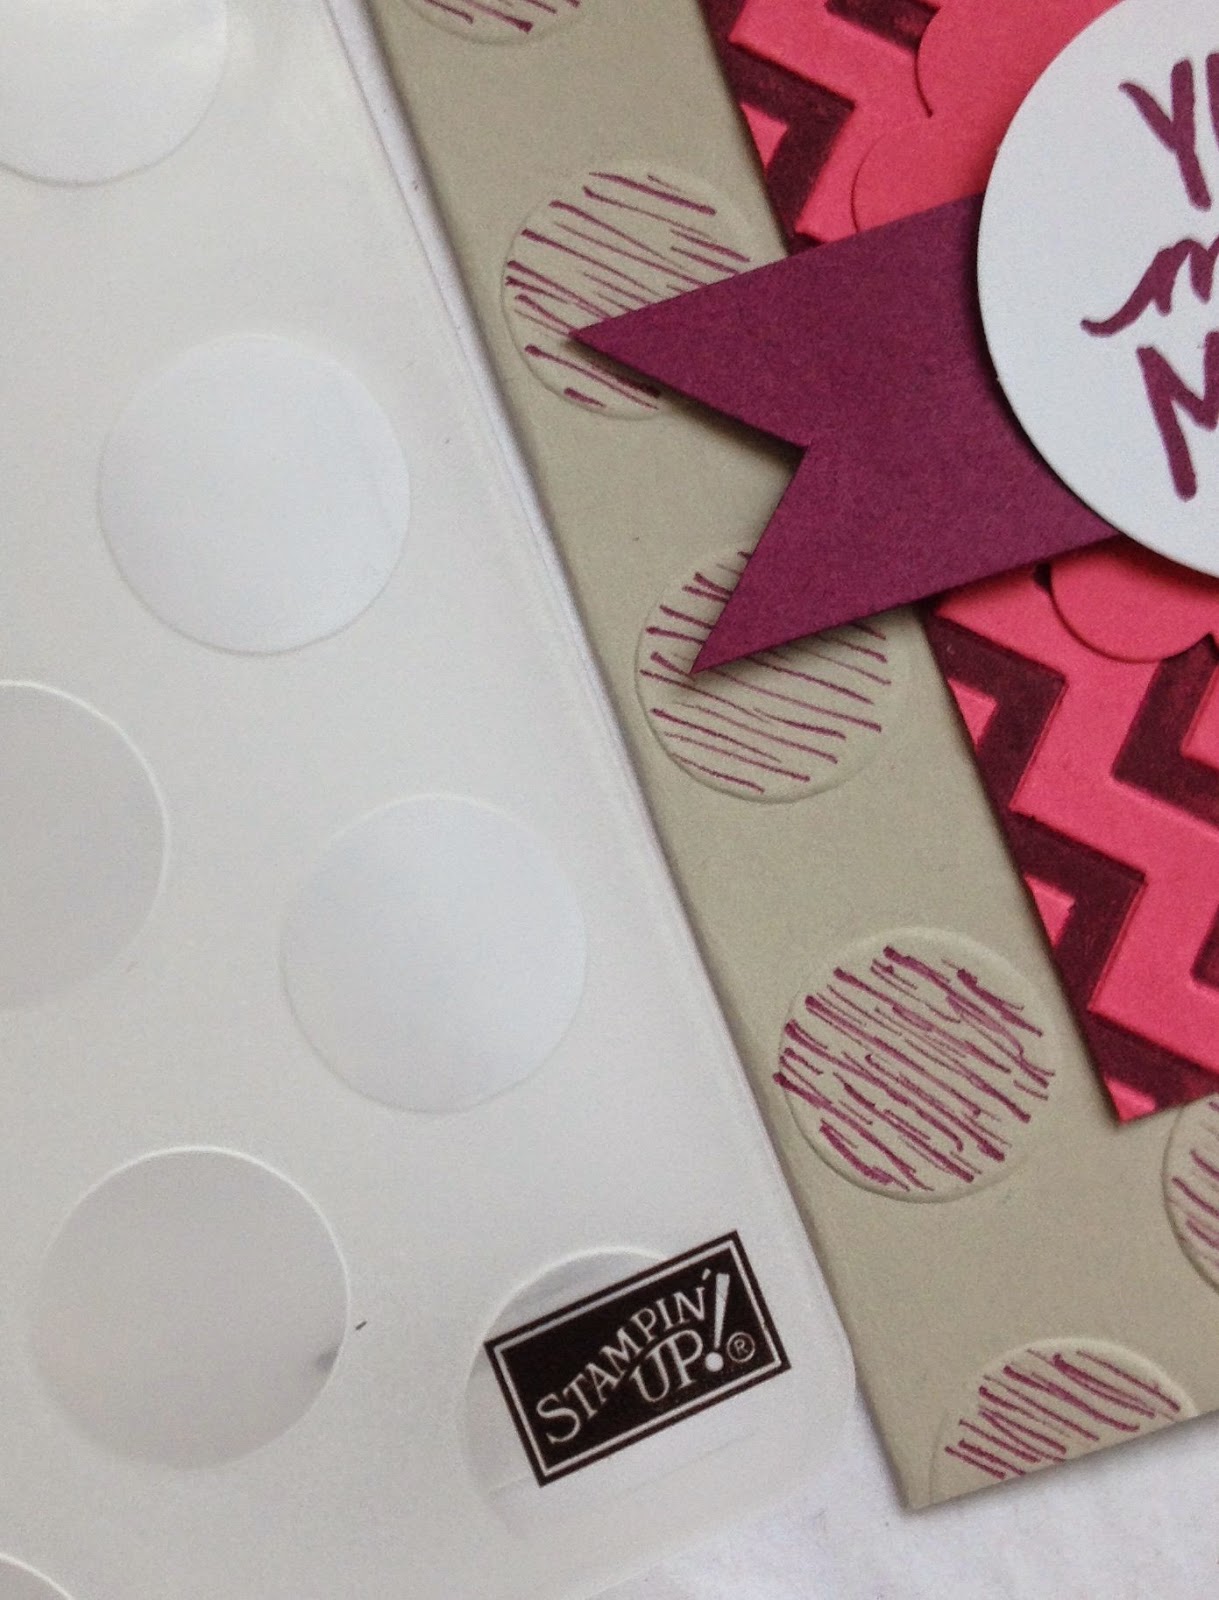
Stampin Up Sale-a-Bration 2015 MidnightCrafting Best Day Ever circle detail
Embossed with Polka Dot TIEF,
then used Stampin' Write Marker to sketch lines
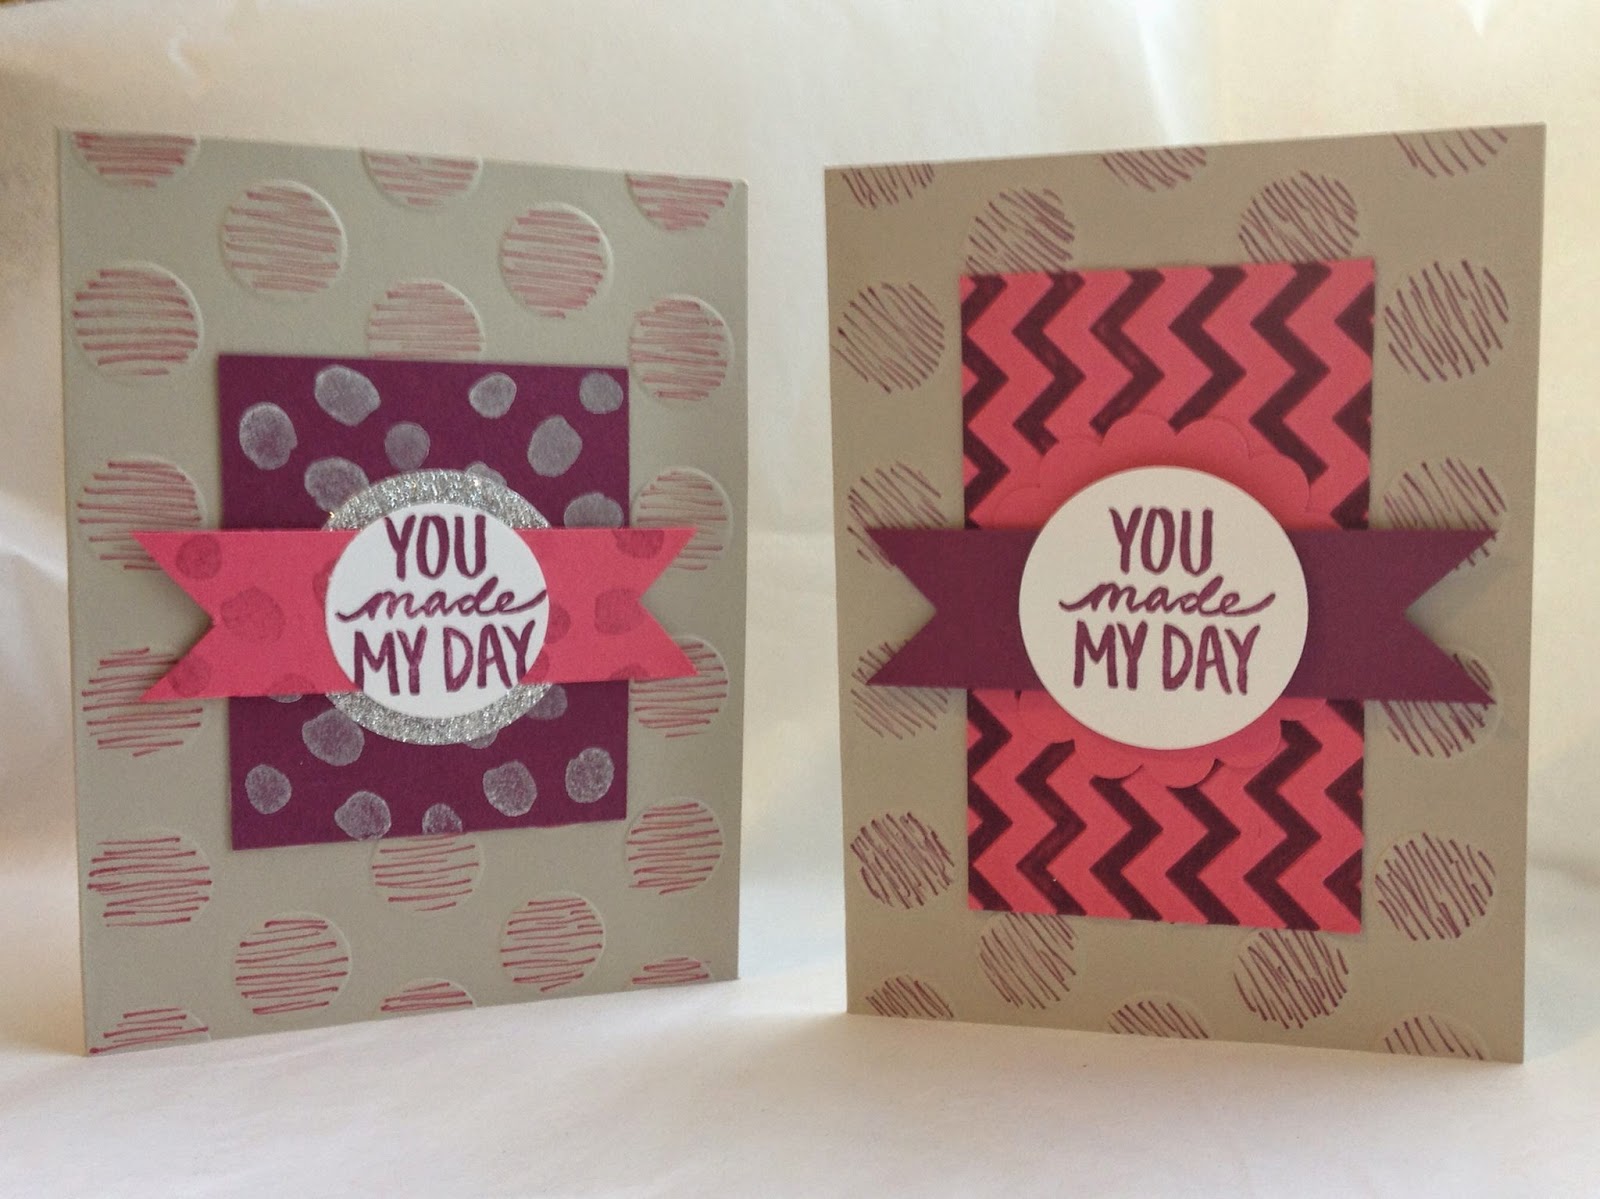
Today I used a Sahara Sand base, embossed with the Polka Dot Textured embossing folder. I CASE'd a design from the Sale-A-Bration 2015 brochure, and sketched in the dots with a marker. Looking back on the photo, I suppose this look could also be done using the Dots and Stripes Decorative Masks, but I like how it came out as it is. I swiped the marker from the edge of the circle across almost to the other edge, and then came back from that edge to the first side, creating a sketched dash across the circles. Its subtle, but fun. Very fun!! :-) I made the marks in time with the songs playing on my radio,  it was like dancing with my markers!

Stampin Up Sale-a-Bration 2015 MidnightCrafting Best Day Ever silver
Best Day Ever - SAB 2015
Strawberry Slush and Rich Razzleberry with Silver accents
For the first card the embossed dots are sketched in Strawberry Slush, all going the same direction as the Strawberry banner layer. Next, I stamped a Rich Razzleberry layer with the the dots in Silver Encore ink. Then a circle punched from the Silver Glimmer Paper, stacked with a banner in Strawberry Slush (stamped in the dots again, stamped off first for a faded effect), and lastly the Circle of Whisper White stamped in Rich Razzleberry. Interesting details to try out, I liked this card.

Stampin Up Sale-a-Bration 2015 MidnightCrafting Best Day Ever Bold
Best Day Ever - SAB 2015
Strawberry Slush and Rich Razzleberry Zig Zag
The second card is bolder. The embossed dots on the base are sketched with the Razzleberry marker, but I didnt really pick a direction, they are going kind of askew of anything on the card, maybe matching the zig in the Chevron embossed pattern on the next Strawberry layer. Maybe. Atop this layer I placed a plain Strawberry scallop circle, and then a plain Razzleberry banner, topped with the White circle stamped in Razzleberry.
Embossing Folder with Color
Swipe ink across folder, insert paper and emboss, voila!
On the Strawberry  layer I used the technique where you swipe your ink pad across the embossing folder, transferring color to the embossed image. (shown above is the scrap left after I cut the piece for my card. Fun technique, if a bit messy.

I'm looking forward to even more creativity and sharing in the new year.
From my heart to yours, Happy New Year!!
And as always, Happy Crafting!
-Angie

Products used in today's cards are shown below, 
click on any image to see more information in my online Stampin' Up! Store. 

Always open, Secure Shopping and Speedy Shipping, 
Shop Now for your craft supplies, 
Project Life by Stampin' Up!, amazing stamp sets, and more : 
Spanish Stamps are Available

Built for Free Using: My Stampin Blog
Read More »

Big News in Moonlight

www.MidnightCrafting.com 1 Big News Moonlight DSP Stampin Up
Big News Stamp Set with Moonlight Designer Series Paper Stack
Big News Stamp Set. Covers many occasions. Using it today for more Thank You cards!
I liked how the squiggle in the stamp went with the squiggly lines in the Moonlight Designer Series Paper. The Hello Honey is nice and bright, and I paired it with a Smoky Slate base and Pistachio Pudding accents.

www.MidnightCrafting.com 2 Big News Moonlight DSP Stampin Up
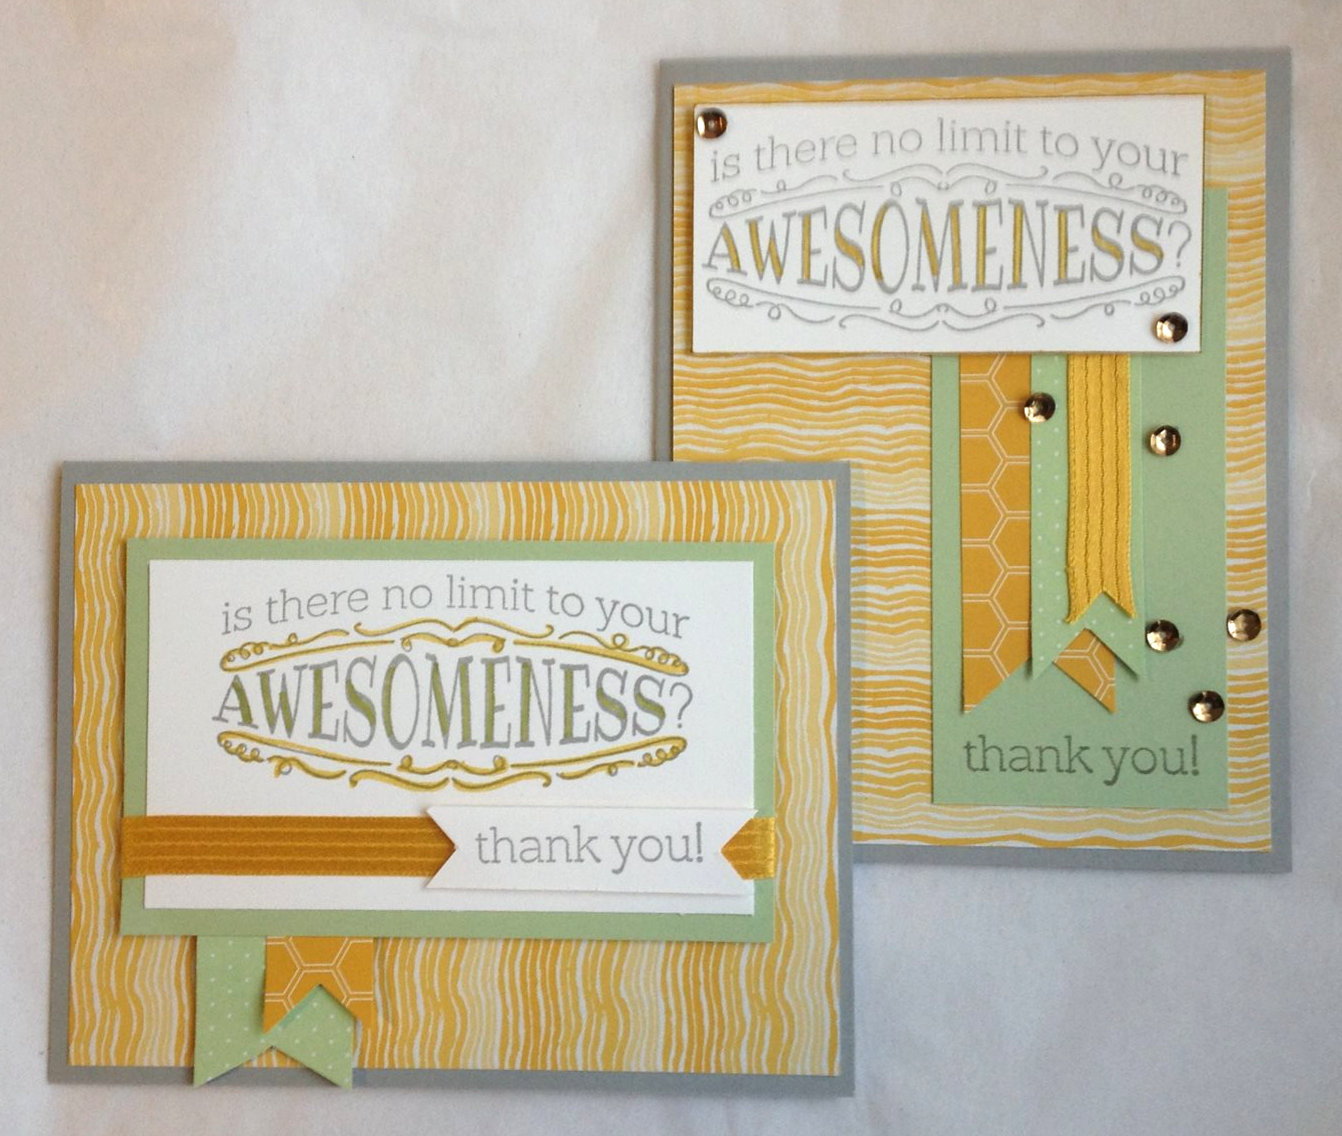
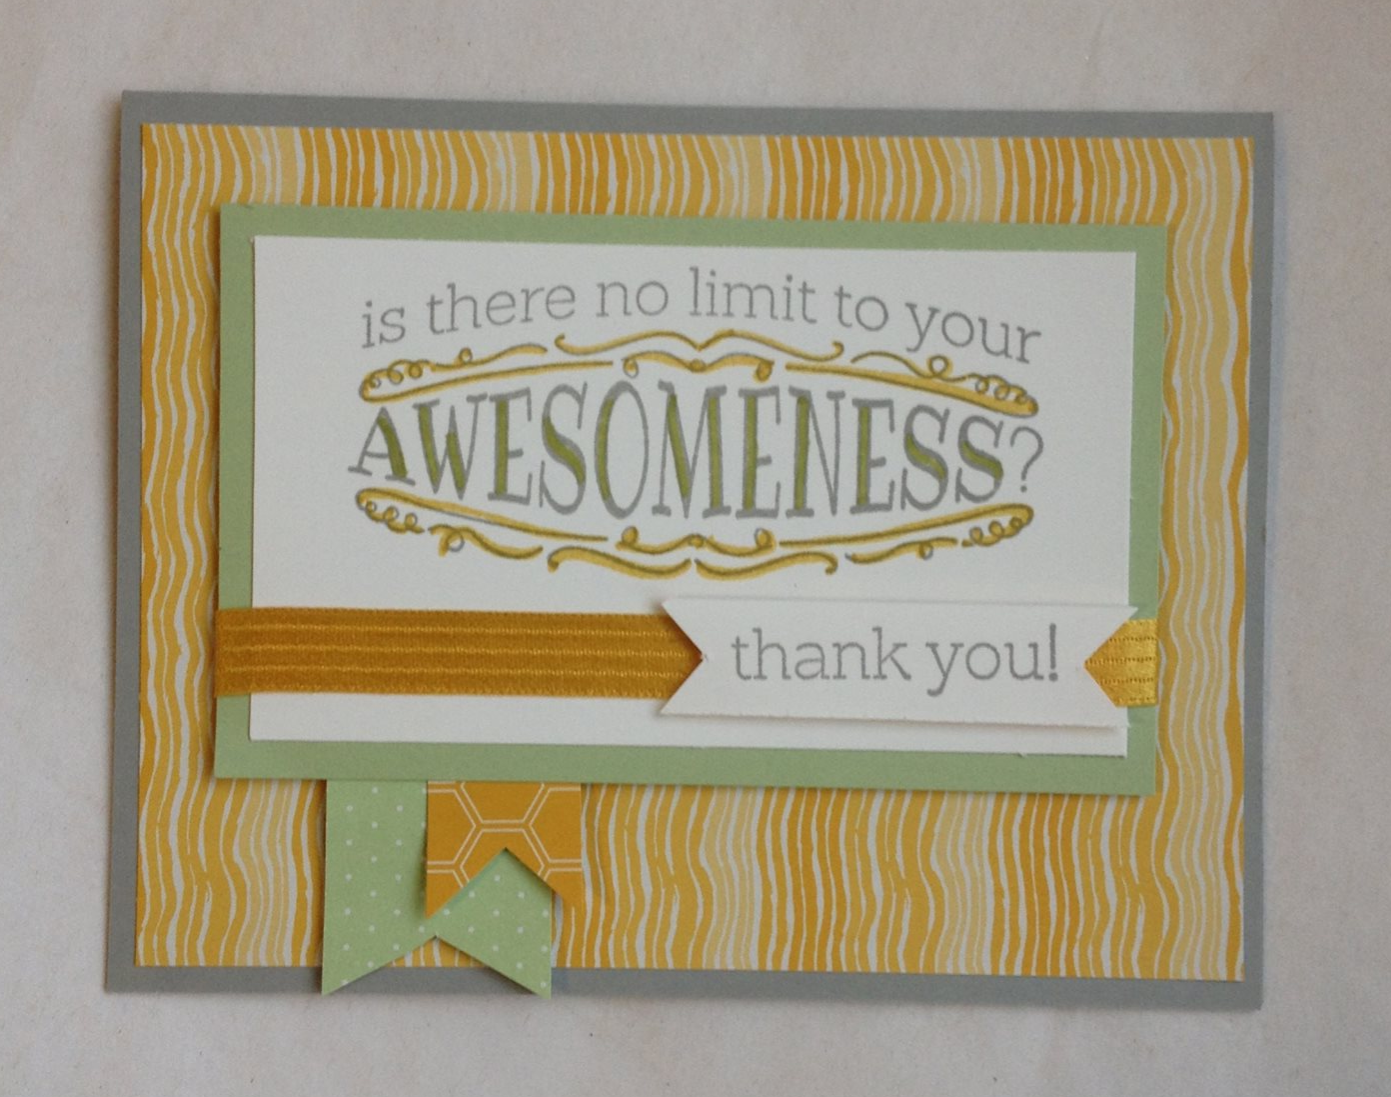
Big News - Is there no limit to your Awesomeness? Thank You Card
The first card has a little color to the stamp. I used the Old Olive Blendabilities and a Hello Honey Stampin' Write Marker to add the emphasis. The landscape layout fits the scale of the stamp, but I wanted to make the pennants longer on the bottom, and just had no room. So...

www.MidnightCrafting.com 3 Big News Moonlight DSP Stampin Up
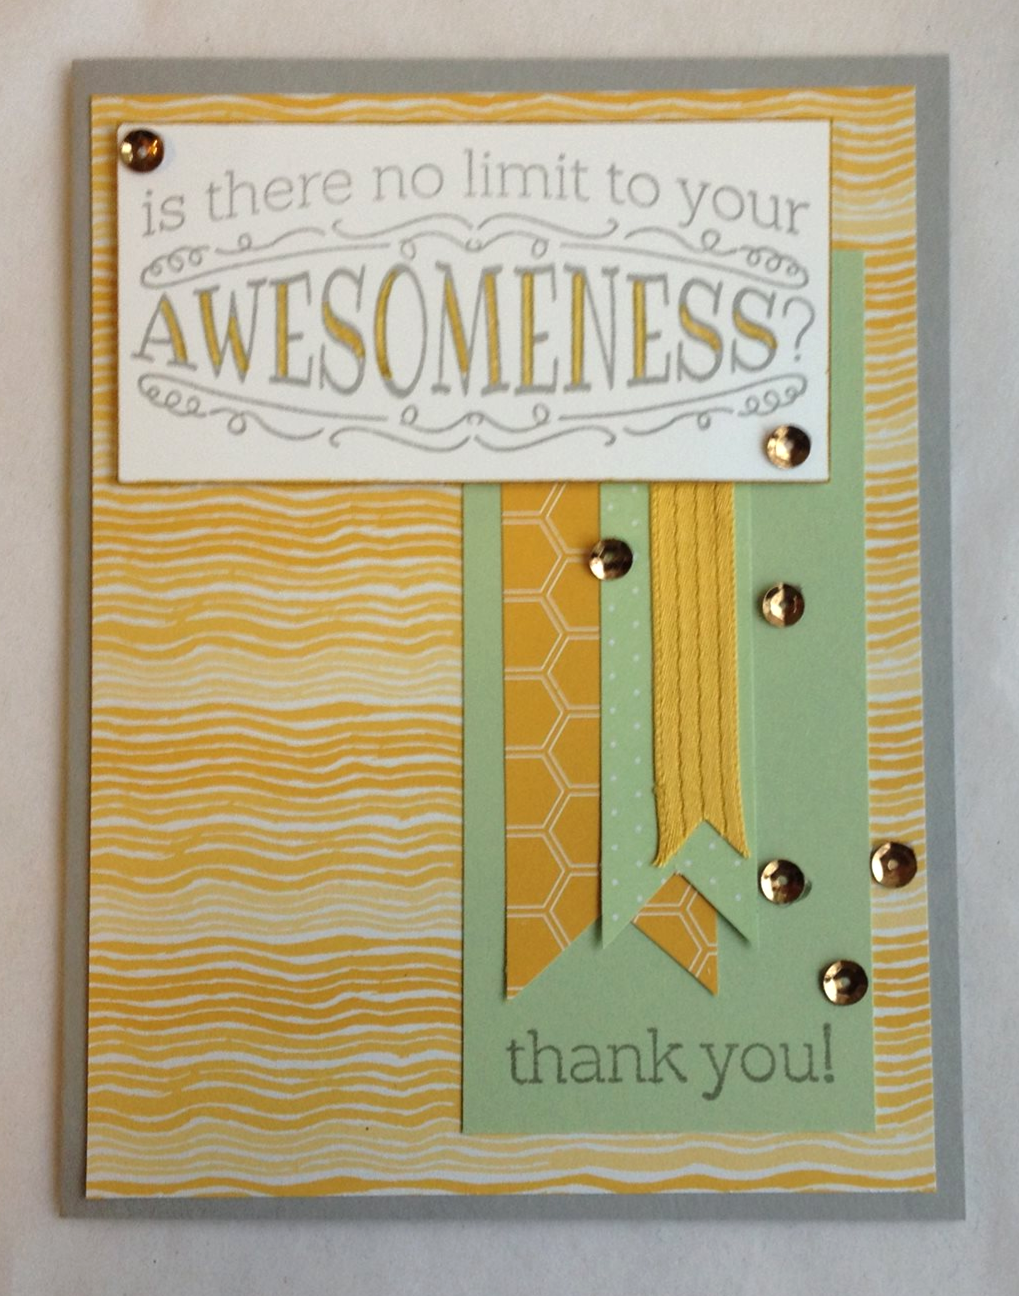
Big News portrait card with sequins
The second card I did portrait, which squeezes the stamp at the top, but I liked the banners dipping down to the Thank You. I just used the Hello Honey marker on the stamp this time, and added some of the In-color Sequins. I ran the marker along the edge of the Whisper White card stock layer to give it some definition, and popped it up on Stampin' Dimensionals.

An 'oldie' but a goodie, this set can be found in the Annual Catalog along with the Designer Series Paper Stack.
Happy Crafting!
-Angie

Products used in today's cards are shown below, 
click on any image for more information in my Online Stampin' Up! store.
Always Open, with Secure Shopping and Speedy Shipping :

Built for Free Using: My Stampin Blog
Read More »

Sale-A-Bration Peek - Lotus Blossom

Sale-a-Bration 2015 Stampin Up Lotus Blossom MidnightCrafting
Sale-A-Bration 2015 Sneak Peek - Lotus Blossom

Sale-A-Bration will be here soon!!!!!

But TODAY I am sharing a sneak peek of one of the Free Products from the Sale-A-Bration Catalog. This is Lotus Blossom, a 7 piece Photopolymer stamp set that will create beautifully layered-color flowers with just one color ink! And try two colors of ink, oh-la-la! Shut the front door!! Gorgeous.

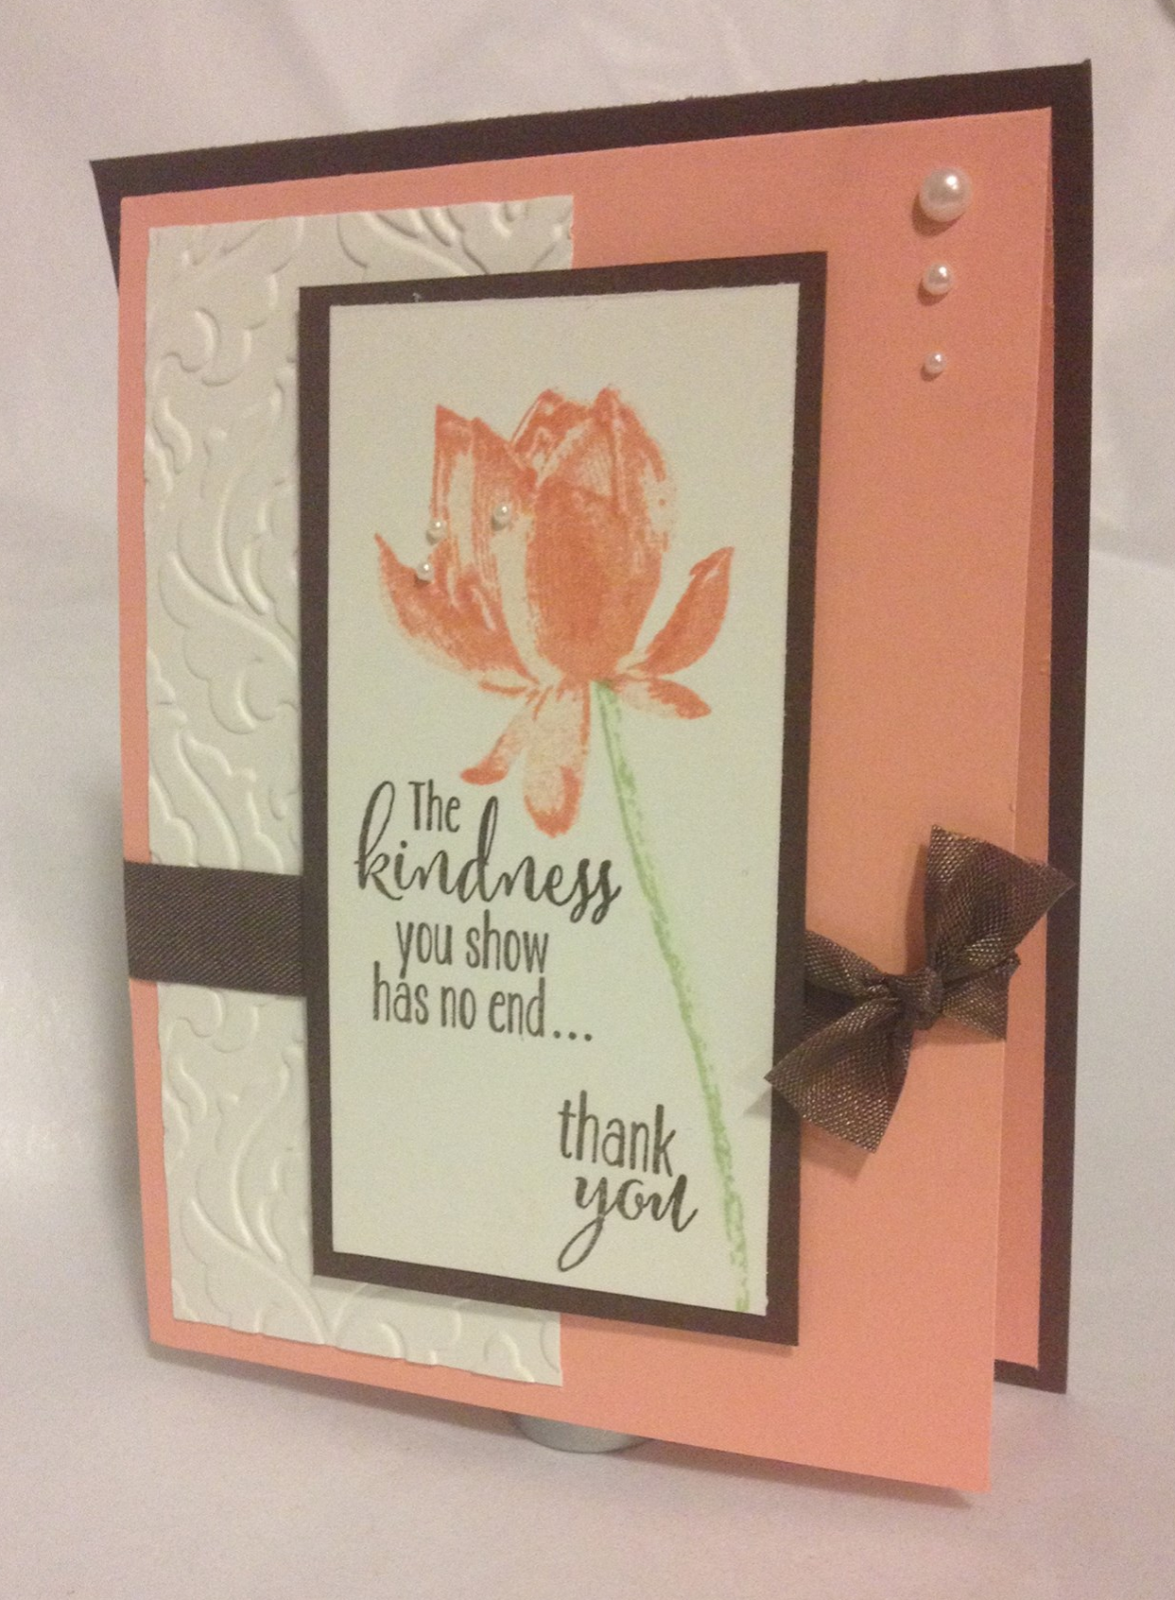
I made two cards, as usual, using an Early Espresso card base, with Crisp Cantaloupe and Very Vanilla. The inks I used are Early Espresso, Crisp Cantaloupe, and Pistachio Pudding.
Sale-a-Bration 2015 Stampin Up Lotus Blossom MidnightCrafting
Different card base adds interest to this softly sweet Thank You card.
Sale-A-Bration 2015 Lotus Blossom
The first card has a somewhat fancy base, I cut a 4.25" x 5.5" base from Espresso, and layered a folded 10.5" x 4" Cantaloupe piece. The card opens upward. A little different, but a nice effect. Only down-side to this card fold is that is doesn't really stand up well on a shelf or desk, which is not a big deal, but still...
Layered over the Cantaloupe is an Very Vanilla piece embossed using the Beautifully Baroque Textured Impressions Embossing folder. A ribbon of the Espresso Seam Binding is layered next. And popped up on Dimensionals is the top layer with all the stamping!
I stamped the Lotus Blossom in Cantaloupe, stamping-off only for the 3rd layer. This set has 3 pieces to make up the flower, so you stamp 3 times. Because the stamps are photopolymer, it will be a cinch to line up - no guesswork, you can see it clearly through your block!

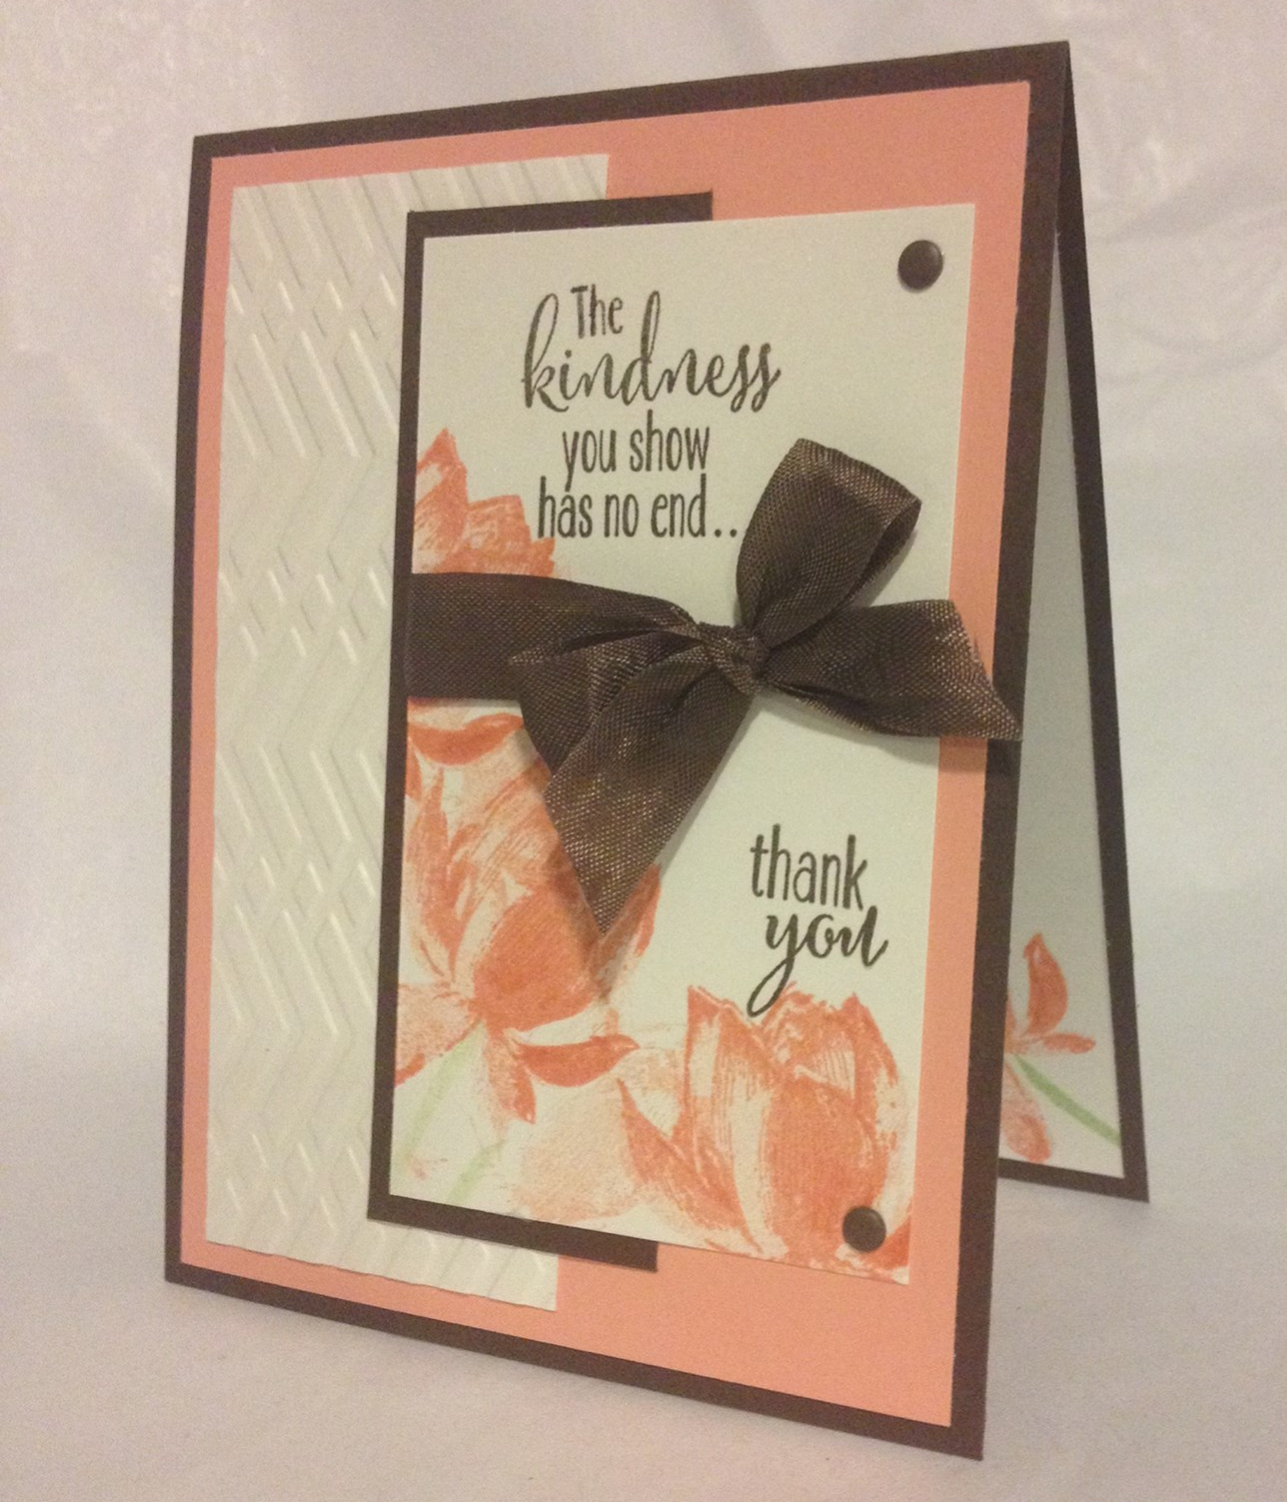
For the second card, I did away with the fancy base and used a more traditional A2 card layout. An Espresso base, Cantaloupe layer, and for the Very Vanilla I used the Zig Zag Textured Impressions Embossing Folder.
Sale-a-Bration 2015 Stampin Up Lotus Blossom V2 MidnightCrafting
Zig Zag Embossing and a little different layout,
but still sweet in Cantaloupe and Espresso.
Sale-A-Bration Lotus Blossom Only Available 01/06/15 through 3/31/15
For the stamped layer I tried a little different layout, stamping the Lotus Blossom around the edges. I used a larger Vanilla piece and a smaller Espresso layer for a different look, but still added the Espresso Seam Binding ribbon. A couple Espresso Candy Dots finish it off. Well, almost. I did add a Vanilla panel inside with a single Lotus Blossom stamped, as the Espresso base is too dark for adding your personal note.

The count down to Sale-A-Bration has begun, in just over a week you'll be able to purchase from the new Occasions Catalog, filled with new and exclusive products to celebrate the everyday and holidays coming up! You will *definitely* find some Must Haves!
Sale-a-Bration 2015 Stampin Up Earn Free Products MidnightCrafting
Earn Free Products with Qualifying Purchases
2015 - January 6th - March 31 ONLY
The best part - with every $50 purchase you can choose a free product from the Sale-A-Bration Brochure! Like this gorgeous stamp set! Exclusive and limited, you will only be able to add these products through March 31st and then they will be retired. So shop early, grab your favorites, and CELEBRATE SALE-A-BRATION!!

I can't wait to share the new catalogs with you! I LOVE THEM!!!
Happy Crafting!
-Angie

Sale-A-Bration begins January 6th, 2015
My customers have already received the new catalogs to begin their wish lists, 
add an account in my online store and request a catalog 
to get your hands on these hot new products! 

Products used in today's card are shown below, to purchase available products, 
please click on any item in the carousel and you will be directed to my online store, 
where shopping is secure and shipping is speedy!
Find me on Facebook at www.Facebook.com/MidnightCrafting 
And chat me up on Twitter at www.Twitter.com/MidnightCrafter
Built for Free Using: My Stampin Blog
Read More »

12 Last Minute {awesome} Gifts


Gift Ideas Print at Home DIY Decor Crafts Printables Calendars
Printables, Custom Home Decor, Classes and more! 
Missed the Shipping Deadlines.
Need a gift for the office exchange at lunch. Today.
Want the most unique and creative Trendy gift out there! ;-)
Dread finding parking, and waiting in the lines.
... Forgot someone!

It happens to the best of us!!

Time is running out, but you can still be the Holiday Hero!
Let me help:

Gift a Class! 

Online Classes and Tools New Skills Experience MidnightCrafting
The Gift of an experience and skills lasts a lifetime!!

From the basics, to new techniques, to specific practical uses - Stampin' Up! offers a variety of Online Classes that your gift recipient can enjoy at their own pace! To find out more details click on any one of the images below:

Built for Free Using: My Stampin Blog

Purchase a Printable! 

Share those Instagram Photos with this Photo Book Template!
You wont show up empty handed! From journal covers, bookmarks, calendar templates - you can print something at home and give a really personal gift! 

Gift a Subscription!

www MidnightCrafter StampinUp net Prepaid Subscription craft kit

One of the hottest gifts out there this year - subscription kits!! You can wow them with the gift of Creativity! Pinterest-worthy projects, everything needed comes in the box, they'll think of you every month their box arrives! Click, Print, Sign, and gift! Easy, fast, AND awesome!

Built for Free Using: My Stampin Blog


Happy Crafting Gifting!!
 -Angie

Shop with me online for all your crafty needs! 
Stamps, paper, inks, embellishments, Project Life exclusive collections, 
gift packaging, technique classes, digital downloads... and MORE!
To Shop my Stampin' Up! online store, please visit 
Read More »

Gold Soiree Making Spirits Bright

Gold Soiree Specialty Designer Series Paper, Making Spirits Bright Stamp set
The New Year approaches!  I don't send too many cards for New Years, but these are bright and shiny, and would make good layouts for a party invite too.
Brushed Gold Card Stock, and Gold heat embossing coordinate with
the gold foil accents in the Gold Soiree Specialty Designer Series Paper

The first card I made has a Tangerine Tango card base, and a piece of the beautiful Gold Soiree paper. I rounded the corners on both the base and the background. Then I stamped the champagne toast stamp from Making Spirits Bright in Versamark on Pistachio Pudding, and heat embossed it using the Gold Embossing powder. I stamped the Happy New Year greeting from the Making Spirits Bright stamp set in Gold Encore Ink onto Crisp Cantaloupe.These are popped up using the Stampin' Dimensionals, and layered over a banner of Brushed Gold card stock. I added a sprinkle of the In Color Sequins. Sparkly and shiny, but not overly fussy.

The second card was a bit more fussy!
Confetti Stars Punch and This and That Epic Day Washi tape

Shiny!
For the second card I added some layers and texture by changing the first layer over the Gold Soiree paper. I used Epic Day Washi Tape, the colors are coordinated to the card theme, and I like the subtle numbers in the tape on the right side. I used the same heat embossed image on Pistachio, but changed up the Happy New Year sentiment, stamped in Garden Green, and placed it as a banner too. These are popped up with Stampin' Dimensionals. I switched out the vertical gold banner to horizontal, and punched it with the Confetti Stars Border Punch. I added some stapled 1/8" Gold Ribbon, tying a little knot over the staple. A little more fuss.

I'm not sure which I like more, but I do know I am in love with the Gold Soiree Specialty Designer Series paper! Such a very pretty set!
Happy Crafting!
-Angie

For more information on the supplies used in today's cards, 
 please click on any of the images in the supply carousel below. 
For these and other quality Stampin' Up! products, shop my secure online store at www.MidnightCrafter.StampinUp.net
Read More »

Day to Day Choose Happiness in the New Year Blendabilities


Project Life Day to Day Stampin Up Choose Happiness Motley Monsters MIDNIGHTCRAFTING
Motley Monsters Designer Series Paper - HAH! for New Years!! 
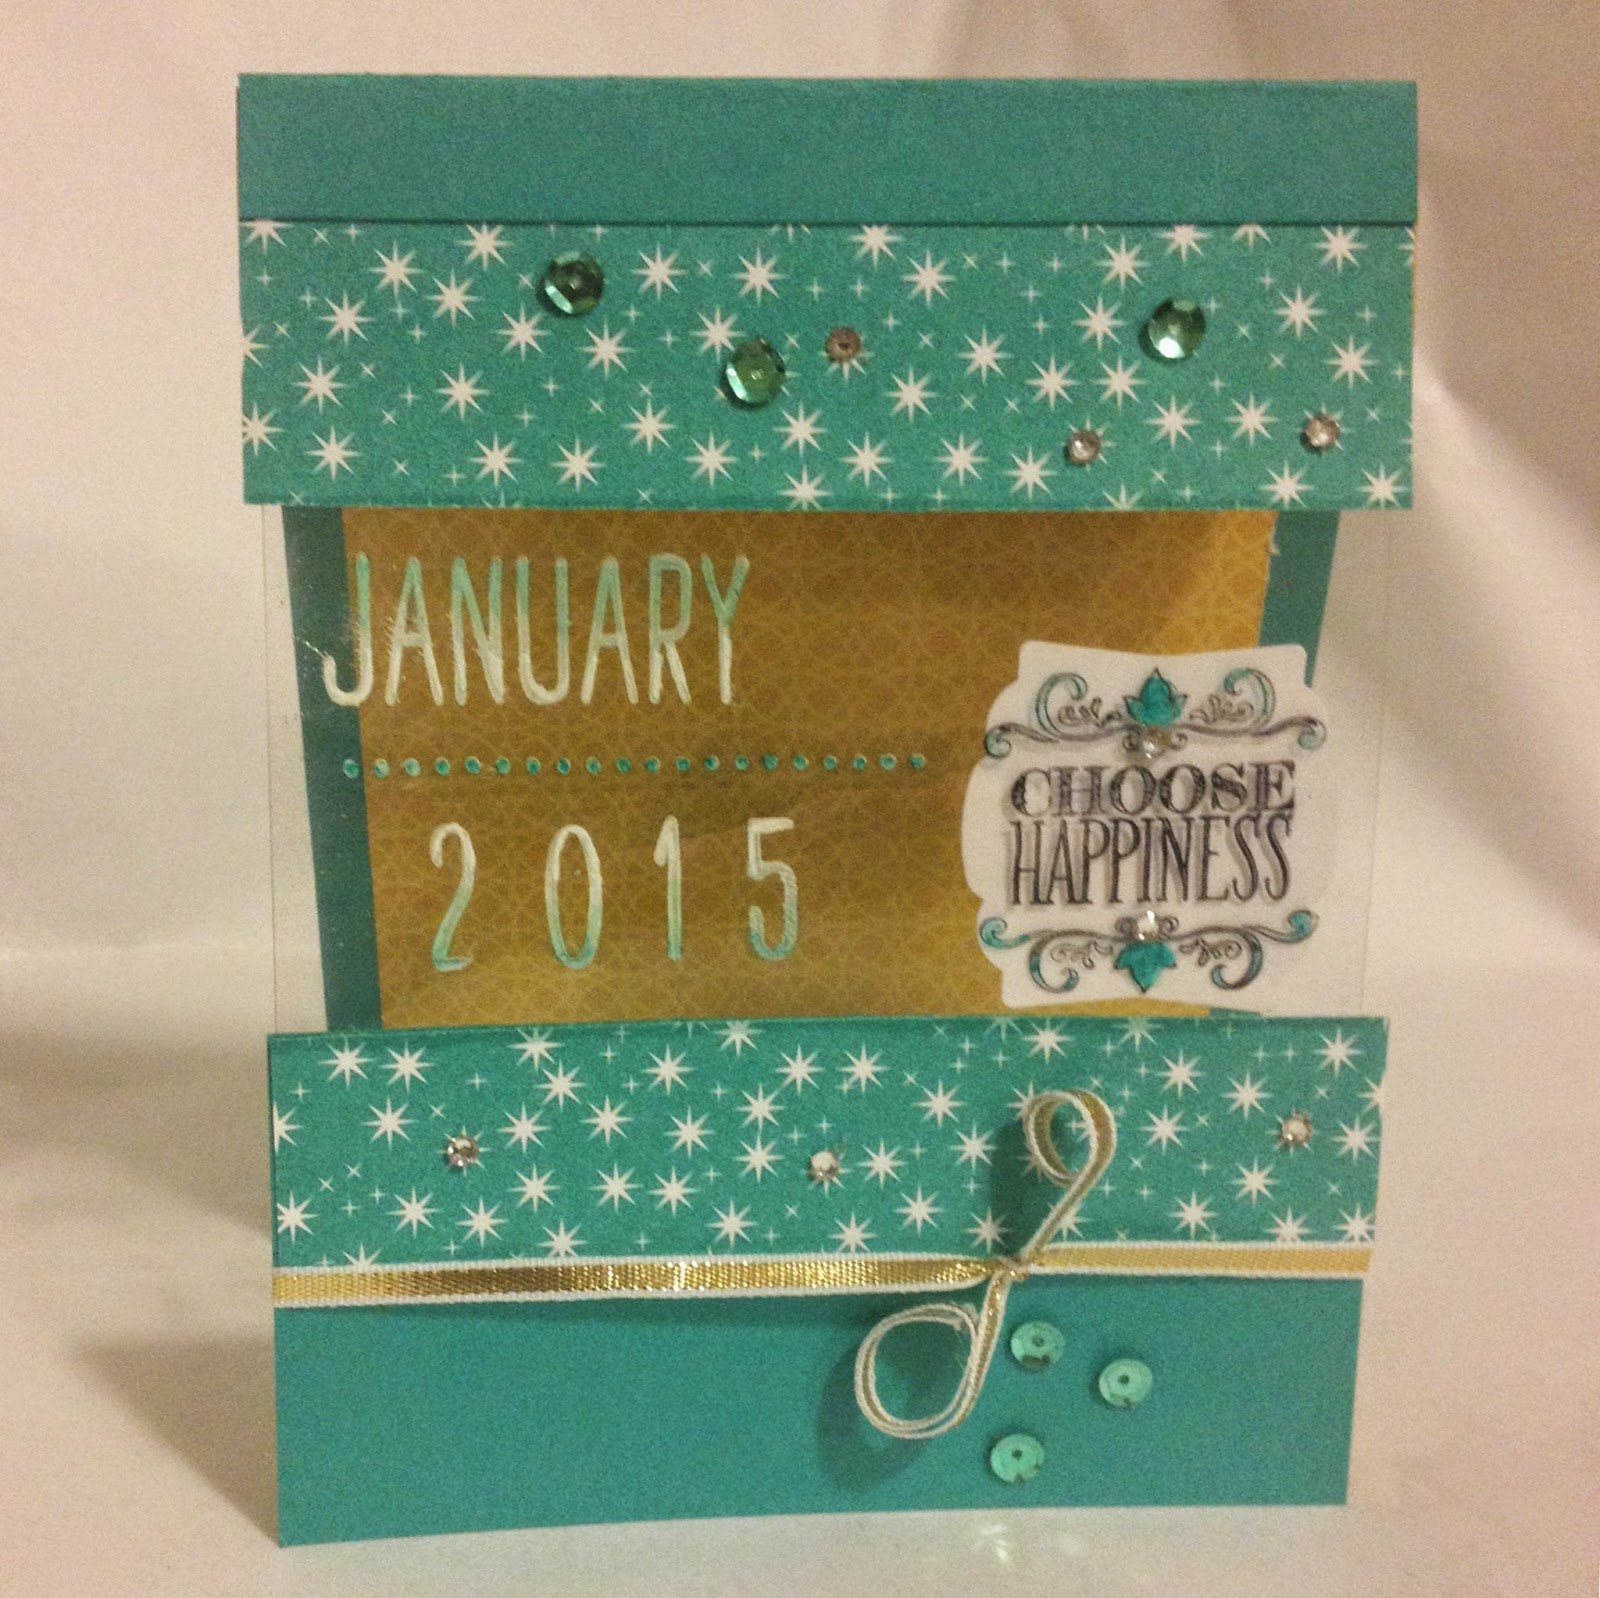
You know those cards that start out one way, and end up COMPLETELY different than you imagined? That's today's card. I love how it turned out, but what a process!!

The card base is Coastal Cabana, with the Motley Monsters Designer Series Paper star pattern, and a piece of the Window Sheets clear acrylic. I stamped the images on the acrylic with White Craft Ink and Black Staz On ink, Using the Project Life Day to Day Stamp Set and the Choose Happiness Set. the finishing touches include the 1/8" Gold Ribbon, Basic Jewels Rhinestones, and a few of the In Color Sequin Assortment. Don't you like the restraint I showed in my embellishments today? LOL

The Project Life Day to Day set is pretty amazing, I think it will be so useful to add personalized wedding and anniversary dates, custom birthday card dates and ages, to make neat planning notes and lists - maybe for my fancy planner I plan to try this new year! ;-) Anyhow, Useful!

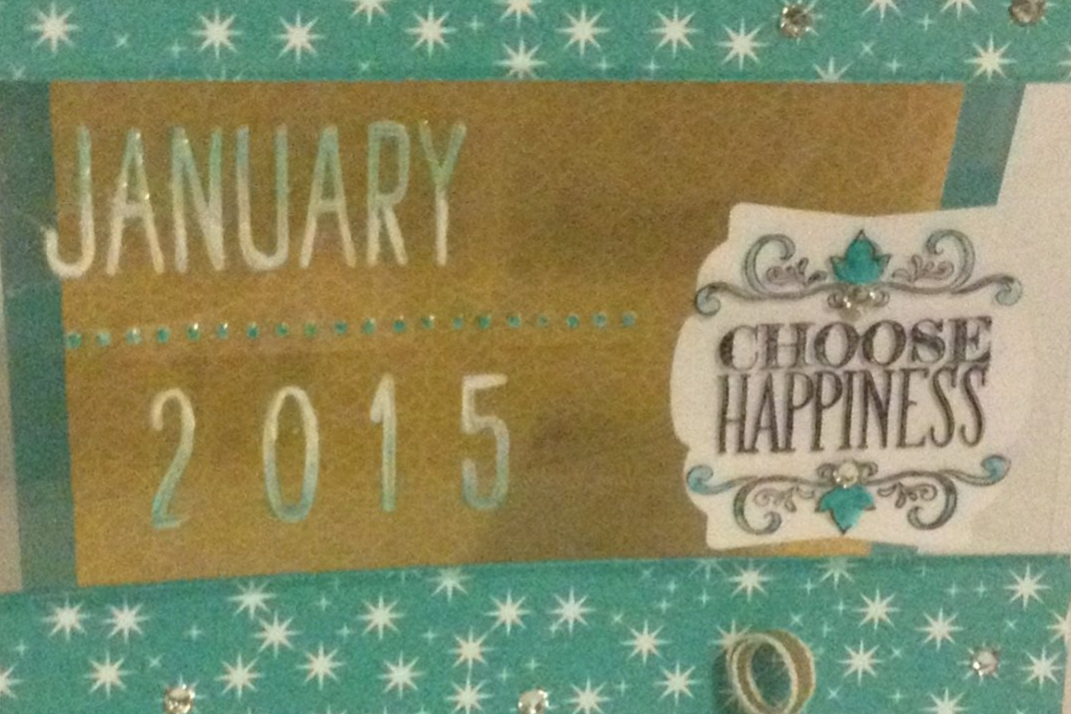
For this card I used the January stamp with the accent dots and then added 2015. The nice thing about polymer stamps is the ease of placing them on the block in the arrangement you like, and then stamping all at once! Of course, they also make stamping multiple times to get a complex image easier too, but I kind of like the custom one-and-done technique.
Project Life Day to Day Stampin Up Choose Happiness Motley Monsters  1MIDNIGHTCRAFTING
Stampin' on Acrylic for the clear inset window, colored with Blendabilities Markers
I stamped the date in White Craft Ink, which I imagined popping on the acrylic Window Sheet against the dark Coastal Cabana of the Motley Monsters Designer Series Paper... but then I realized that for someone to write a note inside the card, that design was a little too dark and busy! Luckily, the yellow reverse pattern worked great! I then stamped the Choose Happiness sentiment in Staz On black, which REALLY pops against the back pattern. Dangit! Should have done both in black - but then I wouldn't have been able to USE MY Stampin' BLENDABILITIES MARKERS to give the date that ombre effect! (I know, I COLORED! can you believe it?!?) But it took a few steps: I added clear embossing powder to the image, and (lightly) heat embossed it. The acrylic is pretty sensitive to heat, watch how much you do at once, and the angle of your heat gun, or it will warp beyond saving! Ask me how I know... Sigh.

Once it was heat embossed, I started at the top of January with the darkest Coastal Cabana Blendabilites Marker and just dabbed the color on. Then I quickly smeared the color down the letters with the tip of my finger. Yes. Smeared. Sorry to get all technical on ya! I did the same thing with the bottom of the year, smearing upwards. I used the Color Lifter Blendabilities Marker to remove any stray marks. Then I used the White Stampin' Chalk Marker to add a little density to the white parts. I used the color lifter to take any stray marks off from that process too! The Chalk Marker is permanent) For the center line of dots I probably could have left them white, but I dotted on some of the darkest Cabana too. I then colored in the leaves and swirls on the Choose Happiness stamp. I wasn't happy with the contrast, as I really wanted to emphasize the Choose Happiness part, so I added a Whisper White Artisan Label Punch behind the acrylic. I adhered it with glue dots in the leaves, tricky! You have to be clever with glue, as you can totally see it through the clear acrylic.
To finish off this center section - and OMG, was I finished yet?!?! - I lightly ran the tip of the lightest Coastal Cabana Blendabilities Marker on the edge of the Motley Monster Designer Series paper where the cut edge was a little too white in the scheme of the design. It was kind of cool how the paper absorbed the ink, but you might practice first on a scrap paper - the ink will bleed unexpectedly, which may or may notwork with your intended effect.

Whew!! Not the card I had set out to make. But I think it worked itself into a pretty new years card!
Project Life Day to Day Stampin Up Choose Happiness Motley Monsters  2MIDNIGHTCRAFTING
Choose Happiness, in the new year and always! :-)
Anyhow.
These acrylic inset cards are interesting. I will definitely try again! Any tips for me?

Happy Crafting!
-Angie

To find out more about any of the supplies used on todays card, just click the image in the table  below.To Shop my Stampin' Up! online store, please visit www.MidnightCrafter.StampinUp.net 

Looking for the perfect last minute gift? I've got you covered with Paper Pumpkin Prepaid Subscriptions! Click, Print, Sign and Gift! Quick, easy, and totally unique! 


Built for Free Using: My Stampin Blog
Read More »

Teeny Tiny Wishes New Year Stars

Teeny Tiny Wishes has greetings for almost EVERY occasion!
Today's cards are more New Year's greetings. I used the number pattern from the Typeset Specialty Designer Paper, with a layer of Gold Glimmer Paper, and die cut and punched stars. I added some In Color Sequins and pearls... I've been on an excessive Bling kick lately!!

Star Framelits diecut the sprinkled star border,
with the star punch from Itty Bitty Accent Punch Set
The Happy New Year is stamped in the Gold Encore Ink. The card base is Crushed Curry, with Very Vanilla stars added. I also did another version (of course) in Pacific Point and Silver with Very Vanilla:
Horizontal New Year Card - Pacific Point and Silver Glimmer
For the blue one, I used the Star Framelits again to die cut stars in Pacific Point, Silver Glimmer, and Very Vanilla, but I also punched the Silver Glimmer strip at the bottom and layered it over a Pacific Point strip. In retrospect, I could have cut the number print layer a little shorter and just let the card stock show through, but I'll try that another time! The silver layer on this card is popped up on dimensionals, and I used the Basic Jewels Rhinestones to add more sparkle.

New Year's Eve is all about sparkle, in my opinion!
Got plans this year? How are you celebrating?
Happy Crafting!
 -Angie

For more information on the supplies used in today's card, 
click any image below to view the item in my online store. 
To browse other quality Stampin' Up! products 
for all your memory keeping, home decor, party and gift giving needs
please visit my online store at 


Built for Free Using: My Stampin Blog
Read More »

Bright and Beautiful New Year

Bright & Beautiful Shiny New Year
I'm obviously getting my holidays confused! Or enjoying some Non-traditional New Year's Color Combos! This is a confusing crafty-time of year. Must start the Valentines, but there's still Christmas to enjoy, and New Years to look forward too... sigh. #firstworldproblems #craftylife

MORE Embellies!! lol
Sequins, Glimmer Paper, Silver Ink, Rhinestones
Today's card was fun to make though! So bright and shiny, with bling and sparkle!! I love the Silver Encore Ink, it works best with the bold images, as you can see from the difference between the star and the sentiment stamped onto the Melon Mambo card base. I inked only the bottom half of the sentiment stamp from the Bright & Beautiful set to make this a New Years card. Stamped in silver on Tempting Turquoise card stock, the smallest star was then punched with the star punch from Itty Bitty Accents. Then that strip is layered over Silver Glimmer Paper. I used the same smallest star to stamp around the middle star from the set. I colored my Rhinestones (my new obsession!) and added some of the punched turquoise stars,with some sequins from the Frosted Sequins set.

Winter Christmas Set & embellishments used for a New Years card, in Valentines colors. hmmm. What do you think??
Bright &  Beautiful New Year that Shines with Happiness! 

Happy Crafting!
-Angie
For the supplies used for today's card, click on any image below 
to find out more information in my Online Store. 
To browse other quality craft supplies, please visit my Stampin' Up! online store at 

Built for Free Using: My Stampin Blog
Read More »

Bright and Beautiful Bling

Bright and Beautiful Star with Sequins Midnight Crafter
Bright & Beautiful with In Color Sequins
Basic Grey and Crushed Curry. A 'silver and gold'-ish take on the Bright & Beautiful stamp set. I really like this one! The stamp set, I mean... I do like the card - its so bright and glitzy in person, very good combo, and I have to say the layout is working well with all the sets I've tried!! But the stamp set:
Bright and Beautiful from the Holiday Catalog (only available until the end of the month!!) Its really a pretty set, with the multiple size stars you can make wrapping paper or gift bag; great backgrounds; and pretty one layer cards. It also coordinates with the Stars Framelits, so you can really get into some dimensional cards; or accents for memory keeping; and 3D ornaments, holiday decor, and party decorations would be a beautiful use as well!!
Its got several Holiday sentiment stamps, but would coordinate with other sentiments throughout the year - Congratulations, Birthday, Anniversary. Not to mention patriotic holidays. Its large enough, with bold detailing, that you can use it with quite a few different stamping techniques like ink resist, rock and roll, baby-wipe ink pads, reverse rock and roll, sponging and markers! Heat embossing really is dazzling, and I love the way these stars look in the Gold and Silver metallic inks! Whew! That ought to keep you busy! I have to add this to my Must Have list from the Holiday Catalog. I've used it several times, you can see my other Bright & Beautiful posts HERE.

The weekend is here, so I'll be off, but before I go:
- The Year End Closeout has begun, just in time for Christmas! 
Grab great $teals up to 80% off, including great Christmas kits & craft items. 
Gifts for those crafty-scrappy-creative friends of yours, 
a great DIY Christmas project for when family is visiting, 
or keeping the kids busy & making gifts over winter break.

- Paper Pumpkin Prepaid subscriptions are excellent gifts 
for those crafters who have everything - and NON Crafty friends and family who have nothing 
-- in the way of Craft Supplies I mean! ;-) LOL 
No planning, no prep, no fussing about cutting or coordinating, 
its ALL done for them!! 
When you purchase a prepaid subscription, you get a Redemption Code 
and a link to a printable Gift certificate, with instructions on how to redeem. 

Happy Crafting!
-Angie

My online store is open 24/7 for your shopping convenience this holiday season, shopping is secure and shipping is fast. please visit www.Midnightcrafter.StampinUp.net and click Shop. 

To shop the products used in today's card, click any image below to visit my online store directly:

Built for Free Using: My Stampin Blog
Read More »

Endless Wishes - Bling It Up

Endless Wishes Midnight Crafter Stampin Up snowflake
Endless Wishes - perfect Christmas set! 
This beautiful, whimsical set from the Holiday Catalog 2014 will be gone with the new year.
Its a great set to keep, though, with snowflake elements and very versatile Winter Holiday sentiments! I love the mix of typewriter and handwriting fonts. Definitely a keeper in my collection.
Endless Wishes 2 Midnight Crafter Stampin Up snowflake
Christmas Snowflakes with some Sparkle
I stuck with the border/sentiment design, and I used the Smokey Slate again with the Coastal Cabana. I love blue for Christmas, and the accent of the color with the grey gives it a cool snowy feeling. In my opinion. :-)

When do you send Christmas Cards out?
I am sad to find many people don't even send them anymore, but I can understand postage is pretty expensive, and time gets away from you. It does take some time to assemble your list, address the envelopes, and tuck a photo or note inside. I really make it a top-of-my-list priority though, its a tradition. My Dad was always - and still is! - so good at keeping up corespondance. He is awesome about birthdays and anniversaries too. I strive to reach his level of organization and thoughtfulness, but I still have alot of work to do. :-)

Happy Crafting!
-Angie

For a great gift for every person on your list, (OK - most of the list)
A new craft project every month, all supplies and photo instructions included, 
delivered right to their door? 
It could quite possibly make you the Holiday Hero!! 


Built for Free Using: My Stampin Blog
Read More »

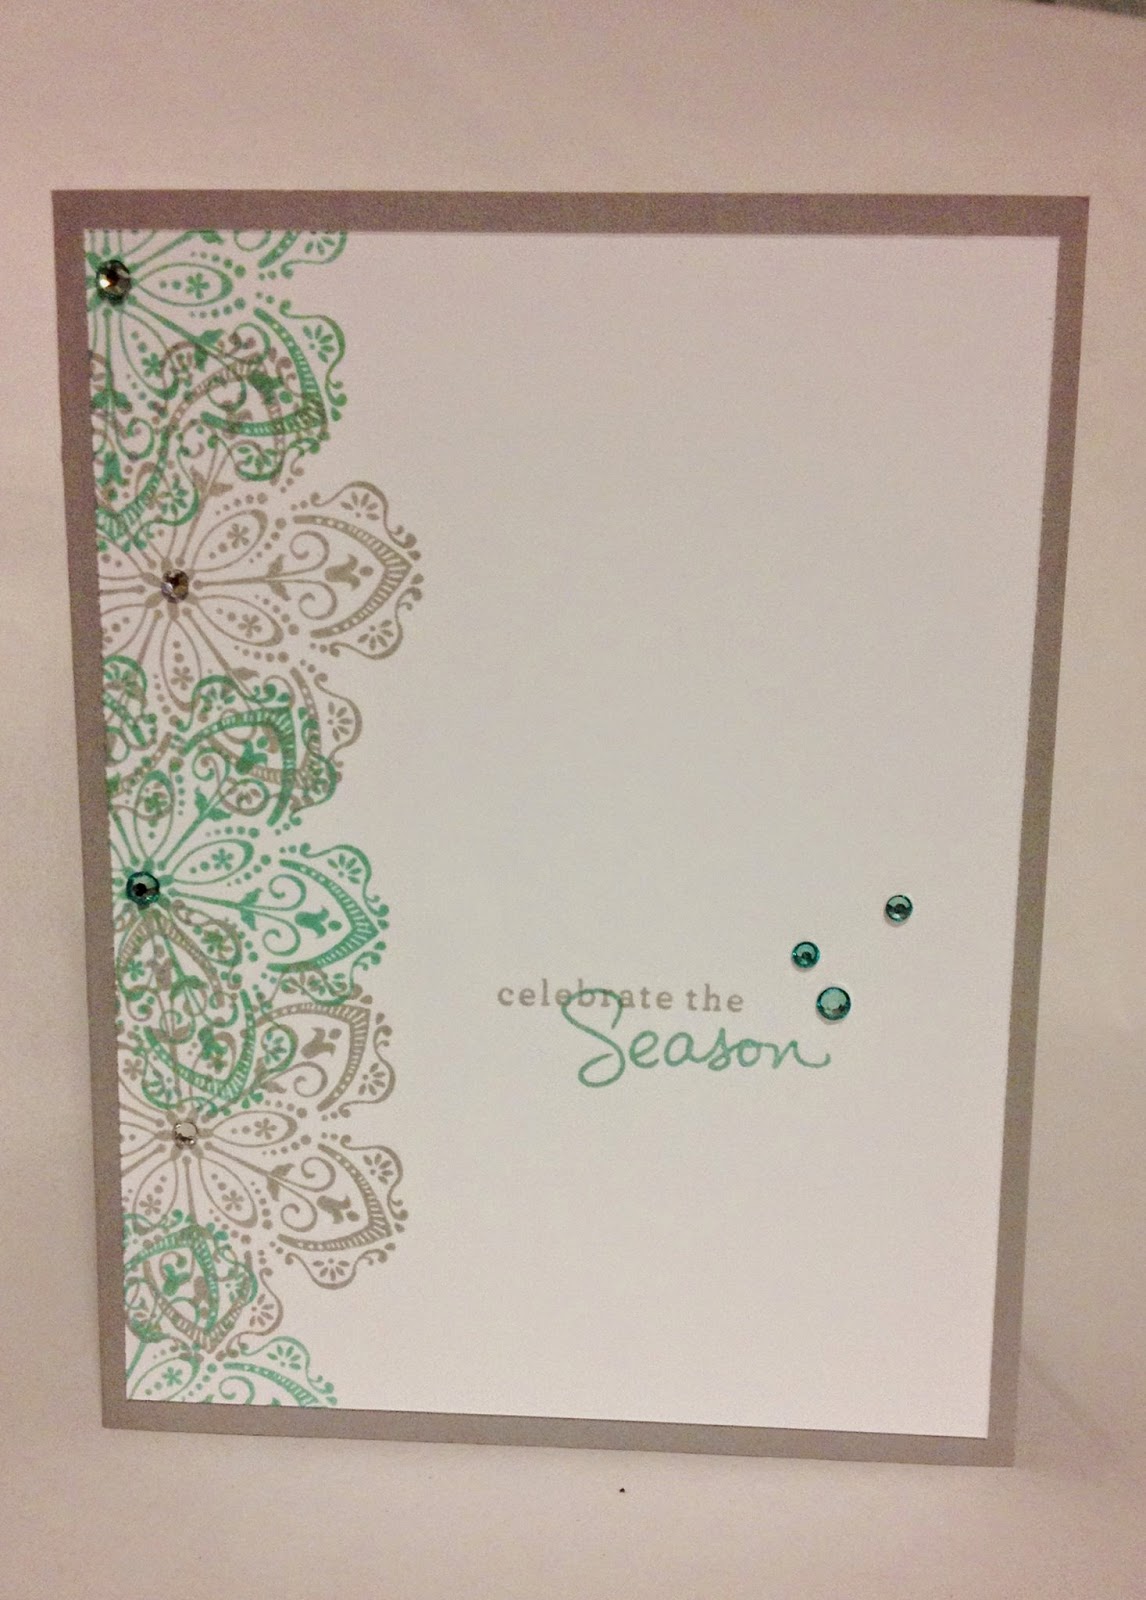
Mixed Bunch Endless Wishes - Celebrate the Season

Mixed Bunch Endless Wishes Midnight Crafter Blendabilities
Coordinated Color Rhinestones with Blendabilities
Celebrate the Season, indeed!
This card uses the VERY awesome Mixed Bunch stamp set, with the also very awesome Endless Wishes stamp set. Clean and simple, this one layer card has a pop of color and some bling to give it some wow. Like I said yesterday, I just love being able to coordinate the rhinestones with different color ink. Great use for the blendabilities!
The mixed bunch set has a coordinating punch, the Blossom Punch, so you can add some dimension. The blossom Punch is also great for punch art! The stamp set includes two flowers, with 3 different centers, and a snowflake. The snowflake is so intricate and detailed, you could use it for a great accent or background stamp! It has an almost vintage, art deco, lacy pattern. The flowers in the set are perfect for spring, summer, or fall - and the different centers give you lots of different looks. I really love this set!!

I think I did a better job on the first card, stamping the border a little better, but I kind of like the extended snowflake here too... What do you think?

Happy Crafting!
-Angie

For a great gift for every person on your list, (OK - most of the list)
A new project, all supplies and photo instructions included, delivered to their door every month? 
It could quite possibly make you the Holiday Hero!! 


Built for Free Using: My Stampin Blog
Read More »

Bright and Beautiful Blendabilities

Bright and Beautiful, In-color Sequins, Rhinestones colored with Blendabilities
OK, I'll admit it. I do not color. I. DO NOT. Color.
Its hard for me. Maybe a mental block, probably my perfectionism rejecting the average-to-poor skills I possess for coloring. Whatever.
But I HAD to have the Blendabilities. To color my accents. I don't think it really counts as coloring. However, that is why I got them. Yes, them. Several color sets. I could not resist the perfect coordination of jewels, the sparkle of almost every color I desired. I gush. But there it is. I gave in to the Blendabilities. Who knows, perhaps I will even color with them someday! ;-) Don't hold your breath.
Bright and Beautiful from the Holiday Catalog 2014

And on to today's cards. I am trying these darker card bases with a pop of color. Here I used Basic Grey and Coastal Cabana. Some Basic Jewel Rhinestones add the bling to an otherwise pretty simple card. I did add some In-Color Sequins, but again today, a pretty clean and simple card.

Happy Crafting!
-Angie

For a great gift for every person on your list, (OK - most of the list)
A new project, all supplies and photo instructions included, delivered to their door every month? 
It could quite possibly make you the Holiday Hero!! 


Built for Free Using: My Stampin Blog
Read More »

Kinda Eclectic Christmas Bliss Snapshot

Snapshot and Kinda Eclectic
December!! Things just got Real. 
Get those cameras ready! 

Today's card uses one of my favorites, Kinda Eclectic. I started the card with Snapshot, but I couldn't find some 'flash bursts' to go with, until I spotted Kinda Eclectic! The card base is Basic Grey, with Smokey Slate and Hello Honey Ink. I added the Merry and Bright stamp from Christmas Bliss - get it, merry and BRIGHT... flashbulbs... LOL I'm so clever! ;-)
Metal Button give a little coordinating grey and bling, and for a dash of Merry, I accented with a little spring of holly, from the Holiday Invitation Photopolymer Stamp, colored with markers in Cherry Cobbler, Mossy Meadow, and Hello Honey. Say Cheese!

Do you take photos of all the holiday activities, or do you just save the memories?
I know there are people out there who might actually take more photos than I do. However, I think its quite possible I will never find them. I am Mamarazzi, just say Cheese!!
The real question: Do you ever print them out?
Hah!!

Welcome to December! May your holiday season be Merry and Bright!
Happy Crafting!
-Angie

For a great gift for every person on your list, (OK - most of the list)
A new project, all supplies and photo instructions included, delivered to their door every month? 
It could quite possibly make you the Holiday Hero!! 


Built for Free Using: My Stampin Blog
Read More »