Yes, I had time to make cards AGAIN... yes I ignored my more important (this week) To Dos and did stamping... but what can I say, I enjoy it, its relaxing, and I need to build up the card collection.
Clean&Simple is celebrating their 100th Sketch! Congrats!!! One of my favorite blogs, take a look and be INSPIRED!
And since I wanted to try for a two-fer Tuesday, I also tried out Two Happy Stampers July Color Challenge using some of the new Stampin' Up! In Colors.
Here are the results:
For Clean&Simple I made two cards (Tuesday Two-fer)
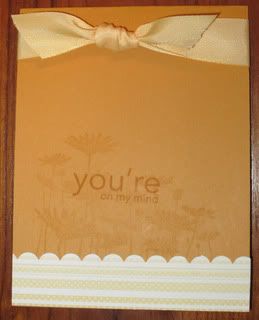
 So Saffron ribbon on More Mustard Card Stock, the designer paper (trimmed using the Scallop Punch) is Retired, the stamp set is Upsy Daisy, stamped here in So Saffron, with a sentiment from the same set stamped in More Mustard.
Read More »
Clean&Simple is celebrating their 100th Sketch! Congrats!!! One of my favorite blogs, take a look and be INSPIRED!
And since I wanted to try for a two-fer Tuesday, I also tried out Two Happy Stampers July Color Challenge using some of the new Stampin' Up! In Colors.
Here are the results:
For Clean&Simple I made two cards (Tuesday Two-fer)
So Saffron ribbon on More Mustard Card Stock, the designer paper (trimmed using the Scallop Punch) is Retired, the stamp set is Upsy Daisy, stamped here in So Saffron, with a sentiment from the same set stamped in More Mustard.
And for Two Happy Stampers I also made two cards:
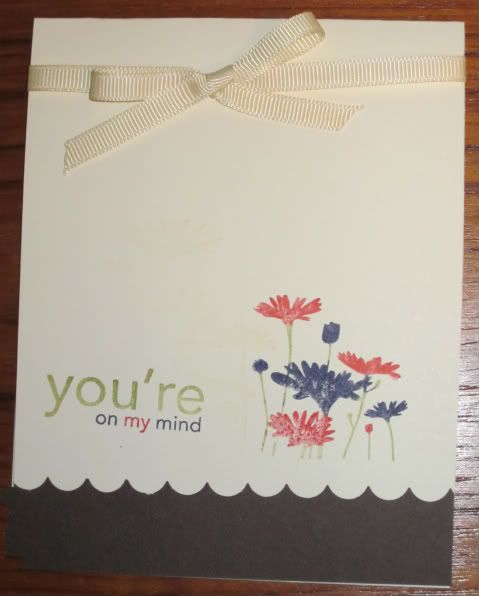
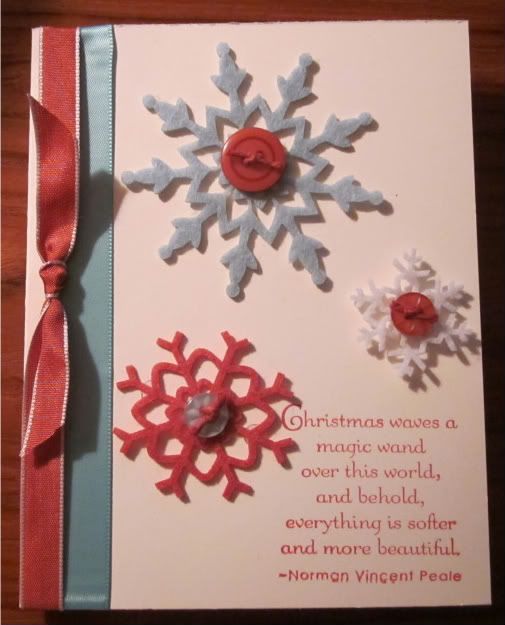
Above is Very Vanilla ribbon & card stock, with Upsy Daisy again - hand colored pre-stampin with the Concord Crush, Poppy Parade, & Pear Pizzazz, the sentiment is done the same way, and the trim is Early Espresso card stock.
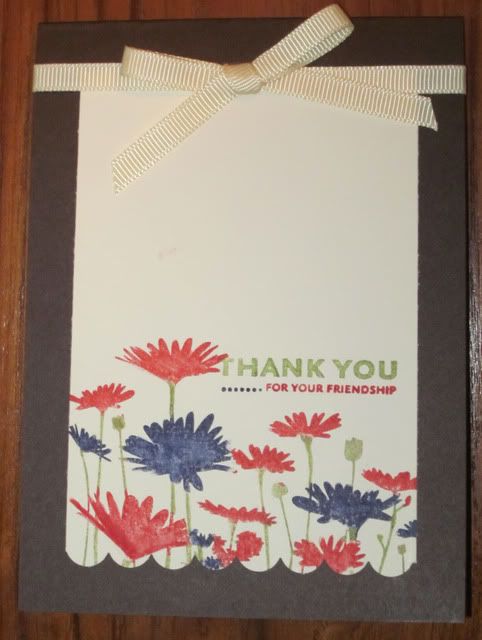
Below you have the same colors, but I mounted the Very Vanilla to an Early Espresso card (VV liner for the inside of the card).
 The hand coloring before stamping was easy: I took my In Color Stampin' Up! Markers and using the brush end just colored the rubber. *Important!! Start with the LIGHTEST color first, in this case the Pear Pizzazz. No sense in ruining a perfectly good marker picking up any stray Concord Crush whilst coloring away! So, after coloring, Huff (big breath from your mouth, like you're fogging a mirror) a couple of times on the rubber (this moistens the ink back up), and then stamp. Let the stamp sit a second on the paper to get the most ink transfer. I used a blender pen on the finished card for a little smoothing effect. I have also seen this coloring finished by spritzing with water and then stamping for a more water-color effect, but I was trying to be super Simple and keep my workspace Clean. :-)
Above is Very Vanilla ribbon & card stock, with Upsy Daisy again - hand colored pre-stampin with the Concord Crush, Poppy Parade, & Pear Pizzazz, the sentiment is done the same way, and the trim is Early Espresso card stock.
Below you have the same colors, but I mounted the Very Vanilla to an Early Espresso card (VV liner for the inside of the card).
The hand coloring before stamping was easy: I took my In Color Stampin' Up! Markers and using the brush end just colored the rubber. *Important!! Start with the LIGHTEST color first, in this case the Pear Pizzazz. No sense in ruining a perfectly good marker picking up any stray Concord Crush whilst coloring away! So, after coloring, Huff (big breath from your mouth, like you're fogging a mirror) a couple of times on the rubber (this moistens the ink back up), and then stamp. Let the stamp sit a second on the paper to get the most ink transfer. I used a blender pen on the finished card for a little smoothing effect. I have also seen this coloring finished by spritzing with water and then stamping for a more water-color effect, but I was trying to be super Simple and keep my workspace Clean. :-)
Thanks for Looking!!! Happy Crafting!