Showing posts with label Project Life. Show all posts

Something Blue... Love Story Project Life Bermuda Bay Cards

Project Life Love Story Bermuda Bay Stampin Up MidnightCrafting
Shades of softly bright, beautiful blue, Bermuda Bay. It sure is hot here in the Central Valley this week!! I added blue with wistful thoughts of cooler temps, cooler locations, basically anything that is cooler than the 95+degree weather we are enjoying here in CA!
Project Life Love Story Bermuda Bay Stampin Up MidnightCrafting

Project Life Love Story Bermuda Bay Stampin Up MidnightCrafting

Project Life Love Story Bermuda Bay Stampin Up MidnightCrafting

Project Life Love Story Bermuda Bay Stampin Up MidnightCrafting

Project Life Love Story Bermuda Bay Stampin Up MidnightCrafting

Using some more cards from the Love Story Collection of Project Life by Stampin' Up! Mixed in some stamps from the Stampin' Up! sets Big News, Cottage Greetings, and the Hostess Set Happy Birthday, Everyone. Candy Dots, Basic Jewels Rhinestones, and some bakers twine add a little extra interest. Some washes of color with the Blender Pen and my Bermuda Bay ink pad, and Dimensionals to add some leveraged layers... Pretty fun playing with these cards!!

Happy Crafting!
 -Angie

WEEKLY DEALS - Shop Tuesday - Monday night to get these special offers!
Click on any item to view in my Online Store
Built for Free Using: My Stampin Blog
Read More »

Love Story Project Life Greeting Cards

 Project Life Love Story Stampin Up MidnightCrafting Cardmaking
Working with Project Life cards is pretty fun, so many options! Besides memory keeping, I mean. Today I just used a few of the 4x6 cards and trimmed them to fit a standard A2 card. I think they came out pretty fun, I especially like the great hand lettering fonts! These are just a few of the 100 card collection. Kind of nice to just futz with the layout and embellishments... ;-) LoL #easy
Project Life Love Story Stampin Up MidnightCrafting Card Making

Project Life Love Story Stampin Up MidnightCrafting Card Making

Project Life Love Story Stampin Up MidnightCrafting Card Making

Project Life Love Story Stampin Up MidnightCrafting Card Making

Project Life Love Story Stampin Up MidnightCrafting Card Making

Project Life Love Story Stampin Up MidnightCrafting Card Making

Make it a great week!
Happy Crafting!
-Angie

WEEKLY DEALS - Shop Tuesday thru Monday night to get these special offers! Click on any item to view in my Online Store
Built for Free Using: My Stampin Blog
Read More »

Valentine Countdown - Muslin Bags with Tags

Mini Muslin Bags offer more room for special treats!
Yes, another one! There are just so many cute ideas for countdowns!
Today I want to share these Mini Muslin Bags - They're 4" x 5.5" and would be big enough for a small gift or for gift cards or (a generous helping of) treats!

For the tags I used the Stacked with Love Designer Series Paper Stack, Stacked with Love Washi Tape, and the Project Life by Stampin' Up! Day to Day stamp set.
Valentine Countdown Series -3 Stampin Up MidnightCrafting
The days are marked with a little sequin.
This first bag I used one of the extra hearts I had die cut for the Hershey Kiss Countdown, And I added some scrap paper with tiny hearts, a button from the Sale-A-Bration Best Year Ever Accessory Pack, some Silver Glimmer Paper, Washi Tape, and attached it to the bag with a Mini Wooden Clothespin. Sweetly simple, I think.


Confetti Heart Punch is so fun! 
 This bag, I made Pennants from some scraps and attached them to the strip of Coral punched with the Confetti Hearts Punch. I love the bright colors of this Paper Stack: not your traditional red and pink, but with elements of those, and striking accents of black.

Rolled Paper Roses, a great accent for Valentines Day! 
For this bag, I used the papers to create a really oversize tag. This might be better on a gift bag, with a sentiment instead of a count down, but I like it none-the-less. Its the rolled roses. I love making them. Great accent for 3D items, and appropriate for Valentines. To make these its super simple ( you can use the Stampin' Up! Die :-) - you just need a square of paper, and you cut out a circle. Cut a spiral into the circle (perfection SO not necessary) all the way to the center of the circle. Then you start rolling from the outside of the circle in to the center. When you've rolled it - do it tight, it will loosen up - then fuss it into shape and glue it at the center or pop it onto a punched circle, directly onto your item, or onto the Sticky Circle Rounds (listed below).
I added at rhinestone to the center of each, and punched a heart through the top of the tag to attach it with the bag strings.


Mash Up! Its a scrap fest of Stacked With Love Papers! 
On this last bag I'll share, it really uses up my scraps. Seriously, small stuff is perfect to use up those leftover bits and still come out with something interesting! This mash up of scraps is a little different than my usual style, but I am please with how it came out! The color coordination of a Paper Stack makes random coordination easy! On this one I used another button, and some of the ribbon from the Sale-A-Bration Best Day Ever Accessory Pack.

Hope you're enjoying these countdowns, I had fun making them, and I know my kids will enjoy opening them!!
Happy Crafting!
-Angie

The items used in today's project are shown below. 
To view more information, or to purchase them in my online store, please click on any image.

Built for Free Using: My Stampin Blog
Read More »

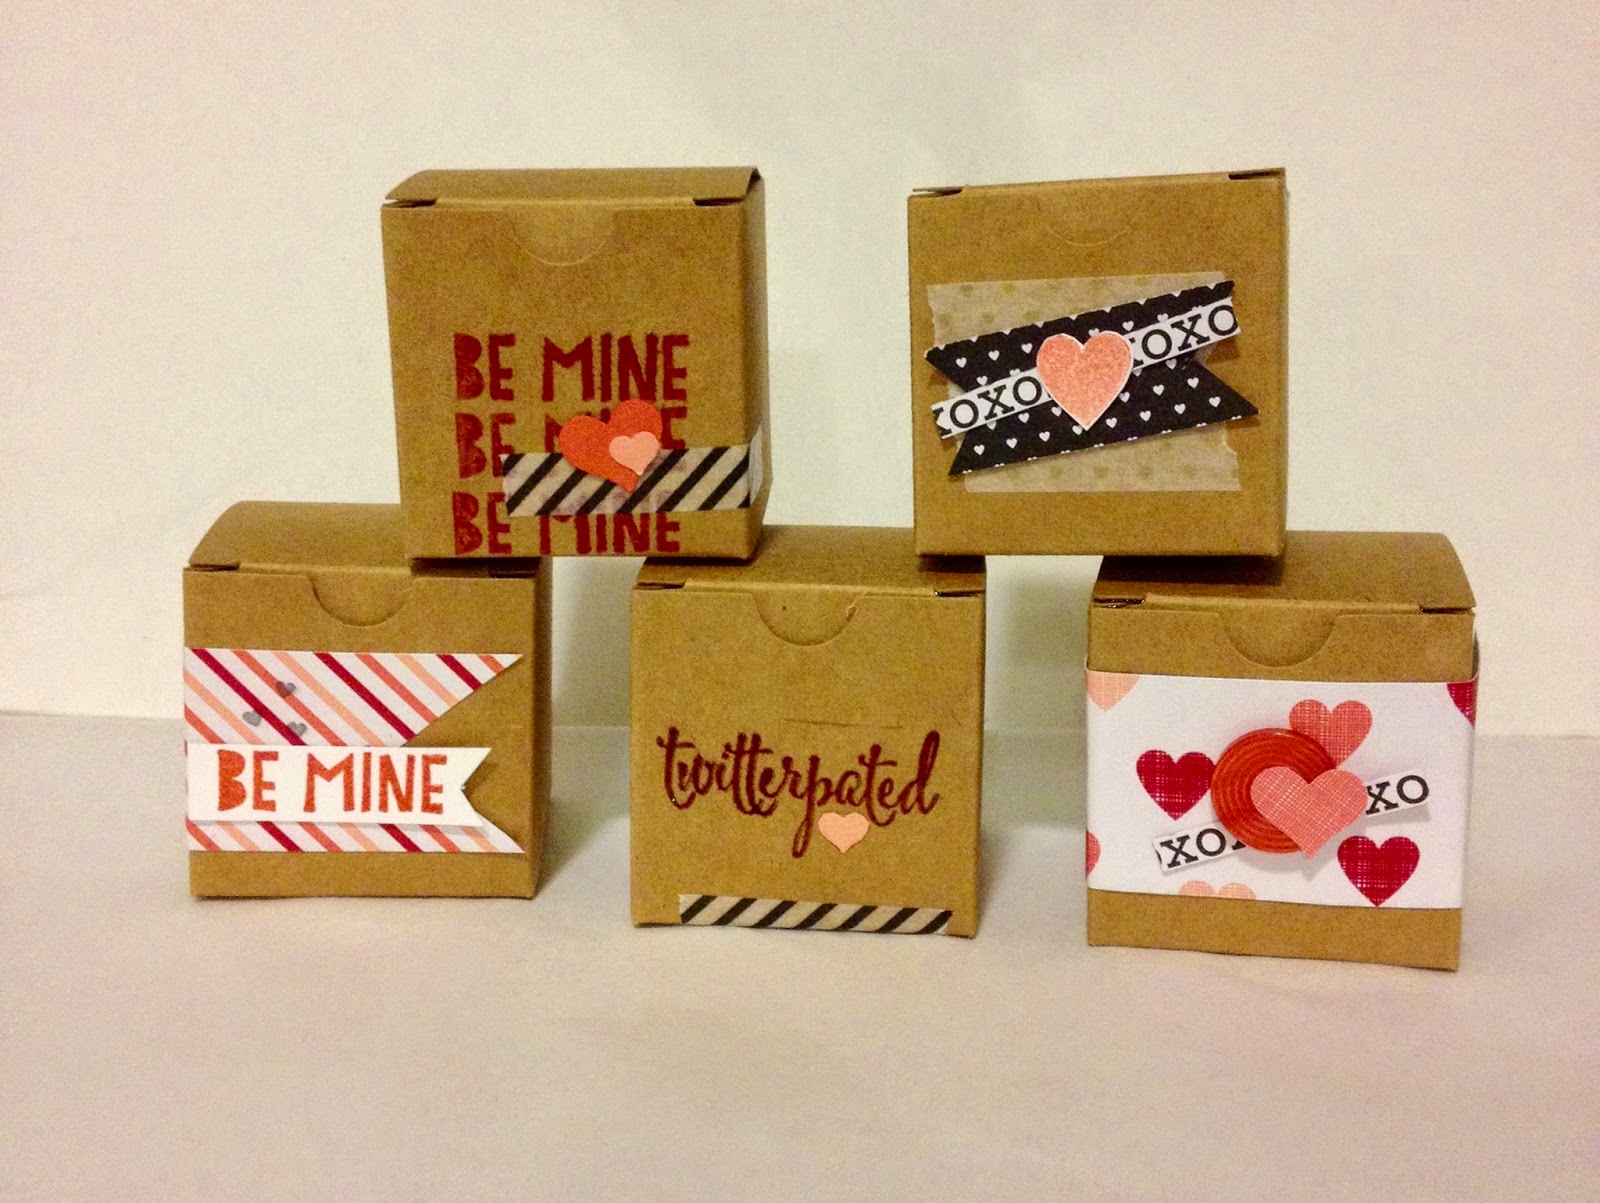
HOW TO : Valentine's Day Treat Boxes / Countdown

Celebrate the Love by using these little treat boxes to Count Down to Valentine's Day!

Another Countdown idea for you! Today its using these darling little treat boxes!! The boxes come premade, you just fold them and they're ready decorate - you'll love them! ;-)

Stampin' Up! Supplies for Valentines Countdown Boxes
I'm using these Stampin' Up! products today:
For more details or to purchase these, please see the links at the bottom of this post.
  • Tiny Treat Boxes
  • You Plus Me Stamp Set
  • Project Life by Stampin' Up! Day to Day stamp set
  • Stacked with Love Paper Stack
  • Stacked with Love Washi Tape
  • Real Red, Basic Black, Whisper White, Crisp Cantaloupe, and Calypso Coral Cardstock
  • Heart Punch from the Itty Bitty Accents Punch Pack
  • Stampin' Dimensionals and Glue Dots


Valentines Boxes Party Favor Countdown Class Treat Gift MidnightCrafting
Tiny Treat Boxes make great Party Favors too!! 
For these boxes I'm CASE'ing the samples in the Occasions Catalog. (Copy And Share Everything - a great way to get really cute stuff by copying a design you like, or take the inspiration and add your own twist).

I started by decorating the boxes. These boxes are about 2" square and come in a pack of 25!! Great for Class Treats because you can make 50 or more with just one pack of the Stacked With Love paper stack and Washi Tape set! Fill them with candy or what-not. They are the perfect size for Party Favors, gifts for neighbors or coworker. They're pretty enough to decorate with too, fill up a mantle or shelf, or use as a centerpiece.

The You Plus Me stamp set is great for decorating for Valentines Day.
TIP: When Using Clear Stamps I like to line a straight edge up through my clear block when I adhere the stamp. I have a much better chance of stamping it straight if its at least squared up to the edges of my block!! I like to line up the block on my Stampin' Grid Paper, then add my stamp, lining it up with one of the lines I can see through my block.
TIP - Line up stamp on grid through the clear block
To get just the Be Mine part of this stamp, I'm going to ink it up with my Stampin' Write Marker in Real Red. TIP: when you are inking up a stamp with the marker, and you've got a larger area to cover, be sure you're using the sides of your brush tip so you don't damage the pen, and so you can speed through the coloring! For smaller areas or details, carefully use the tip.
Inking part of the stamp with my Stampin' Write Marker

Clear stamps make lining up images easier than traditional wood block stamps.
While I do love the ease of clear stamps - storage space, lining up images for stamping, etc. - I was frustrated with their 'clinginess' to the blocks. TIP: What I've found works best for me, is to warm the block up in my hand, and warm the stamp up in my other hand, for about 30 seconds to 1 minute. When they are both warm they seem to have better attraction. For larger stamps I like to also breathe onto the clear block, causing a little fogging of the block and providing a little moisture to aid the stickability. For smaller stamps, or stamps I will need to use for a while, maybe cleaning and changing colors, I add a little glue dot and stick the stamp to that on the block. Definite stickiness, but requires a little more cleaning, and care in removing your stamp. Not a big sacrifice for clear, sure stamping.
Decorated Treat Box - easy peasy!!
I added the washi tape and ended up adding some punched hearts instead of the stamped and fussy cut ones like the catalog used. If you have the old small heart punch, it works OK with the stamps in this set, but the current heart from the Itty Bitty Punch Pack has a little swoosh to it that doesn't match. If I want to do these for favors or class treats, I'm not going to stamp and hand-cut umpteen hearts. I'll punch and stick and be done with it! #lazystamper For comparison - see the image below:
Punched Cardstock - Stamped and Punched - Stamped and Fussy Cut

Once you have your boxes decorated, you can start filling them for gifting!
If you'd like to use them for a Countdown to Valentines Day, here is an easy way to number them for the countdown:

Using the Project Life by Stampin' Up! Day to Day stamp set, I added a February tag, and then tags for each day. Stapled to a strip of cardstock, a few punched hearts, and Voila!! A Special Countdown! Simple! This set is pretty darn useful outside of Project Life! ;-) Use it to make anniversary / shower / wedding / party favors with a special date, save the date cards for a wedding or other special event, use it in your planner or Filofax... Useful! #JustSayin ;-)

The Stampin' Up! items used for this project are shown below, 
Click on any image to view more info 
 or to purchase them in my online store. 

February will be here before you know it - start your countdowns now!!
Happy Crafting!
-Angie


Built for Free Using: My Stampin Blog
Read More »

Day to Day Choose Happiness in the New Year Blendabilities


Project Life Day to Day Stampin Up Choose Happiness Motley Monsters MIDNIGHTCRAFTING
Motley Monsters Designer Series Paper - HAH! for New Years!! 
You know those cards that start out one way, and end up COMPLETELY different than you imagined? That's today's card. I love how it turned out, but what a process!!

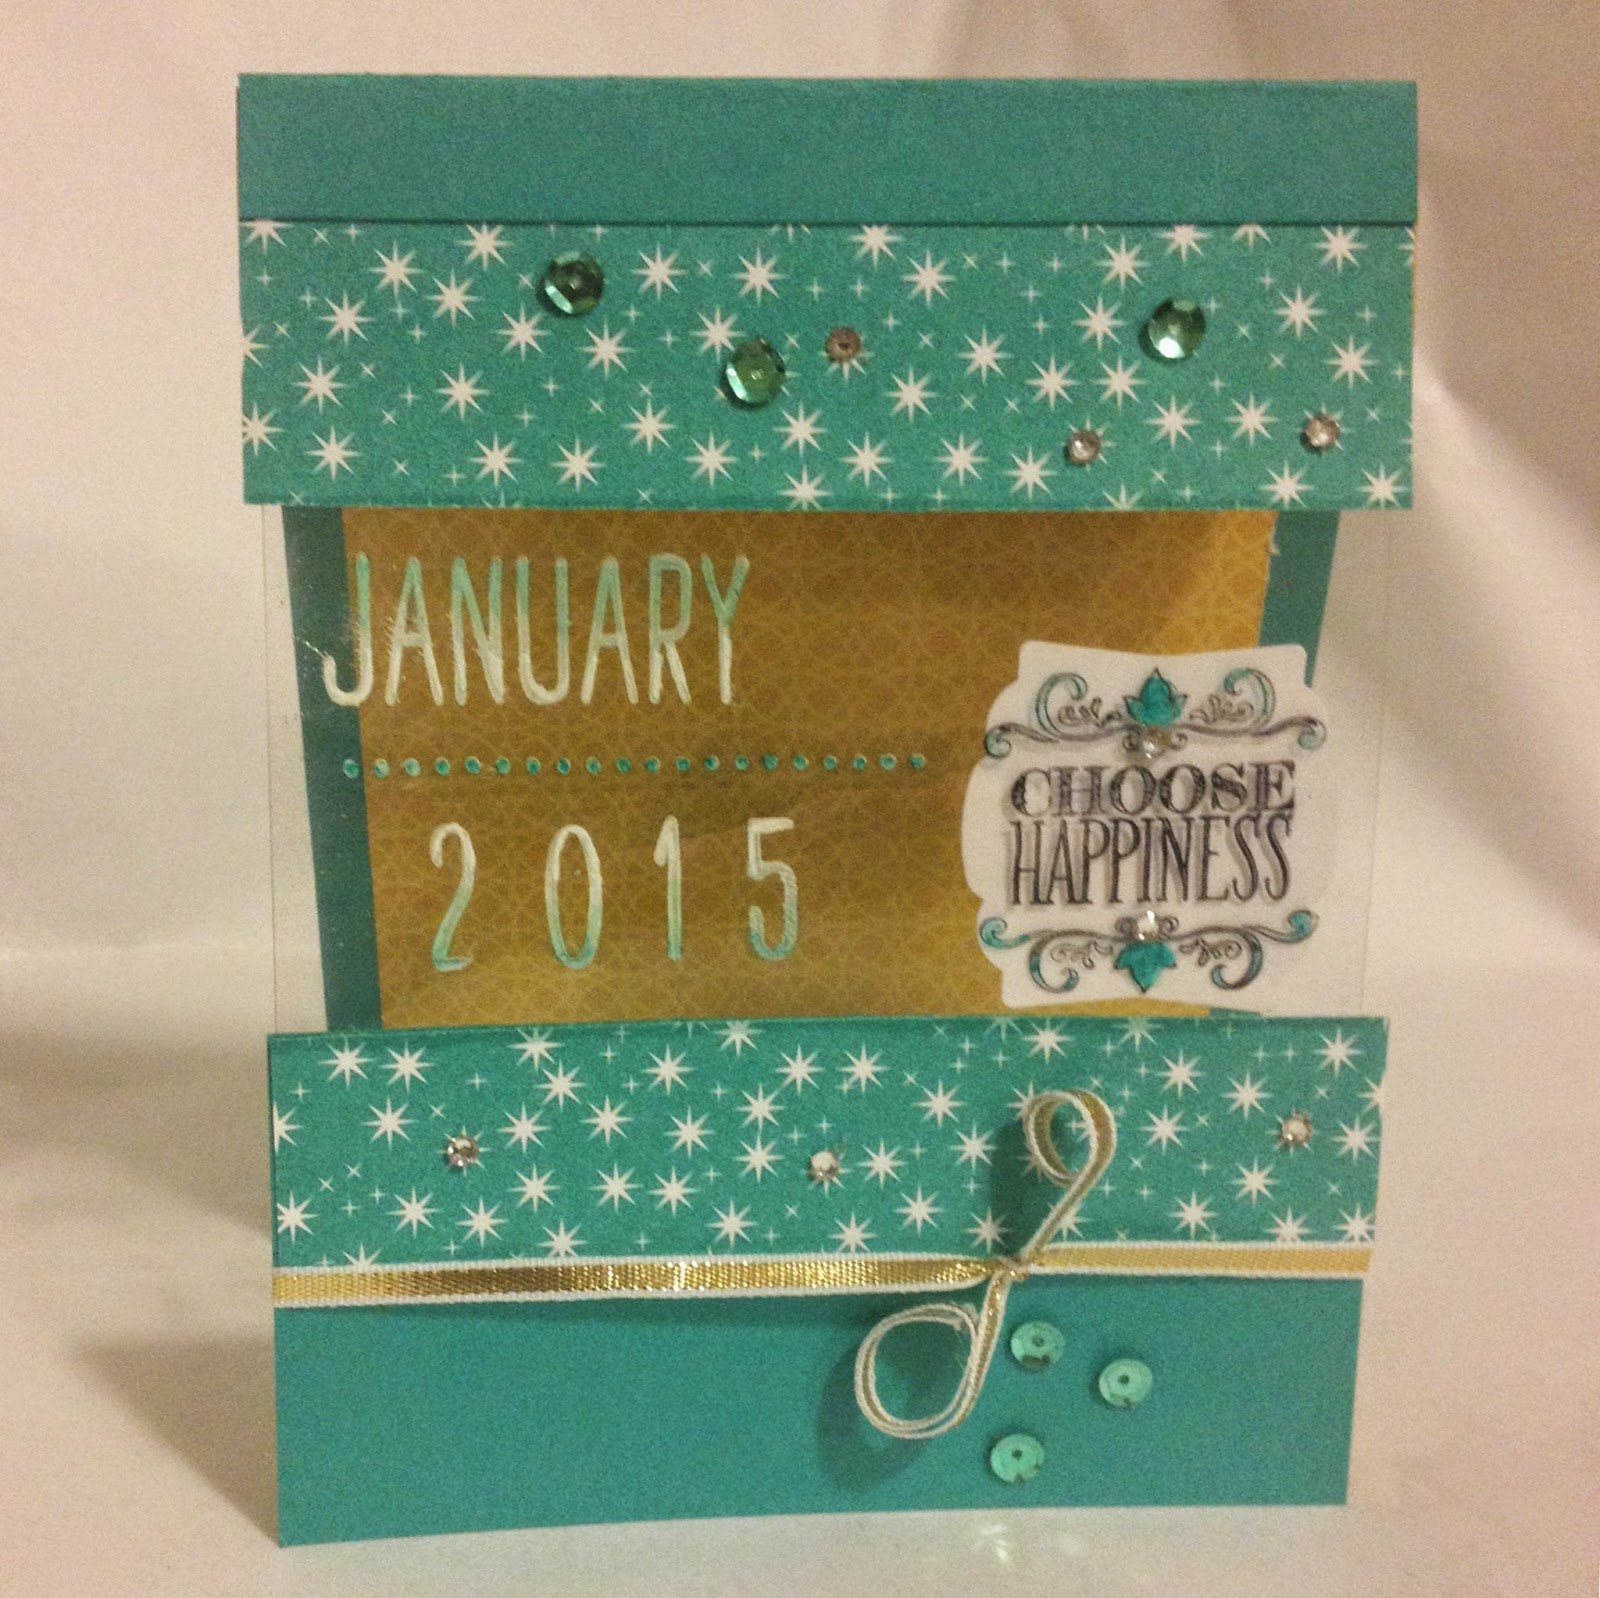
The card base is Coastal Cabana, with the Motley Monsters Designer Series Paper star pattern, and a piece of the Window Sheets clear acrylic. I stamped the images on the acrylic with White Craft Ink and Black Staz On ink, Using the Project Life Day to Day Stamp Set and the Choose Happiness Set. the finishing touches include the 1/8" Gold Ribbon, Basic Jewels Rhinestones, and a few of the In Color Sequin Assortment. Don't you like the restraint I showed in my embellishments today? LOL

The Project Life Day to Day set is pretty amazing, I think it will be so useful to add personalized wedding and anniversary dates, custom birthday card dates and ages, to make neat planning notes and lists - maybe for my fancy planner I plan to try this new year! ;-) Anyhow, Useful!

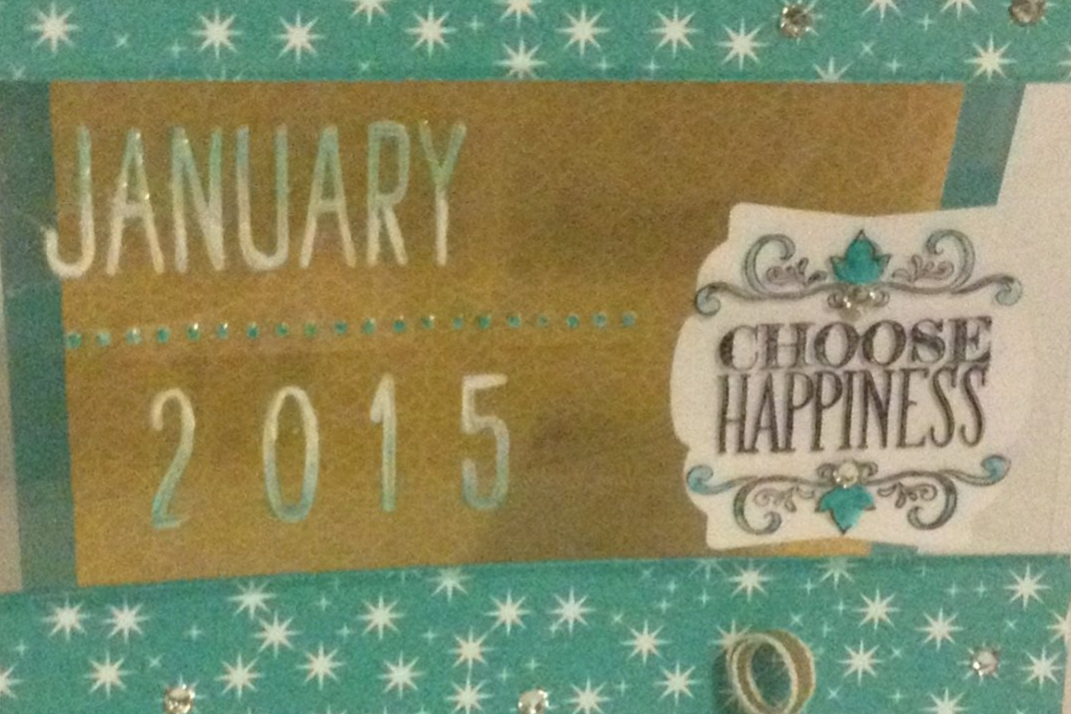
For this card I used the January stamp with the accent dots and then added 2015. The nice thing about polymer stamps is the ease of placing them on the block in the arrangement you like, and then stamping all at once! Of course, they also make stamping multiple times to get a complex image easier too, but I kind of like the custom one-and-done technique.
Project Life Day to Day Stampin Up Choose Happiness Motley Monsters  1MIDNIGHTCRAFTING
Stampin' on Acrylic for the clear inset window, colored with Blendabilities Markers
I stamped the date in White Craft Ink, which I imagined popping on the acrylic Window Sheet against the dark Coastal Cabana of the Motley Monsters Designer Series Paper... but then I realized that for someone to write a note inside the card, that design was a little too dark and busy! Luckily, the yellow reverse pattern worked great! I then stamped the Choose Happiness sentiment in Staz On black, which REALLY pops against the back pattern. Dangit! Should have done both in black - but then I wouldn't have been able to USE MY Stampin' BLENDABILITIES MARKERS to give the date that ombre effect! (I know, I COLORED! can you believe it?!?) But it took a few steps: I added clear embossing powder to the image, and (lightly) heat embossed it. The acrylic is pretty sensitive to heat, watch how much you do at once, and the angle of your heat gun, or it will warp beyond saving! Ask me how I know... Sigh.

Once it was heat embossed, I started at the top of January with the darkest Coastal Cabana Blendabilites Marker and just dabbed the color on. Then I quickly smeared the color down the letters with the tip of my finger. Yes. Smeared. Sorry to get all technical on ya! I did the same thing with the bottom of the year, smearing upwards. I used the Color Lifter Blendabilities Marker to remove any stray marks. Then I used the White Stampin' Chalk Marker to add a little density to the white parts. I used the color lifter to take any stray marks off from that process too! The Chalk Marker is permanent) For the center line of dots I probably could have left them white, but I dotted on some of the darkest Cabana too. I then colored in the leaves and swirls on the Choose Happiness stamp. I wasn't happy with the contrast, as I really wanted to emphasize the Choose Happiness part, so I added a Whisper White Artisan Label Punch behind the acrylic. I adhered it with glue dots in the leaves, tricky! You have to be clever with glue, as you can totally see it through the clear acrylic.
To finish off this center section - and OMG, was I finished yet?!?! - I lightly ran the tip of the lightest Coastal Cabana Blendabilities Marker on the edge of the Motley Monster Designer Series paper where the cut edge was a little too white in the scheme of the design. It was kind of cool how the paper absorbed the ink, but you might practice first on a scrap paper - the ink will bleed unexpectedly, which may or may notwork with your intended effect.

Whew!! Not the card I had set out to make. But I think it worked itself into a pretty new years card!
Project Life Day to Day Stampin Up Choose Happiness Motley Monsters  2MIDNIGHTCRAFTING
Choose Happiness, in the new year and always! :-)
Anyhow.
These acrylic inset cards are interesting. I will definitely try again! Any tips for me?

Happy Crafting!
-Angie

To find out more about any of the supplies used on todays card, just click the image in the table  below.To Shop my Stampin' Up! online store, please visit www.MidnightCrafter.StampinUp.net 

Looking for the perfect last minute gift? I've got you covered with Paper Pumpkin Prepaid Subscriptions! Click, Print, Sign and Gift! Quick, easy, and totally unique! 


Built for Free Using: My Stampin Blog
Read More »

Glorious Green - Color Me Autumn Gratitude for Days

TGIF!!
Happy Friday to you, and thanks for joining me for the last card set in this weeks series!

I decided to go with a monochromatic color palate for these cards.
Glorious Green - Color Me Autumn and Gratitude for Days

The first card has strips of the green and spotty green patterns from the Color Me Autumn Designer Series Paper, with a Mossy Meadow strip stamped in Mossy Meadow with some of the accent stamps from Gratitude for Days. I next layered a Pear Pizazz strip on an Old Olive layer, with a card base of Mossy Meadow. The edges on the right are corner trimmed to match the strips of DSP, also corner trimmed.The sentiment is two of the stamps from the set, one selectively inked in Pear Pizazz, and the other stamped in Mossy Meadow.
Shades of Green - Color Me Autumn and Gratitude for Days

The. Last. Card. in this series is my favorite. For several reasons, hahaha! :-)
But seriously, I love how the Polka Dot embossing folder coordinated with the Color Me Autumn spotty green pattern! I deconstructed the Neutral and Old Olive Two Tone Trim to create the Olive thread vertical accent, and then added the buttons tied up with the neutral thread.The Thanks was selectively inked in Mossy Meadow, with some accent elements stamped in Old Olive and Mossy Meadow. The tag is cut using the Chalk Talk Framelits and popped up on Dimensionals, as is the texture embossed panel.
Lots and Lots of Dots - Color Me Autumn and Gratitude for Days
Atampin' Up Products use in these cards are listed below, if you'd like to find out more about them just click on the item and you can view it in my online store:

Built for Free Using: My Stampin Blog

I must admit that this was a great exercise in creativity for me. Some cards came together easily, others... not so much!! I'll have to decide the theme for next week, but for now I'll enjoy the weekend!

I hope you do the same!
Happy Crafting!
-Angie

To Shop my Stampin' Up! online store, please visit www.MidnightCrafter.StampinUp.net 
Find me on Facebook at www.Facebook.com/MidnightCrafting 
Read More »

CAS - Color Me Autumn Gratitude For Days

( CAS = Clean And Simple )
After yesterdays overload of embellishment, I decided to go the minimalist route. I still managed to add some layers and texture, but the essence is simple.

Stampin' Up Color Me Autumn Gratitude for Days Card Idea
Color Me Autumn and Gratitude for Days
Soft Suede Card bases, with the striking Blackberry Bliss pattern from the Color Me Autumn Designer Series Paper, and a little creative inking on the Gratitude for Days stamp, I used the Blackberry Bliss Stampin' Write Marker to select the text I wanted.

The first card floats a soft Suede pattern with the Blackberry Bliss pattern to add the vertical element in this weeks layout. I added the Autumn Accents Die cuts in Old Olive and Blackberry Bliss, to keep with the paper set color scheme. The Wooden Elements Embellishments are sponged in Old Olive, and stamped in Blackberry Bliss. And that's all, folks!
Stampin Up Card Color Me Autumn Gratitude for Days
Simple Layers with wooden accents

The second card uses the Crushed Curry pattern with that Blackberry Bliss pattern, and the vertical element also has the Neutral and Old Olive Two Tone Trim. I cut the tag using the Project Life Framelits, and hooked it to the trim with an In Color 2014-2016 Printed Clothespin.

Simple, yes. But I'm much more please with today's creations than yesterdays...

The Stampin' Up! Products used in the cards above are listed below. If you'd like to find out more about them, just click on the item to view it in my online store:

Built for Free Using: My Stampin Blog

Thanks for following along this week as I exercise some card making skills!
Happy Crafting!
 -Angie

Please visit my Stampin' Up! online store at 

Socialize with me! 
Read More »

Hello December Project Life Card Collection By Stampin' Up!

Hello December Collection - Project Life by Stampin' Up!
Quantities are Limited - and December will be here before you know it!!
Yes, I know - you're all about Thanksgiving right now. You're grumbling about the decorations up in the store, and the enormous toy catalog with a thousand post-it flags on your coffee table.... I know!!

But lets be rational here. I love Christmas, you love Christmas, lets all LOVE Christmas!
Part of making the Christmas season easier to love is being prepared!
You feel festive once the decorations are up. You feel accomplished when the shopping is done. You feel sentimental once the Christmas cards are mailed out...
Take this one step further, and set yourself up for success:
Project Life by Stampin' Up! makes it EASY to keep track of all those December stories for years to come!


December is busy enough with lots of events and family traditions. Supplies of this exclusive collection are LIMITED, so be sure and order your supplies today so you'll be ready to document and preserve those memories when December arrives!

Built for Free Using: My Stampin Blog

Click on any product above and you'll be taken directly to it in my online store. 
Or, visit my Stampin' Up! online store at  www.MidnightCrafter.StampinUp.net

Happy Crafting!
 -Angie


Lets be Social!
www.Facebook.com/MidnightCrafting
www.Twitter.com/MidnightCrafter
Read More »

Color Me Autumn Gratitude for Days - Vintage Country

Well, Vintage Country was my attempt at least! Funny how cards evolve in progress sometimes.

Veterans Day has passed, but your opportunities to Thank a Veteran exist every day!
14 Ways to Show Your Thanks To Our Military:
"Buy a ticket for a Vet to attend a fun event. Brown Paper Tickets Salutes shows you how to donate event tickets that will get into the hands of a vet in the city of your choice: the program has delivered more than $1 million in entertainment tickets to military families by event organizers and ticket buyers in 48 states. Events of all types in price ranges from $5 to $100, from sporting events to comedy shows, farm-to-table dinners and comic book conventions are listed in cities across the country, and you can purchase one or more tickets that will get donated directly to Vets hoping who could use a night out."

My cards today are continuing the theme this week, Same Paper, Same Stamp, Same layout. Sigh. Its more of a challenge than I expected, so forgive me the fudging on today's cards. I'll try harder for tomorrow!!


Vintage Country - term used very loosley


Color Me Autumn DSP and Gratitude for Days Stamp Set
 I used the Color Me Autumn Designer Series Paper as the background, and stamped the sentiment from the Gratitude for Days stamp set onto a Tea Lace Paper Doily. Layered over the Burlap Ribbon, and Natural and Old Olive Two Tone Trim (deconstructed from the swirl rope to the threads), the doily and the DSP strip needed to be attached with Stampin' Dimensionals to give it height clearance. I added the Vintage Designer Button to give it "credibility" that the whole thing would stay together! Its a little more bulky than I would prefer. So for the second card, I kept things simpler and followed the sketch a little more closely, besides flipping it on its side again. :-)


I used the Two Tone Trim again, and Linen Thread, and accented this time with an arrow from the Wooden Accents Embellishments. This piece I stamped with some of the elements from the Gratitude for days stamp set that matched the Blessings stamp (triangles, probably to small to notice here, but they DO match!)

So there you have it. I'm going to claim this as a victory. What are your suggestions for that bulkiness? I hadn't noticed it before, maybe because I usually use the ribbon with cardstock layers? I'd be appreciative of any tips or thoughts you have on that...

Happy Crafting!
-Angie

To Shop my Stampin' Up! online store, please visit www.MidnightCrafter.StampinUp.net 
Socialize with me on Facebook at www.Facebook.com/MidnightCrafting 
and Twitter at  www.Twitter.com/MidnightCrafter
Read More »

Color Me Autumn Gratitude for Days - Blessings

Welcome to Veterans Day Week!
"Thank You" will never quite be enough to show our gratitude to those who serve, but its a great place to start!!

7 Ways to Honor a Vet on Veterans DaySay “thank you.” It’s a simple gesture, but a deeply meaningful one. If you see a veteran in uniform out in public, simply step up and thank that person for his or her service. Shake that person’s hand, look them in the eye and give a sincere “thank you.”
Many veterans wear their uniforms in public on Veterans Day, making it easy to identify veterans out and about. It doesn’t take much out of your daily rush to stop and spend just a few seconds thanking them for their courage and sacrifice."
Thank You.
This week I decided to use the set Gratitude for Days, and the rest of my Color Me Autumn Designer Series Paper. I think its a good week to remember all we have to be thankful for, and those who make it possible to enjoy it all in safety and freedom.
The stamp set coordinates with the Simply Sent kit Gratitude for Days, which is a great way to save those memories at Thanksgiving, or a variety of other fun uses! The stamp set has some pretty accent stamps that will keep it in the "useful" piles of stamps pretty much all year! 
I also decided to try and follow a sketch for the layouts this week, we will see if I can make it all week with the same layout, paper and stamps... That seems challenging, but that's why I do it. To challenge myself!
Gratitude for Days, Color Me Autumn, and Autumn Accents
I like the crumpled leaf look for the Autumn Accents Bigz Die cuts, I used it on these cards, and here works well on the Color Me Autumn Designer Series Paper. This paper set has some really bold patterns, but also has some solid color designs as well. Not completely solid, they're more water-colored looking, with variations in the darkness of the color. I thought that would work well for leaves, as Fall leaves are rarely uniform in color. 
The left side of these cards is colored using the Stampin' Spritzer tool. It gave a water colored look to the card that kind of matches the leaves. I used two different stamps from the Gratitude for Days Set, and added some swirls to the first one. 
Today I'm Thankful... Color Me Autumn and Gratitude for Days
Count Your Blessings - Color Me Autumn and Gratitude for Days

Its easy to say Thank You, try it this week... and then every time you see a Service Member. They, and their families, sacrifice so much to protect and preserve our way of life here. Count them in your blessings.
Happy Crafting!
-Angie

Today's products are linked above in the bold text, or you can find them in the Holiday Catalog 2014.
For these, and other quality Stampin' Up! products, please visit my online store at


For current events and promotions, join me on Facebook at
Chat me up on Twitter at www.Twitter.com/MidnightCrafter 
- its almost like texting me, so come say Hi! :-)
Read More »

Project Life by Stampin' Up! GIVEAWAY

CLICK HERE to ENTER TO WIN
Stampin' Up! has partnered with Becky Higgins to bring you the real deal -authentic Project Life products, now in exclusive Stampin' Up! colors and designs. Its a super simple, totally affordable way to get your photos into albums: just slip your photos into photo pocket pages, and add designed cards. 
Its a back-to-basics approach to documenting your life.

Stampin' Up! is giving away 100 Project Life Card & Accessory Packs, 
and ONE Lucky Winner will walkaway with EVERY PRODUCT currently available!

Check out all the amazing products available now at

Project Life by Stampin' Up! GIVEAWAY http://bit.ly/1tvnz2d
CLICK HERE to Enter the Project Life by Stampin' Up! GIVEAWAY http://bit.ly/1tvnz2d

Let me share this great :)short(; video that introduces you to the Project Life system of memory keeping:


You won't win if you don't play!
- no purchase necessary -

May the odds be ever in your favor! ;-)
Project Life Giveaway OFFICIAL RULES
Contest Ends November 30, 2014 at 11:59:59 pm Utah time.

Happy Crafting! 
-Angie 

To purchase these and other quality Stampin' Up! products, please visit my online store:

Find me on Facebook at www.Facebook.com/MidnightCrafting 
And chat me up on Twitter at www.Twitter.com/MidnightCrafter
Read More »

Typeset DSP - Remember This Day

Kind of excited!!
I made this card for today:
Remember This Day - Typeset DSP,  Spiral Border Punch

It uses the Typeset Specialty Designer Series Paper - those little scraps you always end up with from projects; Very Vanilla cardstock for the base; the Spiral Border Punch, and the stamp sets Gratitude for Days (accents) and Project Life Holiday Cheer (sentiment).

And, ironically enough, I reached 500 Followers on Instagram today!! Definitely a day to remember!
Thanks to all of my followers, I appreciate the interaction and support!
If you're on Instagram too, find me at www.Instagram.com/MidnightCrafter

Happy Crafting!
 -Angie

To Shop my Stampin' Up! online store, please visit www.MidnightCrafter.StampinUp.net
Find me on Facebook at www.Facebook.com/MidnightCrafting
And lets be tweet-hearts nn on Twitter at www.Twitter.com/MidnightCrafter
Read More »

Project Life By Stampin' Up! Exclusive Stamp Sets

I love that when Stampin' Up! and Project Life collaborated, the stamp sets that were introduced were really very versatile in other applications besides Memory Keeping!

((Lets face it, that's what I love about most of Stampin' Up!'s products! Versatility means economical, means options and possibilities...))

#PLxSU Card from two exclusive stamp sets Project Life by Stampin' Up!

The card I have for you today was made using the Lucky Stars Embossing Folder (definitely a MUST have if you've not gotten it already) and two of the Project Life by Stampin' Up! stamp sets. One is Point and Click, which I used for the accent panel; the other is Holiday Cheer, used for the two sentiments. Great sets!

The colors are not very good in this photo, I apologize, its more coordinated in real life :-/ Always Artichoke, Pear Pizazz and Early Espresso.

Happy Crafting!
-Angie
We have some great Project Life by Stampin' Up! exclusive kits and collections!! Check them out at my Stampin' Up! online store - please visit www.MidnightCrafter.StampinUp.net and see what the excitement is all about! #PLxSU

Find me on Facebook at www.Facebook.com/MidnightCrafting 
And be my Tweet-heart on Twitter at www.Twitter.com/MidnightCrafter
Read More »