Showing posts with label Masculine. Show all posts

Filled With Love - Alternate Project - Masculine Valentine


The January Paper Pumpkin kit is so fun! But not so manly. Its pink, its sparkly, its got cutesy clips and a bow... Not your average guy's valentine, but I'm sure they appreciate that whatever they get, it comes with a lot of love!

How about another alternate idea? A masculine Valentine using the January Paper Pumpkin kit, Filled with Love. In *Manly* colors like brown and red! With Staples, and no bows. Ribbon, but no bows!
:-)

A Real Red cardstock base, with Early Espresso layer. The brown layer is embossed using the Banners Framelits (yes, if you turn them on the NON-cutting side, they will emboss. Or deboss? must look that up...) Covered in a fine brayering of Encore gold ink, then sponge distressed, the dark brown shows through where the Paper Pumpkin January 2015 Filled with Love heart outline stamp reverse-kissed the inked up cardstock.

Following me there? I em/debossed the banners - nested them all together on the magnetic platform, flat side down on the paper. Then I brayered gold ink over the cardstock. That gold doesn't dry fast (at ALL) so I sponged it and kind of rubbed the edges of the card off more than the banner section.
Then, I did --Not-- ink up the heart stamp, I just 'stamped' it onto the gold, where it lifted off the ink revealing the dark Early Espresso.

This card today, its allll backwards!!

I used one of the bag toppers from the Filled with Love kit, topped with some Early Espresso Seam Binding, a Real Red Cotton Ribbon snippet, and some of that 1/8 Gold ribbon I adore. The gold foil embossed heart from the kit is stamped in Early Espresso (Dark, right?! The gold masks it pretty opaquely!). I do have a (barely visible) banner from the kit stamped in gold (when will I ever learn) with one of the kit sentiments "You have my heart". And last, but not least, I used a dozen staples to hold that sucker in place!! LOL
Manly Staples. :-D

Can't wait to get the February Kit!!! I hope its as versatile and awesome as January! If you are a subscriber, the refill kit is available - hurry and order it, and you can add more sweet treats and cards to your Valentine's Day celebrations!

Happy Crafting!
 -Angie

Even if you miss February's Paper Pumpkin sign up deadline of the 10th, you can still sign up and enjoy next months kit! Paper Pumpkin also makes a nice gift - for yourself, or for birthdays, holidays, or just because you see someone could use the easy craft break. Everything you need is in the box. Gift wrapped even! A nice surprise for your crafty and Not So crafty peeps. Find out more details HERE
Read More »

Hey, Typeset Valentine!

Typeset Specialty Designer Paper with Hey, Valentine Stamp Set
Example A and B, reasons why I should not be allowed to Color.
But, if you ignore that, I think you'll like the layout and the accents on these cards!!

The little pirate dude in the Hey, Valentine set (or in this case, the Amor Mio, translated stamp set) made me want to get out my pirate map, so I pulled some of the map print from the Typeset Specialty Designer Series Paper. There are 4 sheets of this print in the Typeset pack, and cut to 4x4 instead of 4x5.25 like I did, you could get 32 pieces out of the pack. It would make an awesome invitation for a Pirate party or Halloween party! I'll have to give that a try...

So, you may be wondering why I have the translated stamp set. My older daughter is in a Spanish Immersion program, and she speaks Spanish. I love that Stampin' Up! offers stamp sets in Spanish, French, and German! These sets really open up a great opportunity to communicate with family and friends.

Back to the cards. Which no one apparently liked in my Instagram/Facebook poll... LOL
Fine. The coloring IS pretty bad. Have your laugh, and look at the good bones of the card:
Map, Map-ish roll, Distressed Edges. Good Start.
Coloring. All Bad.
The So Saffron base was supposed to set off the saffron color used to accent the gold. I distressed the edges of the Very Vanilla piece, and ran the edges of it through my Crumb Cake stamp pad to give a little definition, then I added the roll to the corner for a old-map kind of feel. I added some gold and pearls to distract you from the coloring. Did it work? :-D
Tiny Pearls fit the necklace perfectly!
With some Gold Sequin Trim and a sliver of Gold Glimmer Paper,
its so cute!! If only I had stopped there...
I will definitely try this card again. I'm thinking just black or espresso ink, with alot more distressing, maybe some crumpling... Something BESIDES coloring, unless I can get into some kind of coloring rehabilitation class. Can you tell I am disappointed in my (lack of) coloring abilities?

Ok, here is the other card. A little different, less bling, slightly better coloring.
Less is more. 
The pennant looked good, I think! With more distressing it could have more impact. Not terrible, one I will be trying again.

Do you build off your cardmaking #fails? Or do they go straight to the 'Circular File'?
Happy Crafting!
-Angie

There is a whole section of Translated Stamps on the Stampin' Up! Store, 
The Supplies I used today are shown below, to find out more info 
please just click on any image and you can view it in my online store.


Built for Free Using: My Stampin Blog
Read More »

Countless Sayings Masculine Valentine

Masculine Valentine 

You & Me. Forever.
"Short, sweet, says it all." the man in your life comments! LOL

But really. This chevron pattern just makes me think 'manly'. Looks kind of like diamond-plate, which makes me think of my Love's toolbox, and the garage, aka "his space". I think you could give this to your Mr. Man and he'd be OK with displaying it proudly. In the garage.

I had an extra chevron embossed Brown Sugar card front, and I looked in my handy dandy Color Coach to find a color that would stand out nicely against it. Brown Sugar is one of those colors that really goes well with almost everything, but one of the suggestions was Cherry Cobbler! Perfect for a luvvvv card. So I got out my heart punch and made a nice heart. then I couldn't decide how to set it off on the card base. I had wanted to use Gorgeous Grunge and CASE a card I liked, but the chevron base really didn't work with that. Plan B. I stamped the Forever stamp from the Countless Sayings 2 polymer set, and while I was putting it back I saw the You & Me stamps, and woo-hoo!! Card layout decided. Gah, that's always the longest part for me. Color and layout.

I laid out the stamps on my D clear block and stamped them in Cherry Cobbler on Very Vanilla. I trimmed the vanilla out to roughly the same size as my block. I added the cut out heart scrap because it framed the You and added more emphasis there, balancing out the Forever heart by Me. ;-) Don't want it to be all about ME...

Happy Crafting!
-Angie
You can make this card with the supplies below, click on any image to see more info in my Stampin' Up! Online Store:


Built for Free Using: My Stampin Blog
Read More »

Masculine Valentines Stacked with Love

Masculine Card Ideas Stampin Up MidnightCrafting Handmade
Stacked with Love Designer Series Paper Stack - Masculine Card Ideas
The new paper stack, Stacked With Love, in the Occasions 2015 Catalog is perfect for Valentines Day! And the modern black and white patterns will carry you through the year too! Nice thing about Double-sided paper!

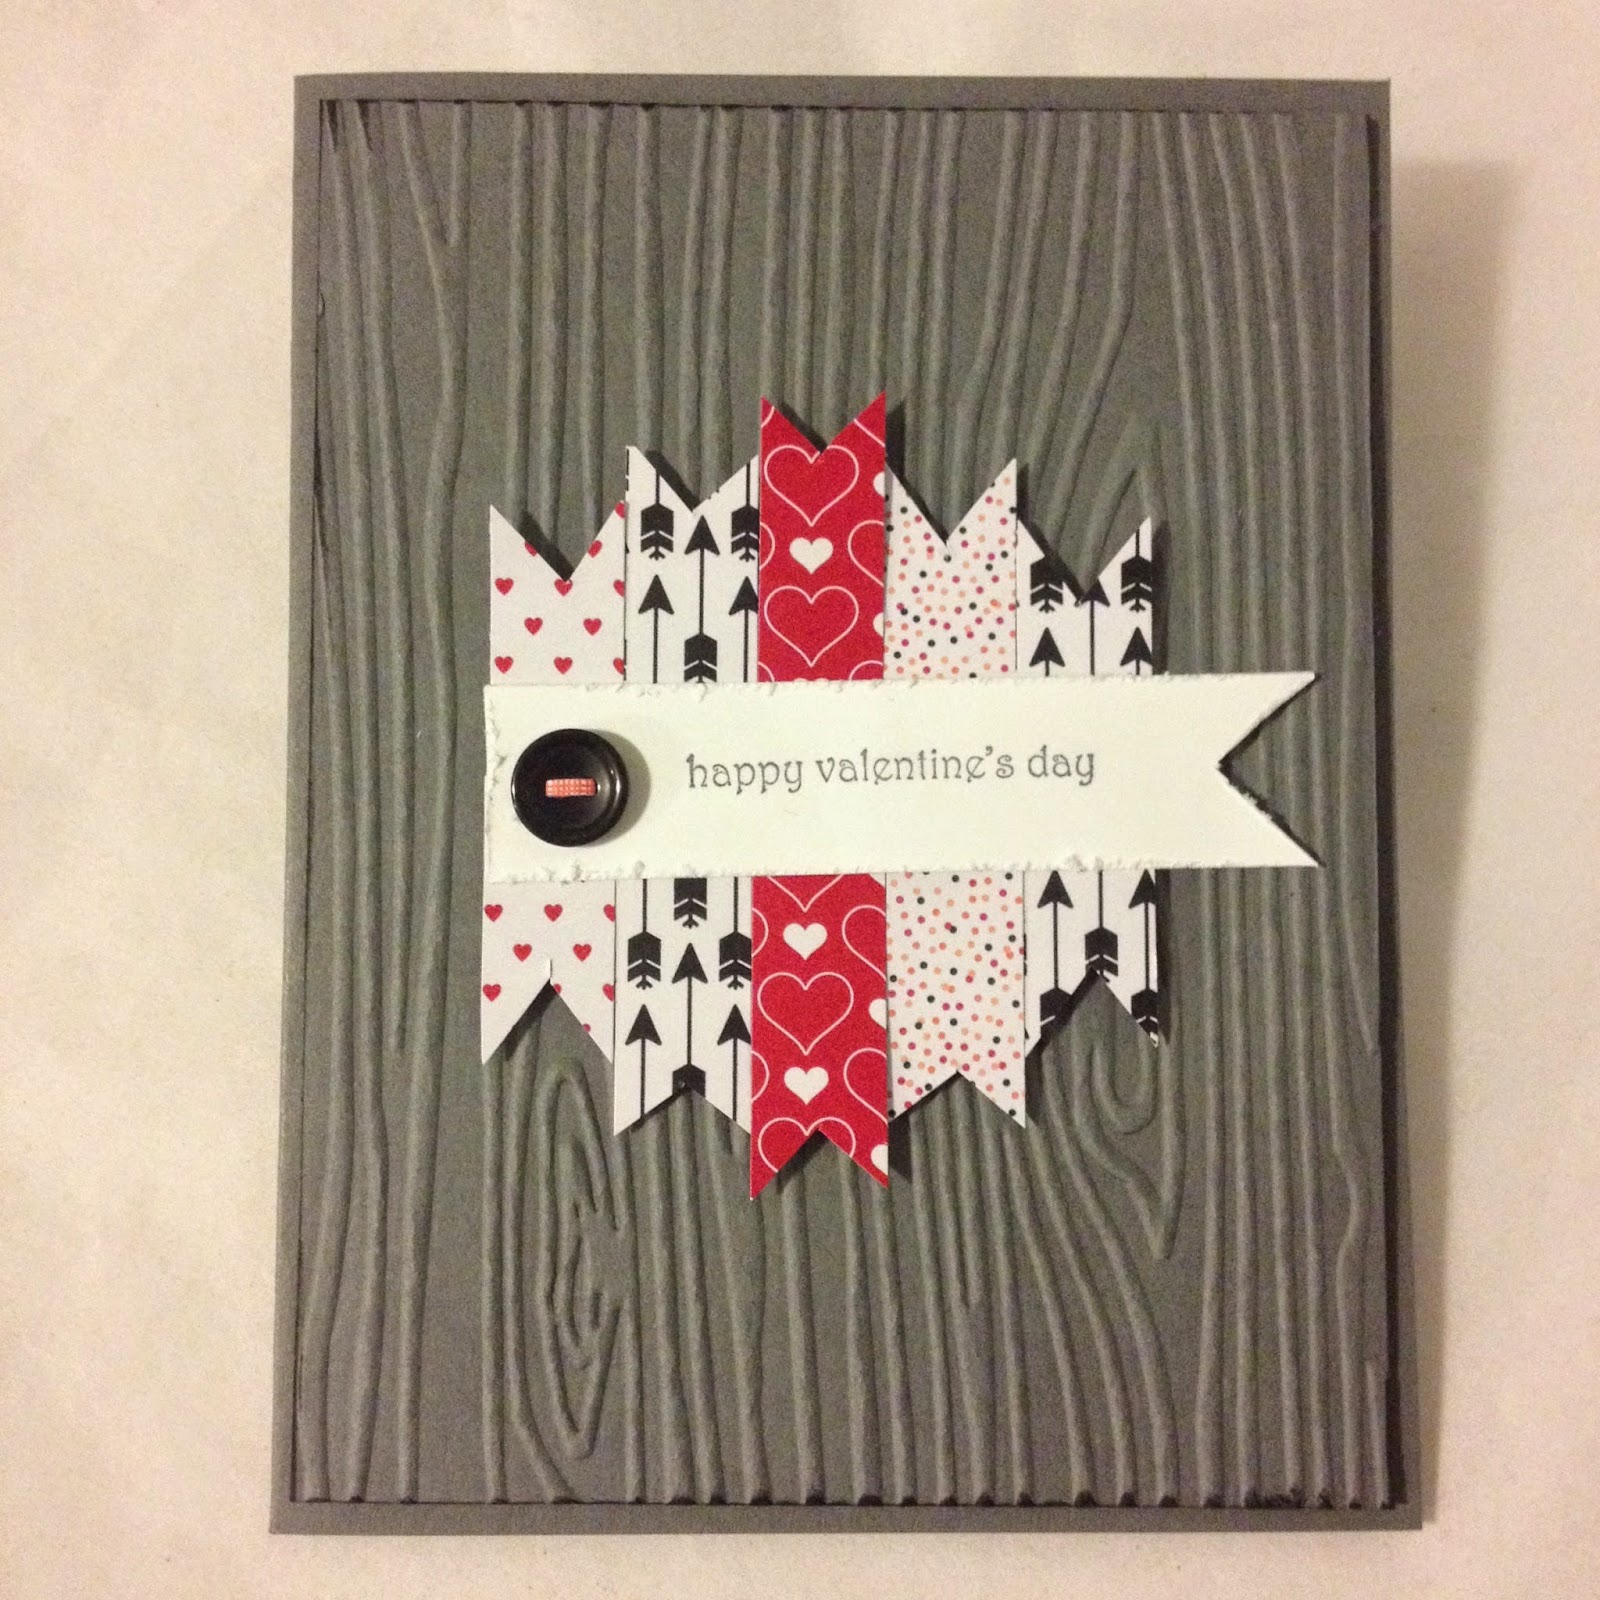
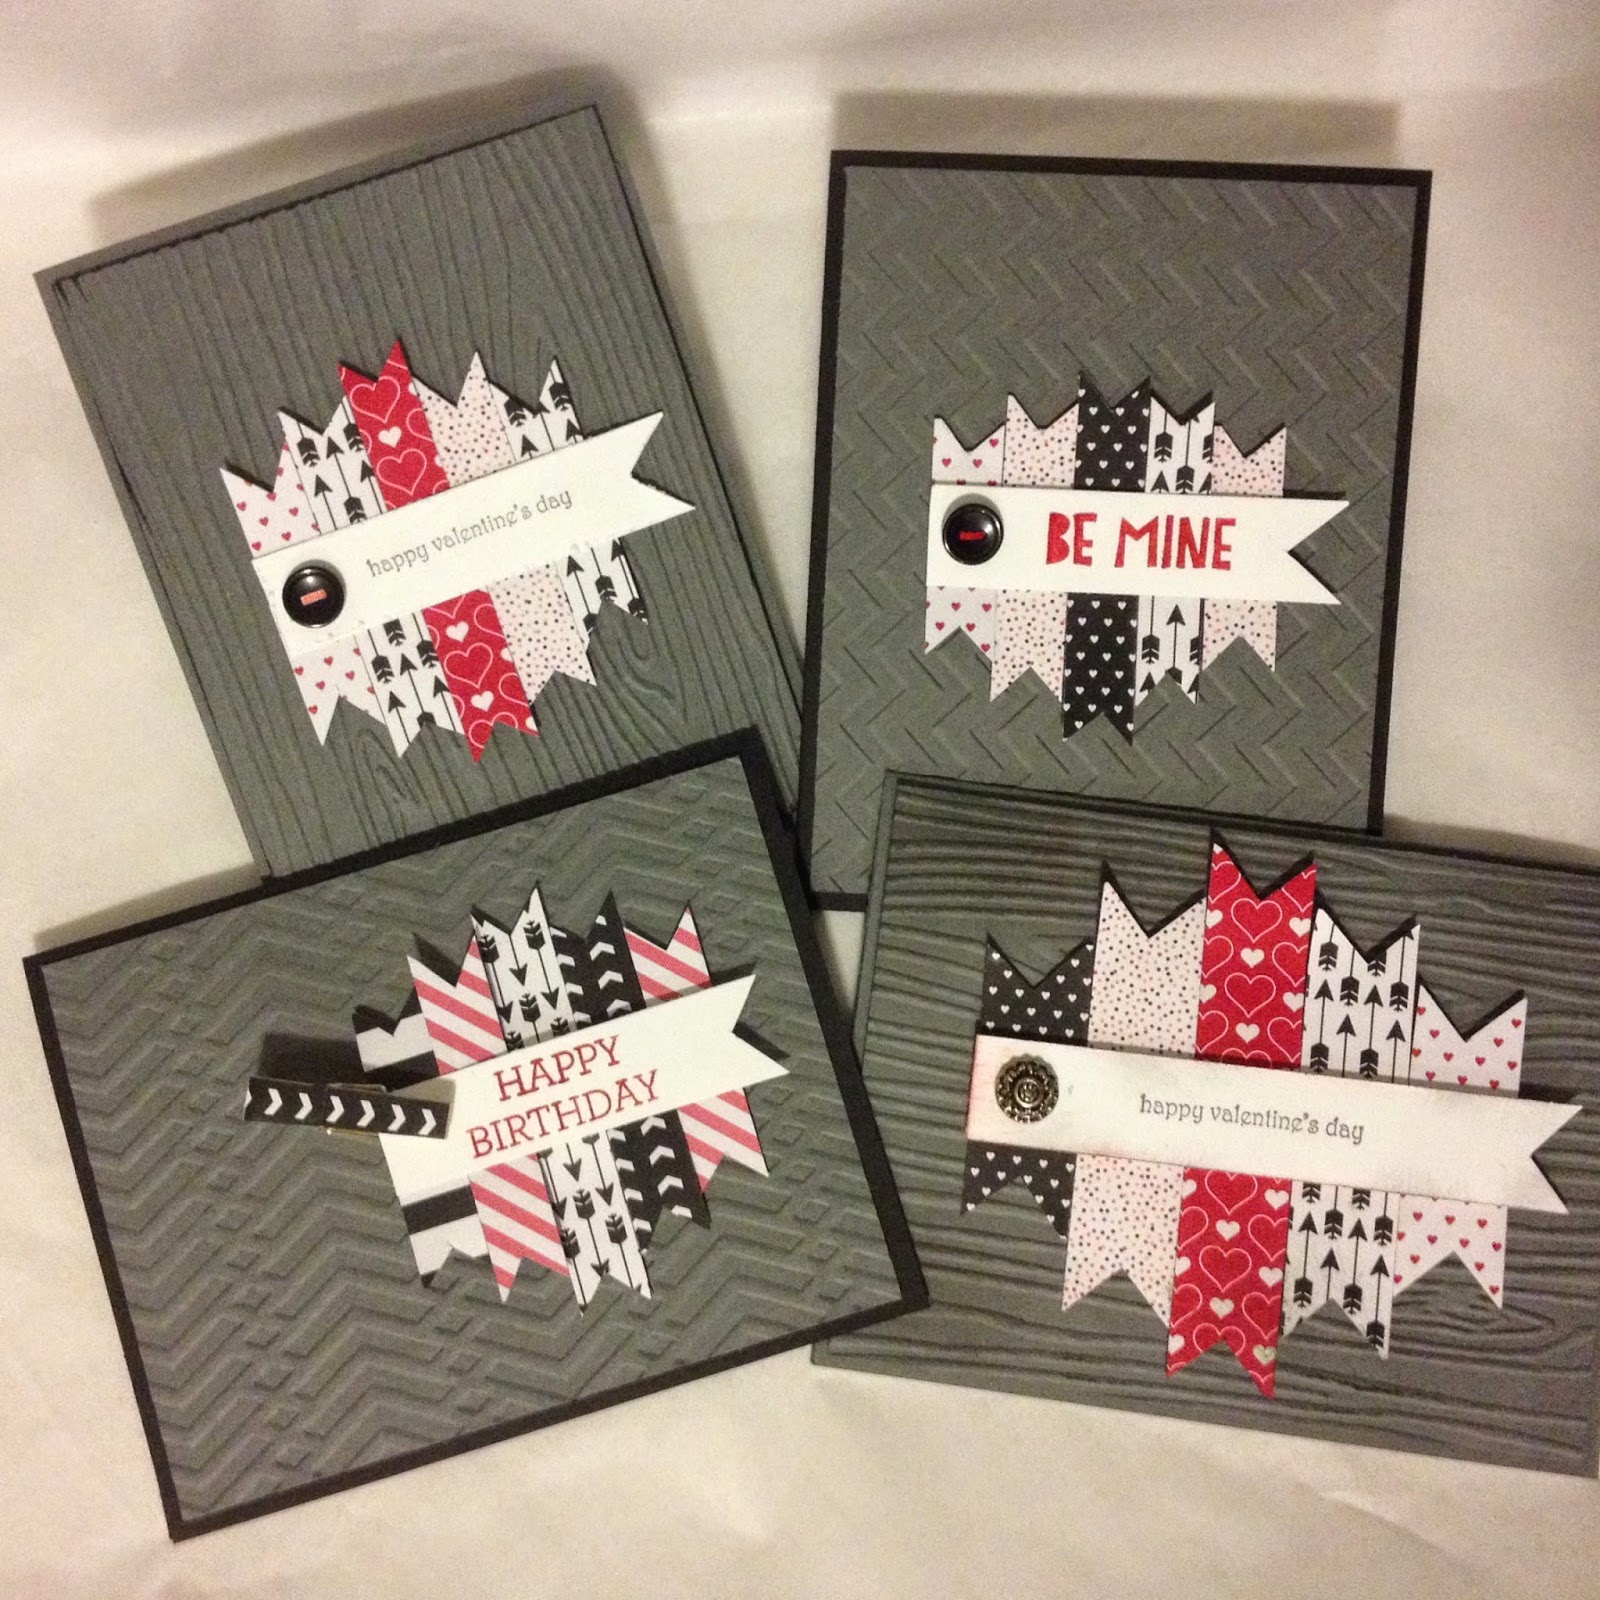
Today I used it to make some masculine Valentine's Day cards. I say masculine, because they are not all frilly and white and pink, but they could be used for the ladies as well! They are striking in the black and white with a pop of red. If the layout is familiar, I cased my Masculine birthday card HERE. Once you get the measurements, and remember to cut long strips in stead of individual tags, it goes pretty quick!! Still, a little bit involved, if you're just looking for a quick card this is not it! #justsayin
Varying the size of the pennants would work better on larger cards.
On this A2, they were a leeeetle large.

On the first card, I forgot to check my measurements and cut the pennants, all 10, into 0.75" wide by 1"-2" length. It made for a very large accent piece over the Woodgrain embossed Basic Grey panel. I used Teeny Tiny Greetings stamp, which certainly lives up to its name on this banner. Ummmmm. Next!!

Masculine Card Ideas Stampin Up MidnightCrafting Handmade
Back to the layout this time. Measure twice, Cut once, right?
Ok. This is more like it!! The pennants are only 0.5" wide, for a total width of 2.5" - much more manageable on an A2 card! I cut the STRIPS this time, longest in the center is 3", then two at 2.75". and then the last two at 2.5". To assemble them, I used a scrap of card stock with a strip of snail adhesive, cut it to 0.5" x 2.5", and carefully lined up my strips over it. The banner is 0.75" x 3" and I added a button instead of a brad. The faux thread is a sliver of paper through the button holes. I used the Woodgrain Embossing folder again, and I think this card came out much better. What do you think?

I still had lots of paper to use from the pages from the Stacked with Love pack, so I decided to try two more cards.
Masculine Card Ideas Stampin Up MidnightCrafting Handmade
The Chevron Embossing folder kind of
looks like that metal Diamond Plating, very manly! LoL
I used the Chevron Textured Embossing Folder on Basic Grey cardstock, I like the pattern against the Basic Black card base. I changed the order of the strips to give more of a black and white emphasis, with only small amounts of red in the pennants. The bolder sentiment - from You Plus Me stamp set - really stands out on this card.

Birthday Themed, the colors still work for more of a manly look.
For the last card I went with the Zig Zag Embossing Folder, over the Basic Black base again. I changed the layout to landscape, and added a Clothespin covered with a bit of the Stacked with Love paper. Using just the Non-Valentine themed paper (I do like the arrows though, and had them point down to the sentiment) I went with the black and white with red theme. I used the sentiments from Crazy About You stamp set - such a great size for the words!
Masculine Layout ideas Stampin Up MidnightCrafting

I still love this layout. I'll have to try it with some softer papers, and see how a more feminine take on it comes out.

Happy Monday!! I hope you'll partake in the spirit of the Martin Luther King holiday, and volunteer in your community, or at the very least, do some small acts of kindness for others today. :-) Together we can make a difference, just as working together Dr. King and his followers made a difference. We may not change the world as they did, but even small acts have ripples into eternity.

Happy Crafting!
-Angie 

The products used today are shown below, 
click on any image for more information in my Online Stampin' Up! store. 
Secure shopping and direct shipping are available 24/7 from my site.

Built for Free Using: My Stampin Blog
Read More »

Awesome Motlley Monsters Flower Patch

What the What?!? 
Motlley Monsters DSP and FLOWER Patch stamp set?!?! 

But... It is Awesome! Right?! ;-)

Flower Patch and Motley Monster DSP combine for some awesomeness.
Ok, maybe not totally awesome, beauty is after all in the eye of the beholder! But I like the combo.

I had some scraps of the leaf pattern from a sheet of the Motlley Monster Designer Series Paper. The squares are 1.25" and the card base and ink are Crumb Cake. The Candy Dots are from the Brights Collection. I could not for the life of me find any stamp sets in my collection that had leaves in them. (I know, shocking!) So I improvised and used some of the "leafy-er" shapes from the Flower Patch Photopolymer Stamp Set. And I felt pretty good about it, so I ended up using the sentiment from that set as well. Don't laugh too hard!

This is your Two for Tuesday post... enjoy!
Check out this mornings 5 Must Haves To Make Your Holidays Easier 
Happy Crafting!
-Angie

To Shop my Stampin' Up! online store, please visit www.MidnightCrafter.StampinUp.net
Find me on Facebook at www.Facebook.com/MidnightCrafting
And be a tweet-heart and tweet me on Twitter at www.Twitter.com/MidnightCrafter
Read More »

Everyday Occasions Motley Monsters

Motley Monsters? That paper is just for Halloween!!
Sure... and Autumn, and Masculine cards, and anyone who likes Owls, or starry skies... Its got quite the mix of patterns!
Motley Monsters Everyday Occasions Card
Masculine For You card - Autumn or Fall - Everyday Occasions
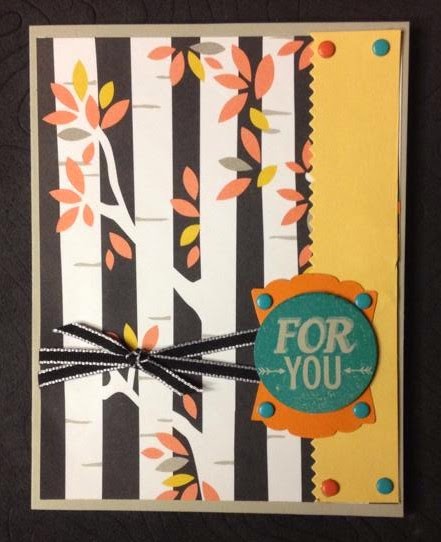
For today's card I paired the tree pattern from Motley Monsters Designer Series Paper - carefully cropped to avoid any spooky eyes - with a stamp from the Everyday Occasions Cardmaking Kit. I like the 7 piece stamp set included in that kit, its useful for everyday occasions! LOL I used Stampin Dimensionals to pop up the For You on the Artisan Label Punch, and added some Candy Dots. The Crushed Curry strip on the edge is finished with the Finishing Touches Edgelits Die, and I added some Basic Black 1/8" Taffeta Ribbon.

Happy Crafting!
-Angie

Get your own supplies for this card and more at my online store!
www.MidnightCrafter.StampinUp.net
Shop Securely 24/7 for Superior Supplies, Shipped Directly To You!
Find me on Facebook at www.Facebook.com/MidnightCrafting
And be my Tweet-heart on Twitter at www.Twitter.com/MidnightCrafter
Read More »

Masculine Birthday Card version 2.0

Second verse, same as the first! LOL Yes, this is a second version of the card I CASEd yesterday. But I tried the Lullaby Designer Series Paper with the Wood Grain Textured Impression Embossing Folder. This time, the colors are Baked Brown Sugar and Coastal Cabana, sponging again on the edges of the pennants and banner. This DSP almost doesn't say masculine to me, but its fairly guy-ish. 
Right? 


If you want to try this card layout, the dimensions I used are for an A2 card. 
Card Base - 5.5" x 8.5"
Embossed Layer - 4 x 5.25"
Banner - 3" x 1"
Pennants - 0.5" x (longest 3"; middle 2.5"; smallest 2")

I like this layout because it has texture, and its festive with the pennants and the banner, and its kind of a simple Wow. I will say the color coordination is key, not all colors work in this layout - trust me, I've tried! But once you find that color combo that works, its pretty satisfying! 

Make it a great weekend! 
Happy Crafting! 
~Angie

REMINDER: Paper Pumpkin sign ups are due by the 10th! You can still take advantage of the 50% Off your first TWO months, but only if you become a member by Wednesday 9/10!!
Find out more about this great creative project subscription service in my post:  http://www.midnightcrafting.com/p/creative-project-kits.html 
or sign up directly at www.MyPaperPumpkin.com 

Read More »

Masculine Birthday Card - Park Lane and Tiny Triangles

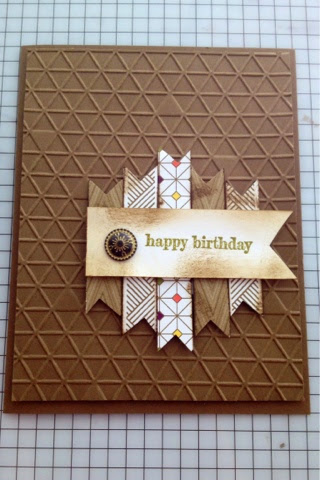
I'm sure you've seen this layout on Pinterest, its been pinned over 1000 times - just from my board alone! I've tried it a couple times, but never feel that I get it even close to original - UNTIL Today! I used the Tiny Triangle Textured Impressions Embossing Folder,(which I secretly adore) and the paper is Park Lane Designer Series Paper!! Park Lane! The one with all the flowers?!? YES.    

Soft Suede and Tiny Triangles Banner and Pennants
Masculine Birthday Card - Tiny Triangles and Park Lane
   

I used the Soft Suede cardstock for the base and embossed layer, then I sponged the Whisper White banner with Soft Suede and then painstakingly cut and lined up and adhered the pennants. Painstakingly. It was kind of tricky for me to get them to stay lined up while I got them taped up on the back side. Then I popped up the banner with Dimensionals, then the pennant layer also with Stampin' Dimensionals, and then the embossed layer ALSO popped up with Dimensionals. (TIP: I used the edges of my dimensional sheets in long strips to support the lower half under my greeting.) I added the Vintage Brad, and Voila! Masculenity. Right?! I hope you agree. :-)

Have a Fabulous weekend!!
Happy Crafting!
~Angie

P.S. This is the last weekend to register for My Paper Pumpkin with the special HALF OFF offer - check it out and register soon!!! See my post with more info including the Promo Code, HERE -> http://www.midnightcrafting.com/p/creative-project-kits.html 
Read More »