Blessed by God paired with Painted Blooms DSP
using Pacific Point and Wild Wasabi
Isn't it funny when you look at color combos in your life and think, wouldn't THAT be nice on a card?! OK. I might be one of the few that actually thinks that, but I'm sure you know what I mean! I was giving my daughter her snack a while ago, and my bright blue sweatshirt with her green snack bowl really caught my eye.
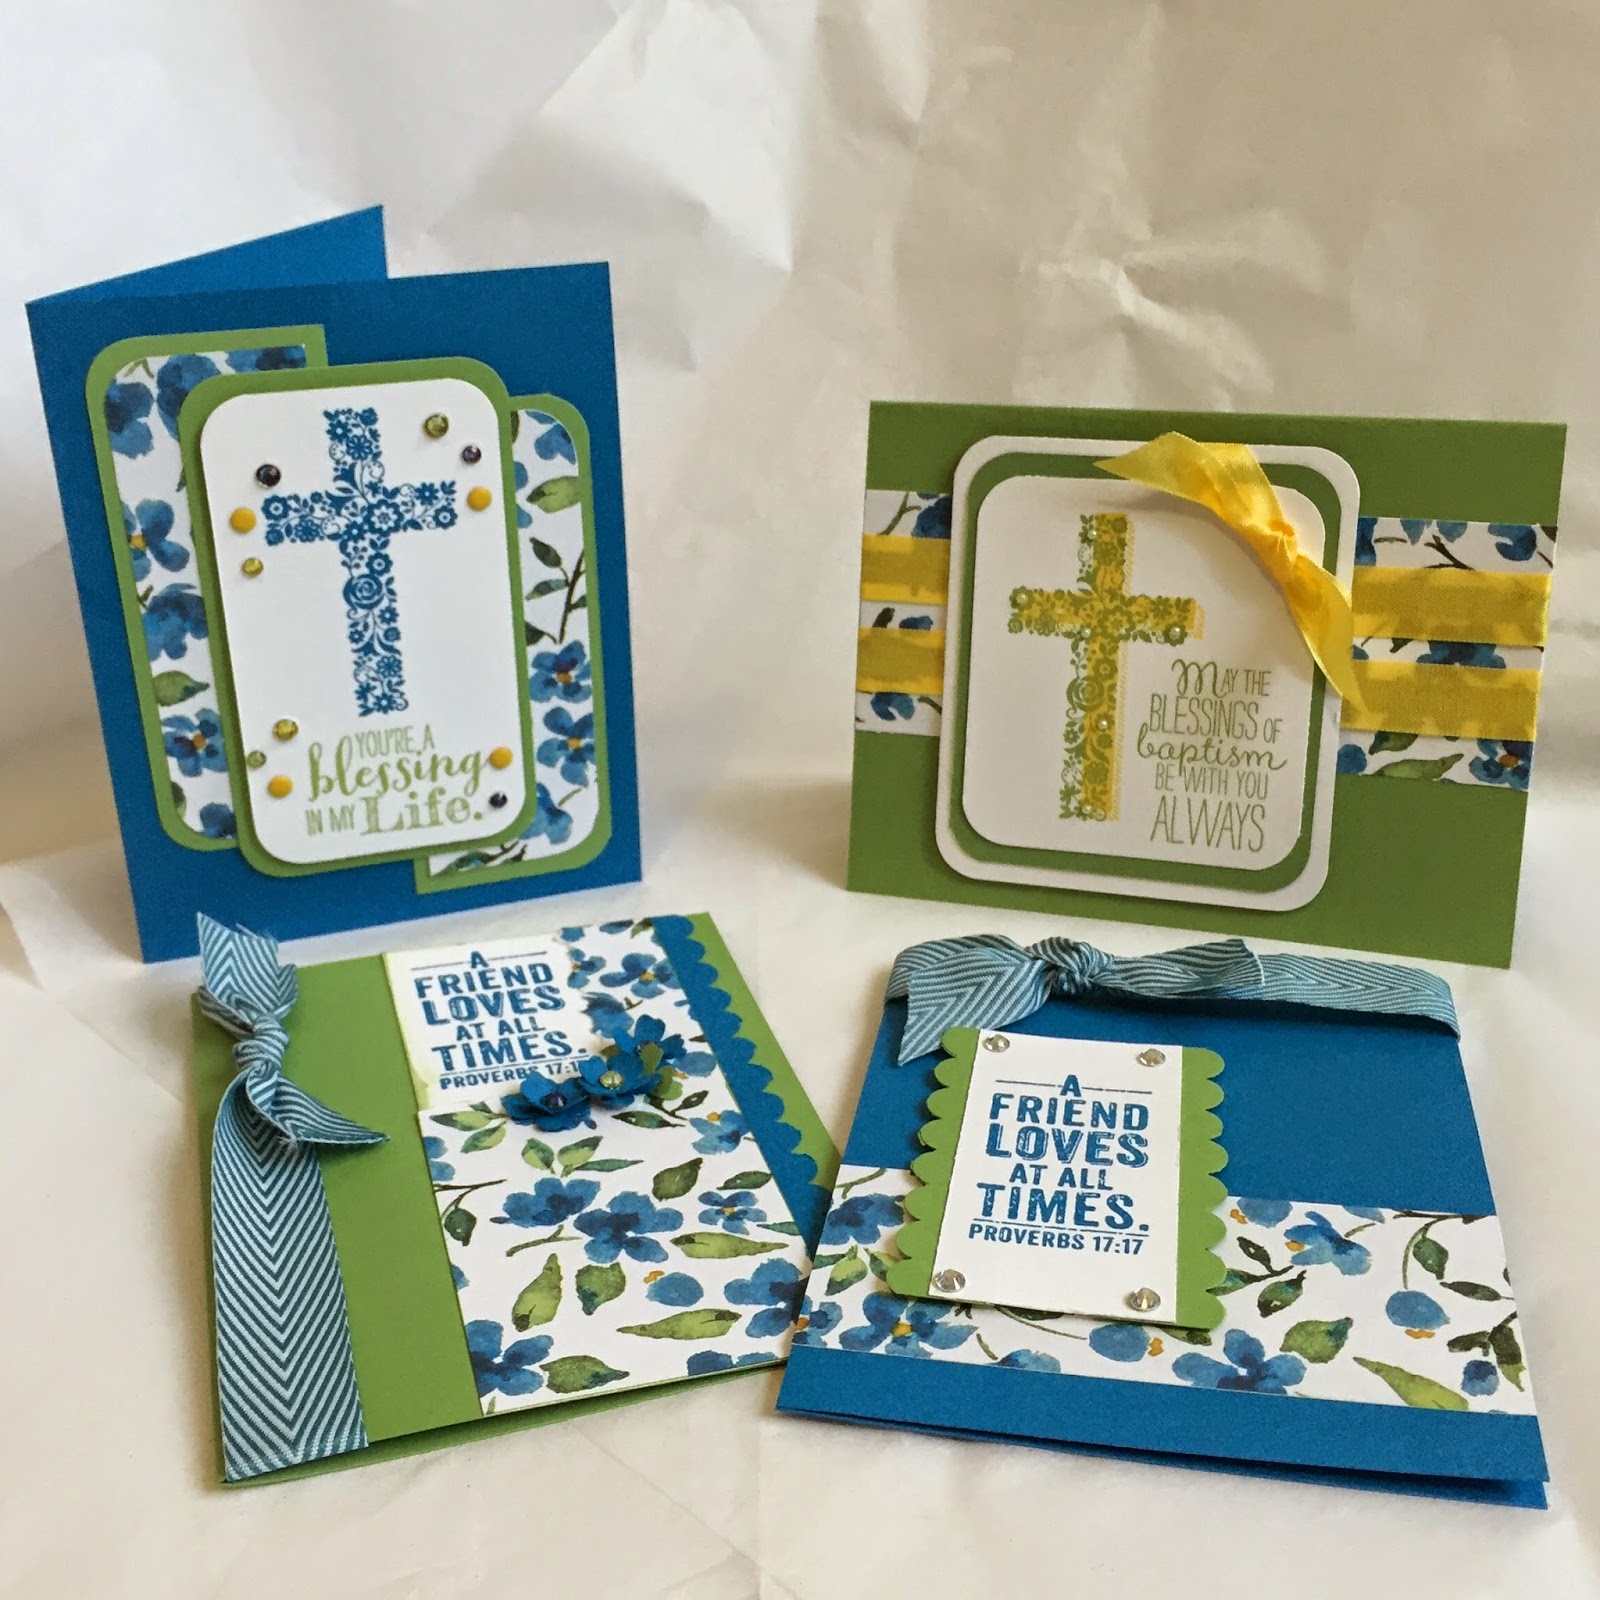
I got up to Craft Central at nap time, and made these cards using Painted Blooms Designer Series Paper and the Blessed By God stamp set. The colors pop together, and are incorporated into the blue flowered print in the paper set! Blessed by God stamp set is in the Annual Catalog, and is a good set for weddings, baptism, friendship and a variety of other occasions. (Anniversary, retirement, congratulations - it works, look at the set!)
For the first card, I used a Wild Wasabi base, a strip of Pacific Point punched with the Scallop Border Punch, and some of my Island Indigo Chevron ribbon. Yes, it does match mostly because of the shades of blue in the flowers. I ripped out a section of the Painted Blooms DSP and tucked a white piece stamped in Pacific Point, sponged on the edges with the Wild Wasabi.
The second card has a Pacific Point card base, with accent panels of Wild Wasabi, and some added Candy Dots and colored rhinestones. I used the Corner Rounder punch to add some focus to the center panel.
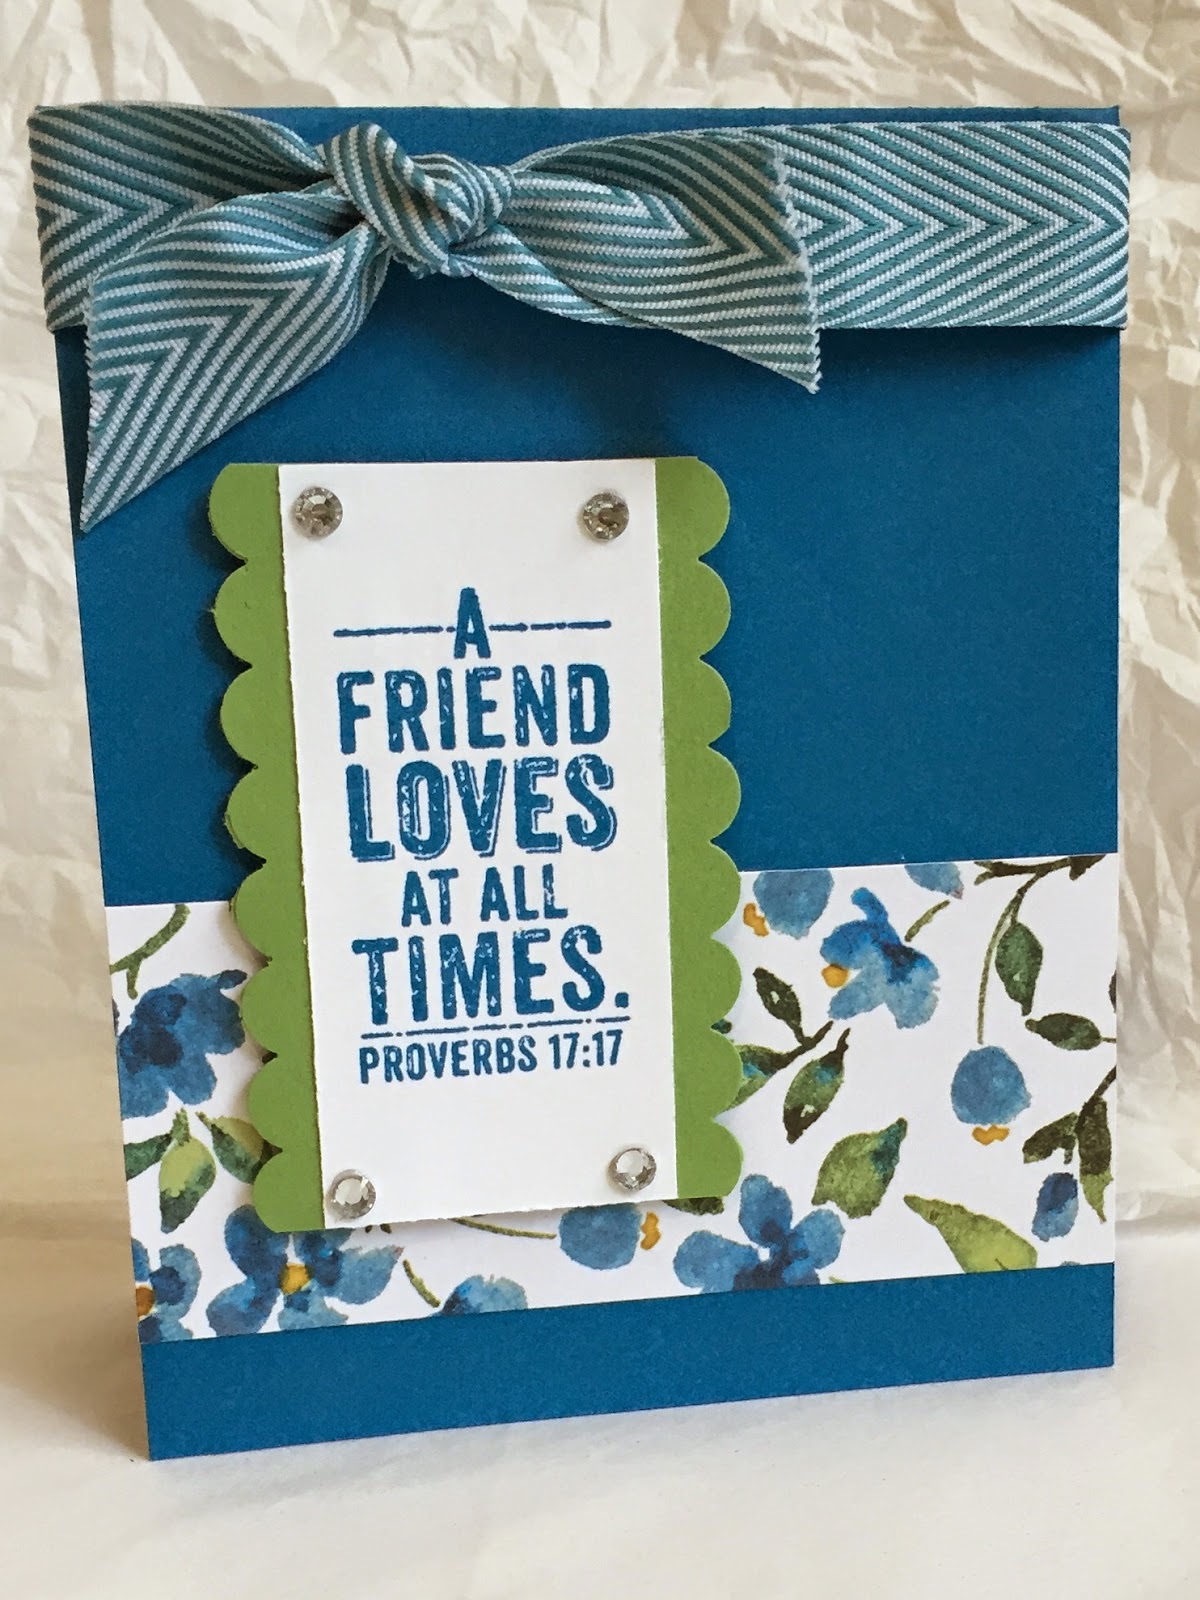
The third card also has the strong blue Pacific Point base, with more scallop border punches this time in Wasabi. I used more of the chevron ribbon, and accented with some rhinestones.
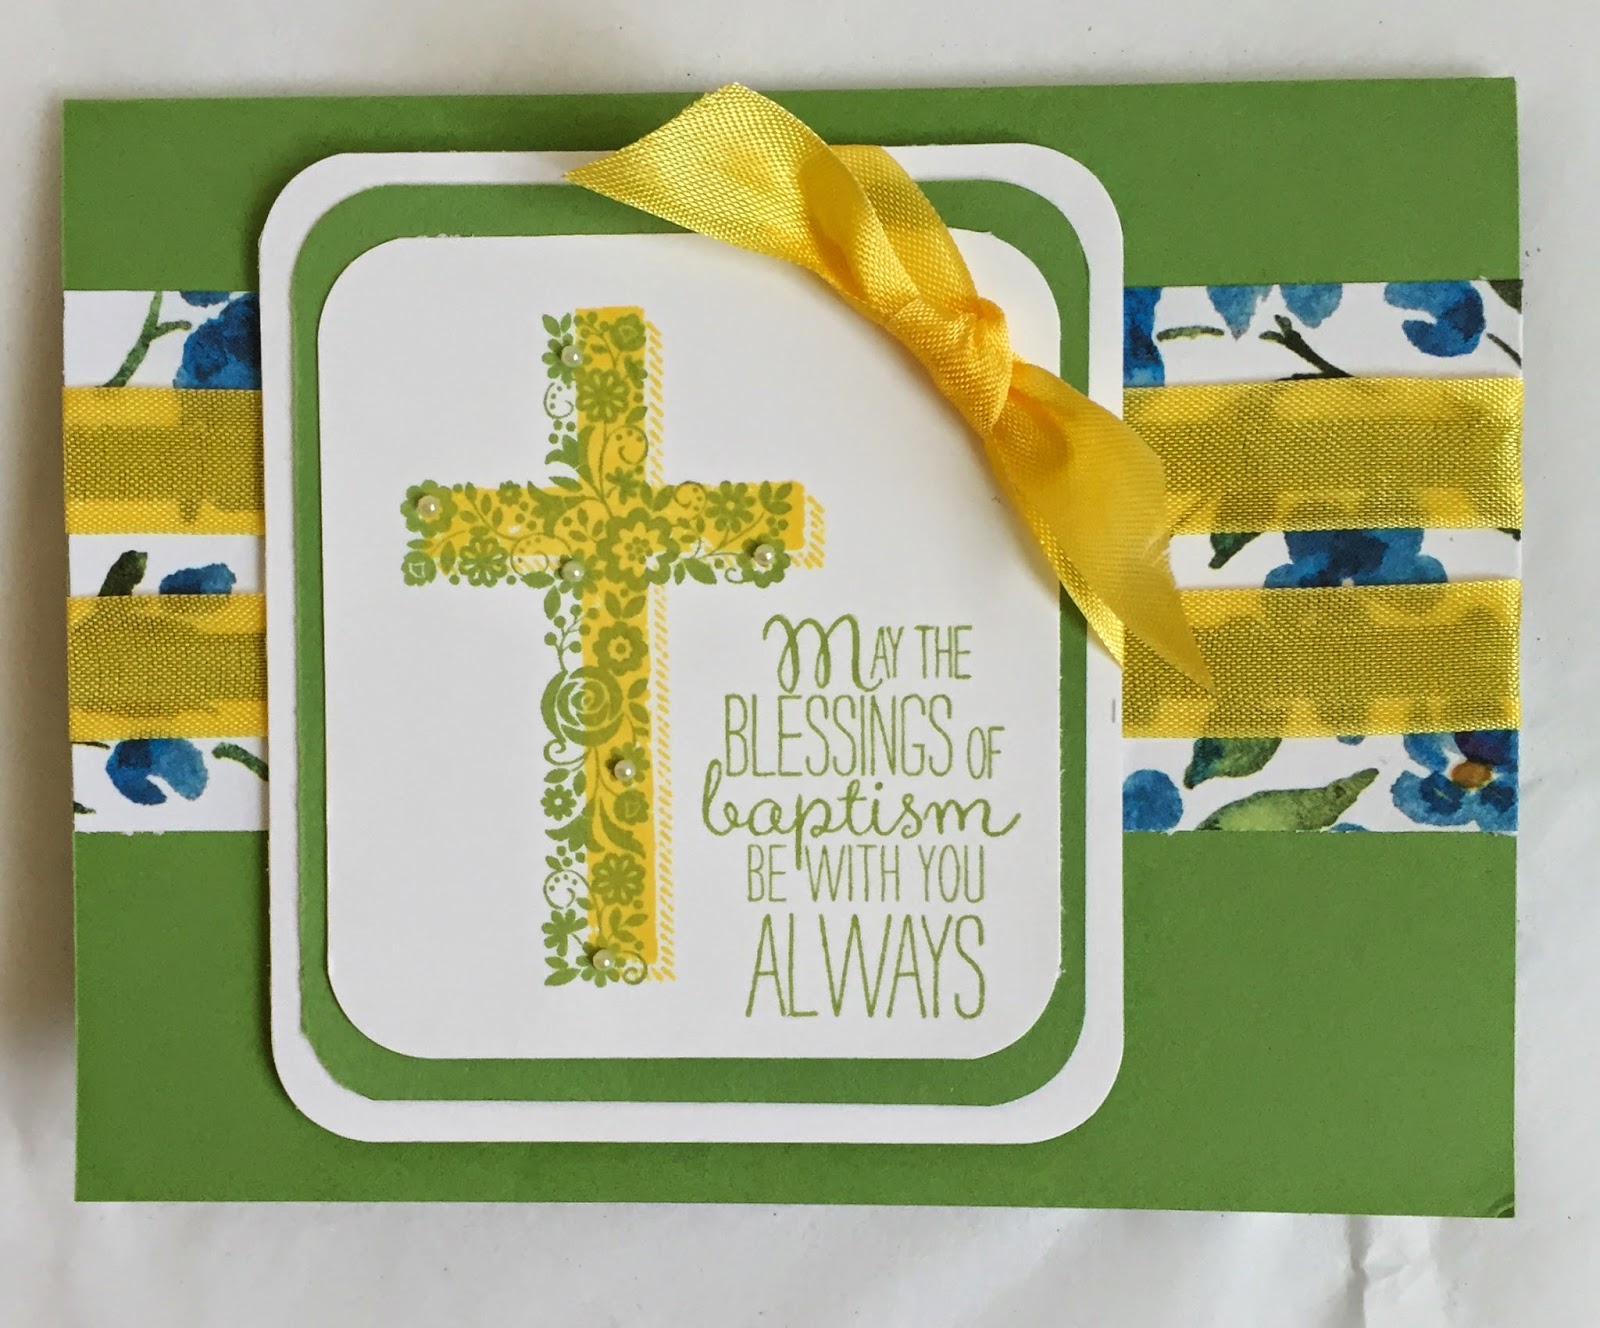
The last card I tried a 2 step stamping style with the crosses in the set. I stamped the solid cross in the lighter Daffodil Delight, and over it stamped the flowered cross in Wild Wasabi on a triple layer panel. I used 3 strips of the Painted Blooms DSP across the Wild Wasabi card base, and wrapped the space between the strips with some Daffodil Delight 1/2" Seam Binding.
I think these are bright and happy cards, a perfect way to send someone your special wishes. What do you think of the color combo?
Happy Crafting!
-Angie
Sign Up today - Paper Pumpkin Kits ship out after the 10th for subscribers!
Easter is early this year! You'd better HOP to it if you want to get all those cute Pinterest projects completed! lol Today I'm sharing a cute treat bag, to hold some sweet Easter treats. These would also make cute little favors, for a baby shower or spring party, maybe your Easter Brunch. Easy for a class party, too! The Polka Dot Tag a Bag is a versatile (and economical!) little treat bag. Darling with the Tag a Bag Accessory Kit, it also lends itself to many other tag creations for just about every holiday or event. Perfect to have on hand for a quick gift card holder or other small gift.
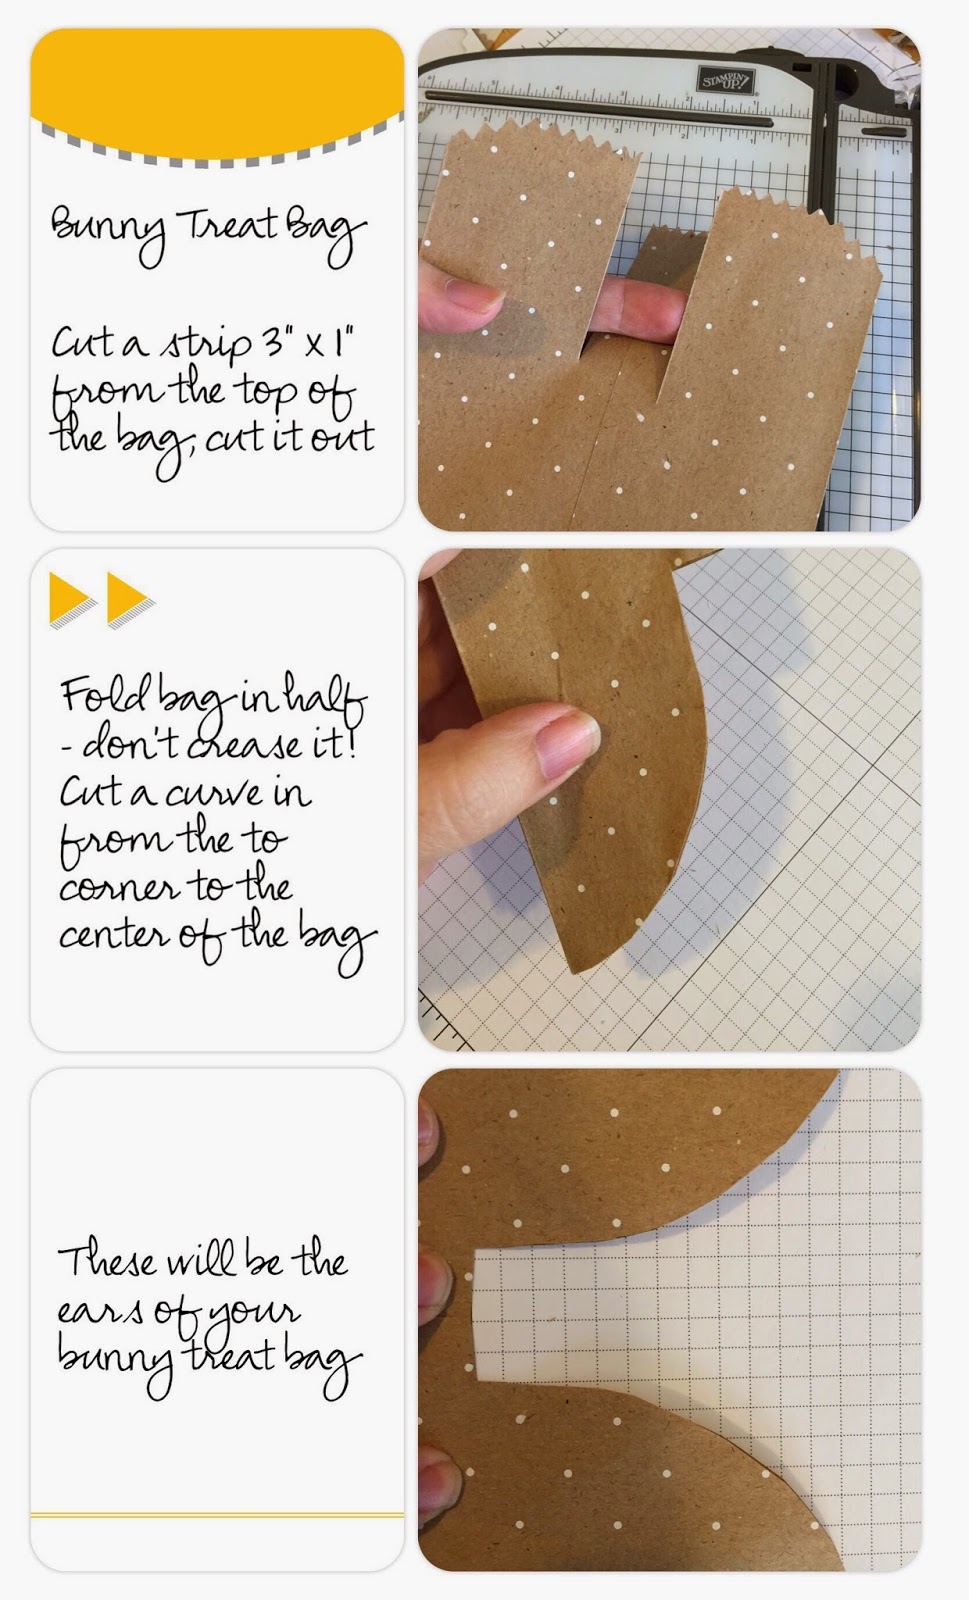
To make these, you need to cut a rectangle out of the center of the bag. This is about 3" down from the top, and about 1" wide. Then, bring the edges of the bag together, and cut a curve for the ears that will match exactly.
Fill your bag with goodies! Taste-test a few for quality!!
Then, gather the bag at the bottom of the rectangle space you cut, and fix the ears so they are looking like... ears. You could totally tie them up here and leave it like this -very cute! But for more "realistic" styling ;-) you can trim two pieces of card stock, or paper of your choice, and adhere them into the ears. Tie off the gathered piece with some pretty ribbon and...
Voila!!
Pretty party favors, or class treats!
I used the Polka Dot Tag A Bag; Crisp Cantaloupe Card Stock; Pumpkin Pie and Crushed Curry Chevron Trim, Natural & Old Olive Two Toned Trim.
Yes, by the last month of Sale-A-Bration, you've stocked up on all the stamps,paper and accessories, and earned everything in the free Sale-A-Bration catalog. Your wish list was almost fulfilled... But Wait! There's More!!
Stampin' Up! will release 4 new items
to the Sale-A-Bration catalog on March 1st!
Every $50 purchase earns you one, so get those wish list back out!! You KNOW how wonderful the items in Sale-A-Bration have been this year - Don't miss out on these 4 great new items:
I'm super excited about the Velum stacks, but the new stamp sets?!? PERFECT for coloring! I'm really trying to develop my coloring ;-) but a beautiful image to start with always helps!
I'll definitely be sharing some great ideas
when I get my hot little hands on these beauties this week!
If you've joined my team, you get to order early, WITH a Discount,
and enjoy pre-sales on great new items, and so much more!
Layers Of Gratitude Alternate Project Idea for February 2015 Paper Pumpkin Kit
I love getting Paper Pumpkin each month. I know, I gush about it all the time! But really!!
I am a busy mom. I have a bajillion and one things to do, and the same 24 hours everyone gets to do them in. I need a break once in a while!! Crafting really does wonders for me! It lowers my stress, it releases that creative streak in me, and.it.is.fun!! Paper Pumpkin is everything I need in a box. I can sit down for 30 minutes, drink hot coffee or tea, listen to something besides Caillou or Adventure Time, and make the project. And they are cool projects!
I can think about the pieces and dream up NEW ways to use the supplies. Or different ways to use the supplies. Or how I can use the supplies with some of my other craft supplies... its a great creative exercise, whichever way you want to go. If you are NOT creative, try it. If you ARE creative, you should try it too!! It is a great place to start for anyone who wants to get crafty with no stress and no (ok -only a little ;-) mess!
If you'd like to give Paper Pumpkin a try, or just find out more - please visit my POST HERE.
And on to the star of this show!!
Alternate Paper Pumpkin Kit Project Idea February 2015 - Layers of Gratitude
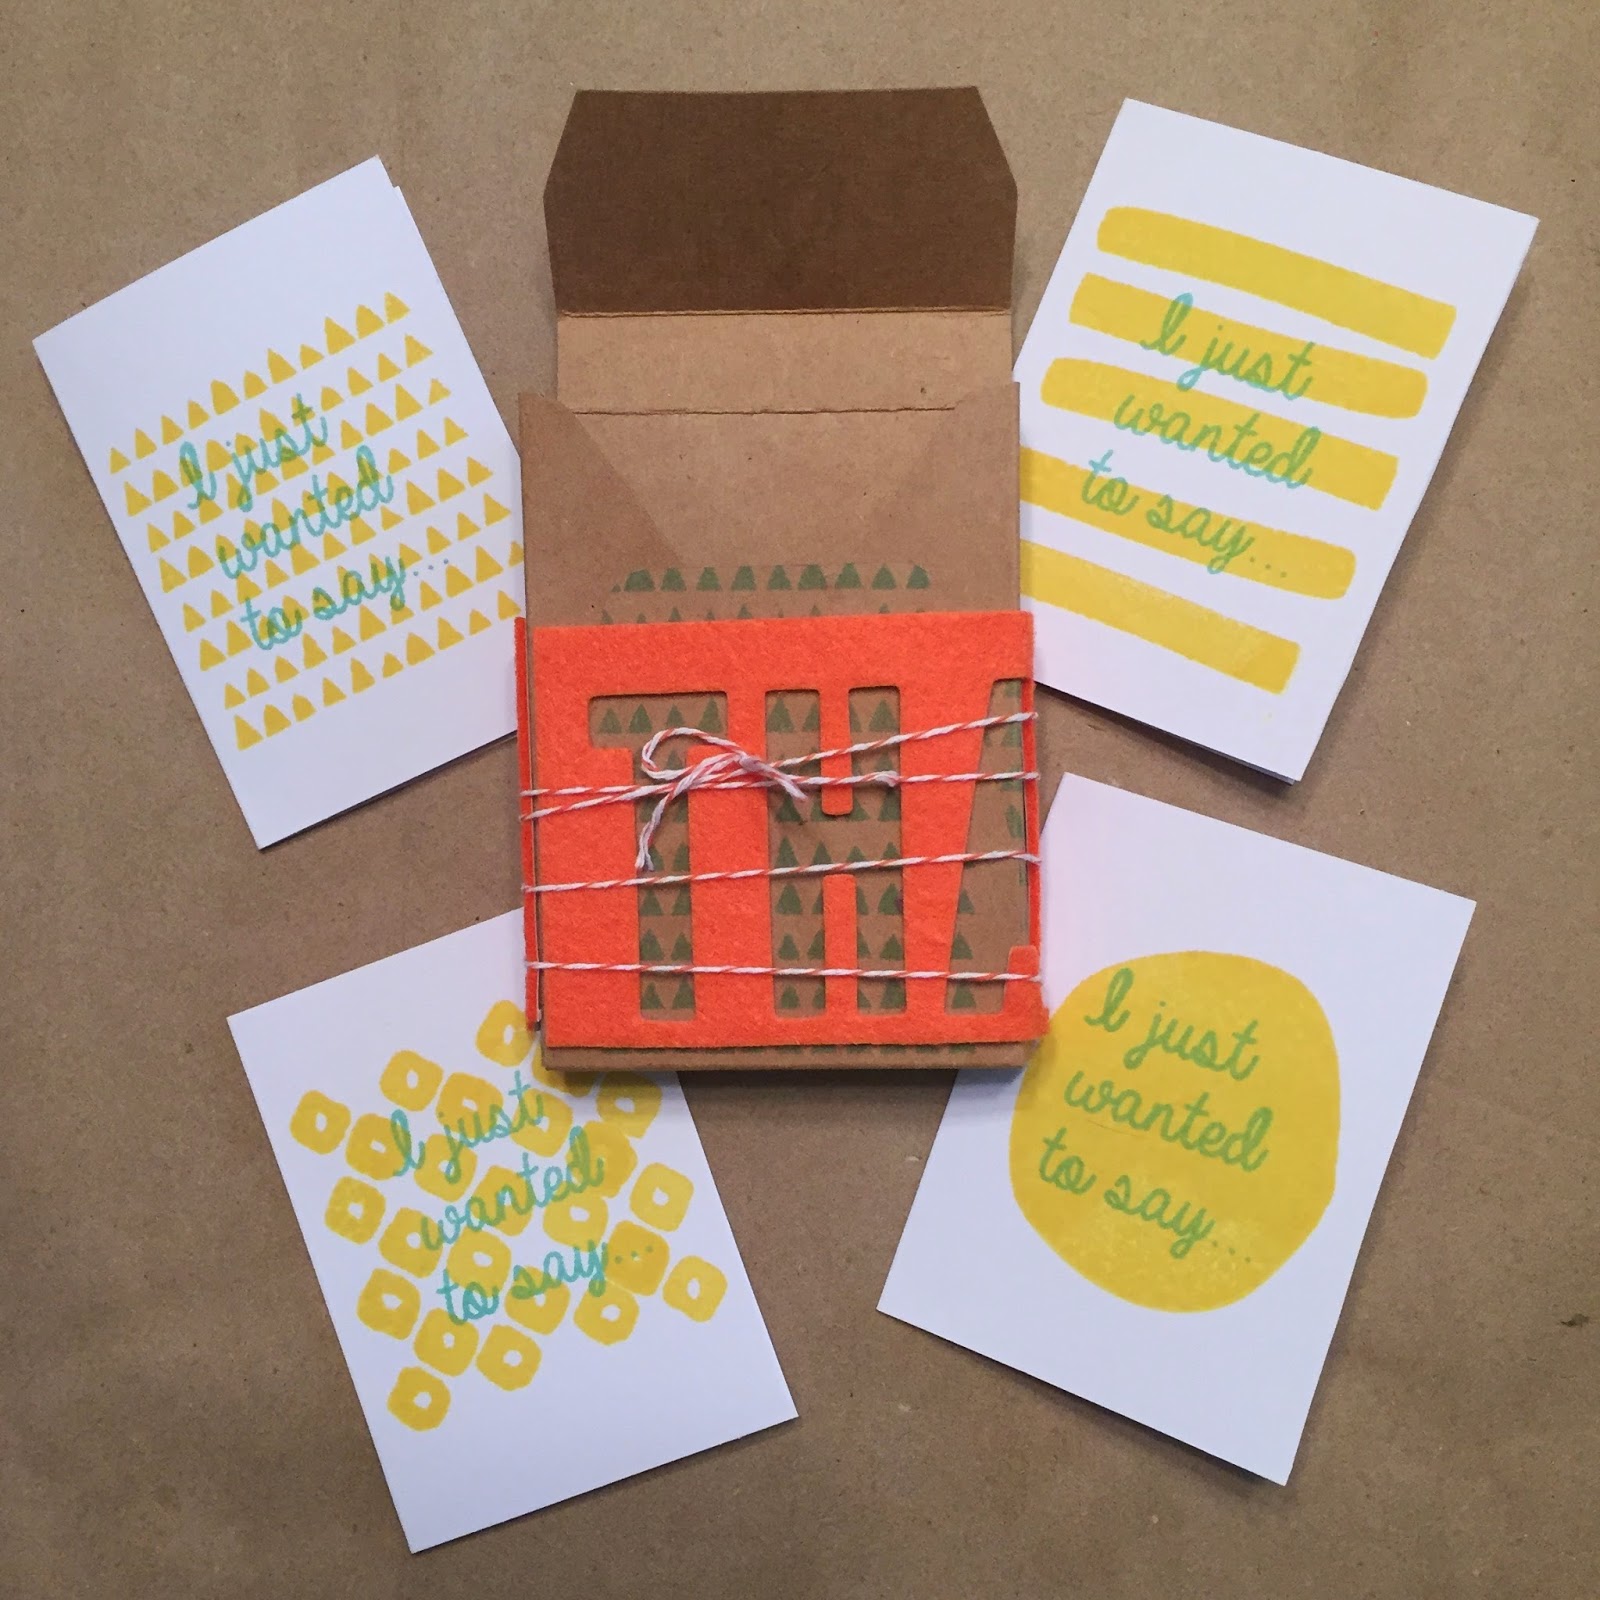
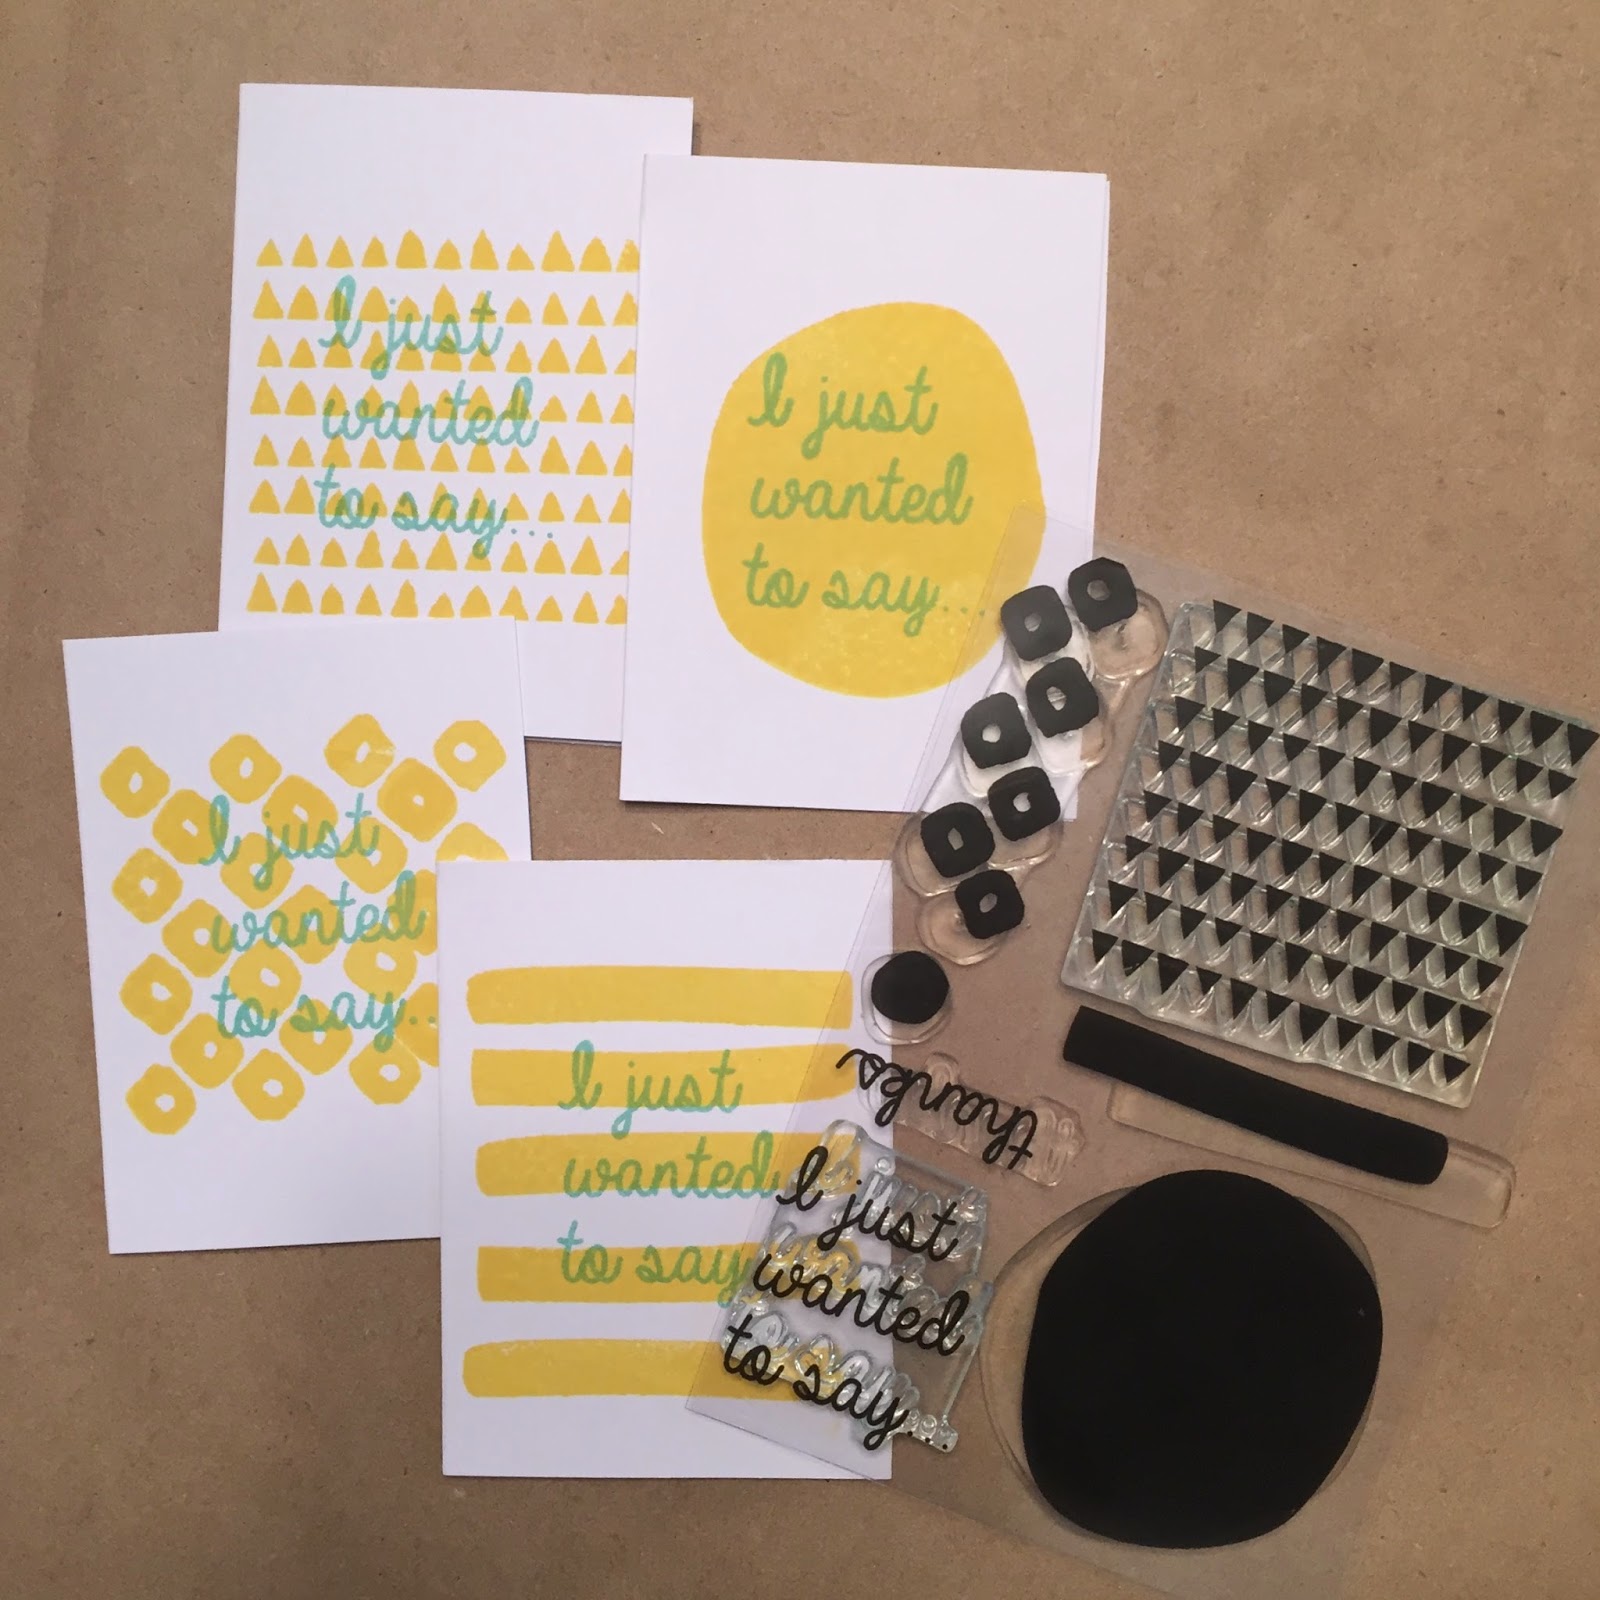
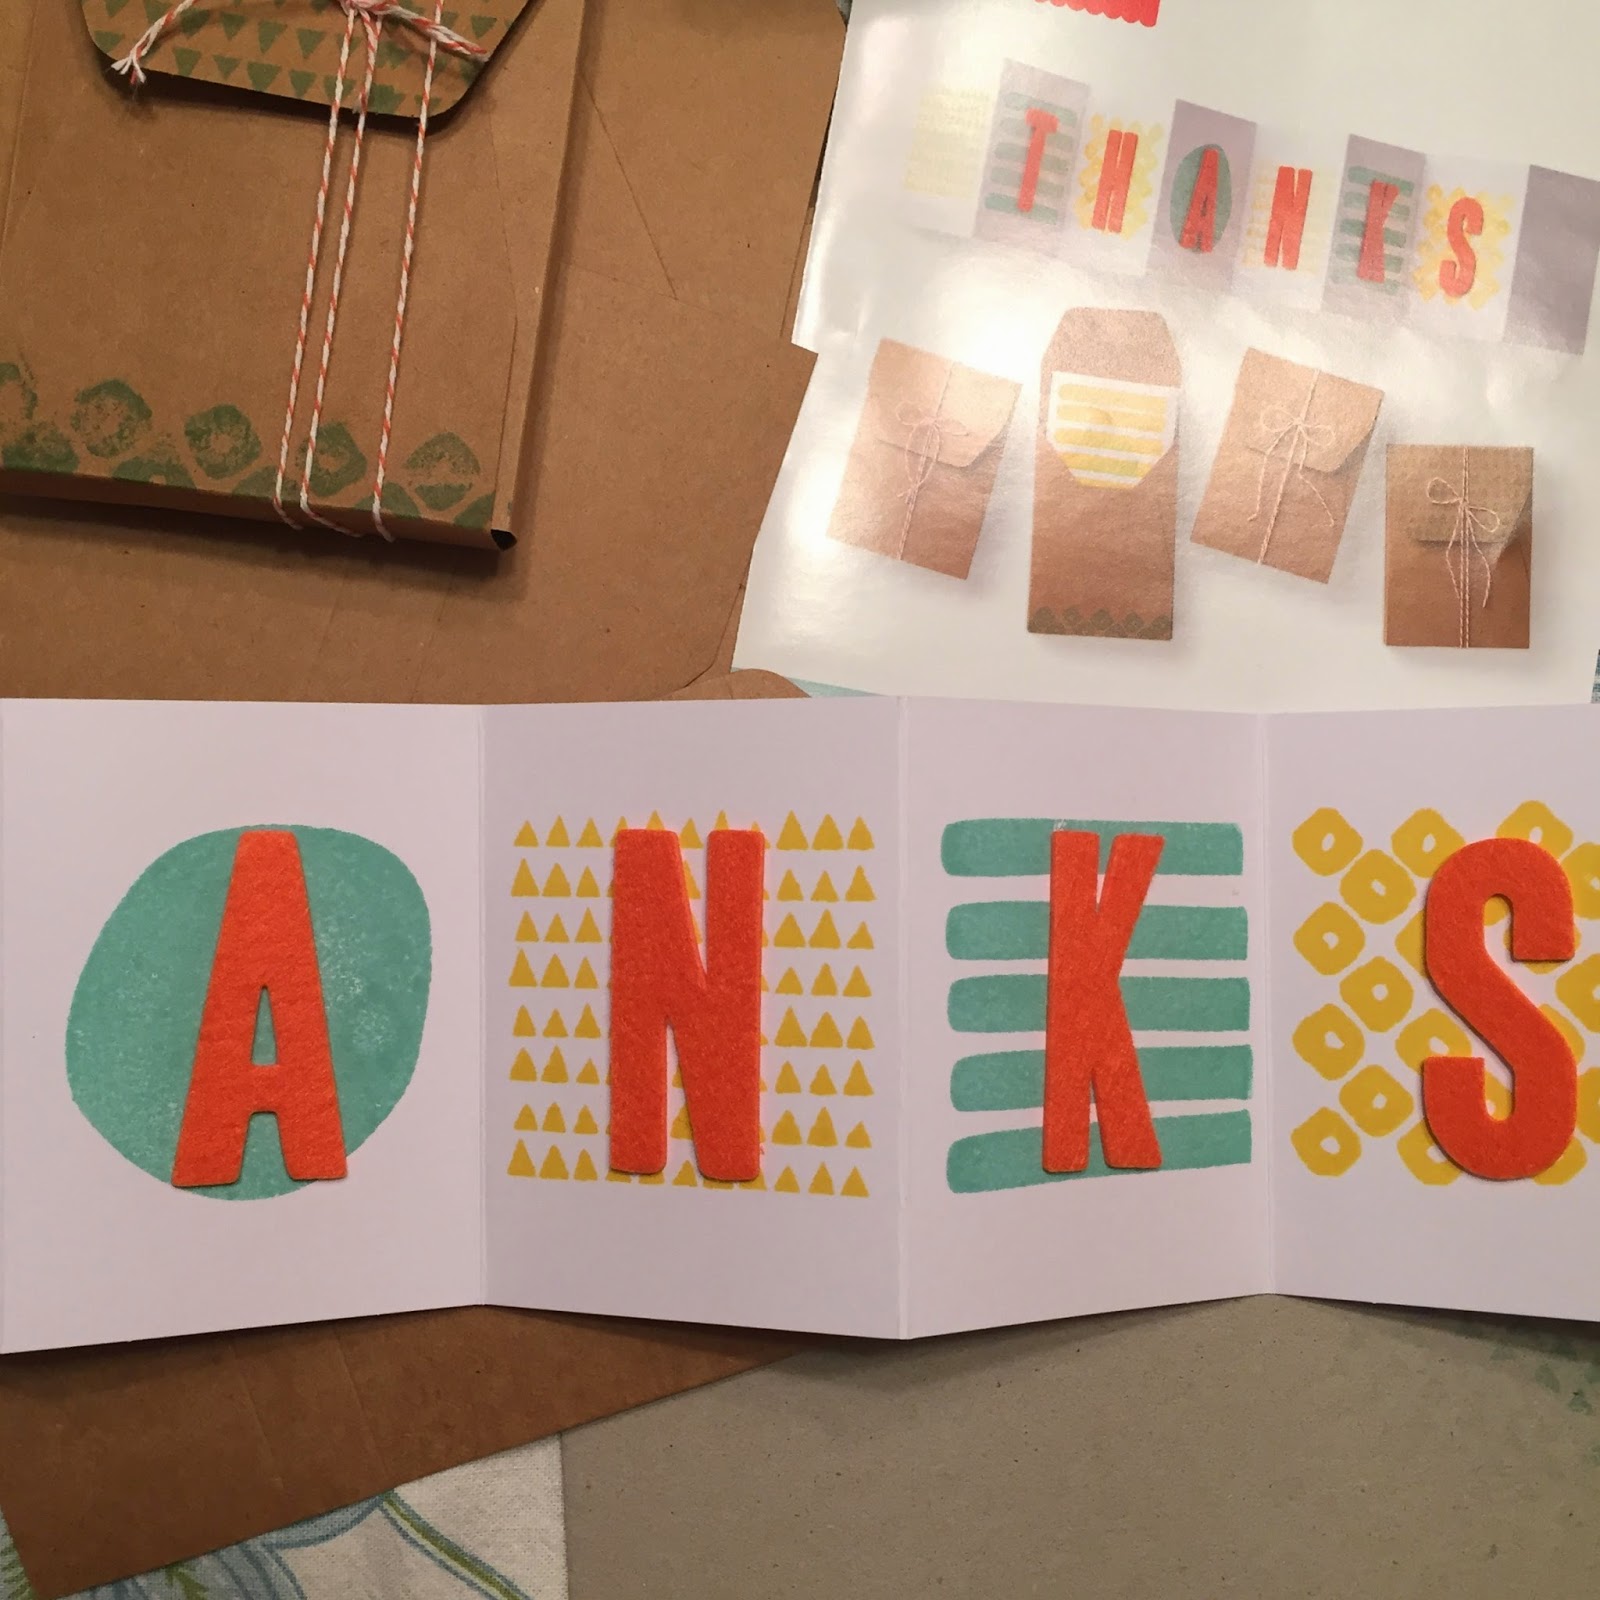
I am sharing a different project you can make with just the supplies in this months kit, Layers of Gratitude. I used the frame for the letters and wrapped it around the little box. I cut the long fold out card into 4 little note cards & stamped them with the 4 designs. You can tuck them in a gift bag or a bunch of flowers; or just leave them, sitting pretty, out for someone to find. The box is stamped (before I added the thanks frame) and wrapped with the little string included in the kit. I trimmed the top flap down a bit to tuck into the bottom flap, so you don't need the string to tie it closed. This would be a cute gift for someone, everyone can use a Thank You note at some point!
Alternate Paper Pumpkin Kit Project Idea February 2015 - Layers of Gratitude
On the inside, I added the Thank you stamp, but you could just as easily leave them blank and add what you REALLY want to say: I love you, you're the best, I'm sorry... whatever the moment calls for. I'm excited to use this GREAT set of stamps!!
Great stamps set for quick or small thank you notes. February 2015 Paper Pumpkin - Layers of Gratitude
There are two things I love about this alternate project. It uses the frame around the letters, so trash to treasure there, folks! AND! If you already made your 8 Thanks fold out cards, and used them for team thank you's or to present a gift card with great style, THATS OK!!
(You can see more of those ideas in my post HERE)
- one of the simplest yet most powerful things - Gratitude
Use those crazy good stamps, and make a set of note cards to use any old time!! Find a little envelope and stick that letter frame onto it.
Its not as fancy and giftable as my project ;-) but still as useful!!
Tuck the little notes in your purse or glove-box or desk, and practice RAK ((random acts of kindness)) for people as you go through your week. "Thanks for that excellent service. Thanks for your kind words when xyz happened. Thanks for your support. Thanks for your help. Thanks for your big bright smile..." Gratitude. Its a good thing to share. :-)
Paper Pumpkin February 2015 Alternate Project Idea
If you're not a member, you should be! #JustSayin
Find out more about Paper Pumpkin craft subscription box service today
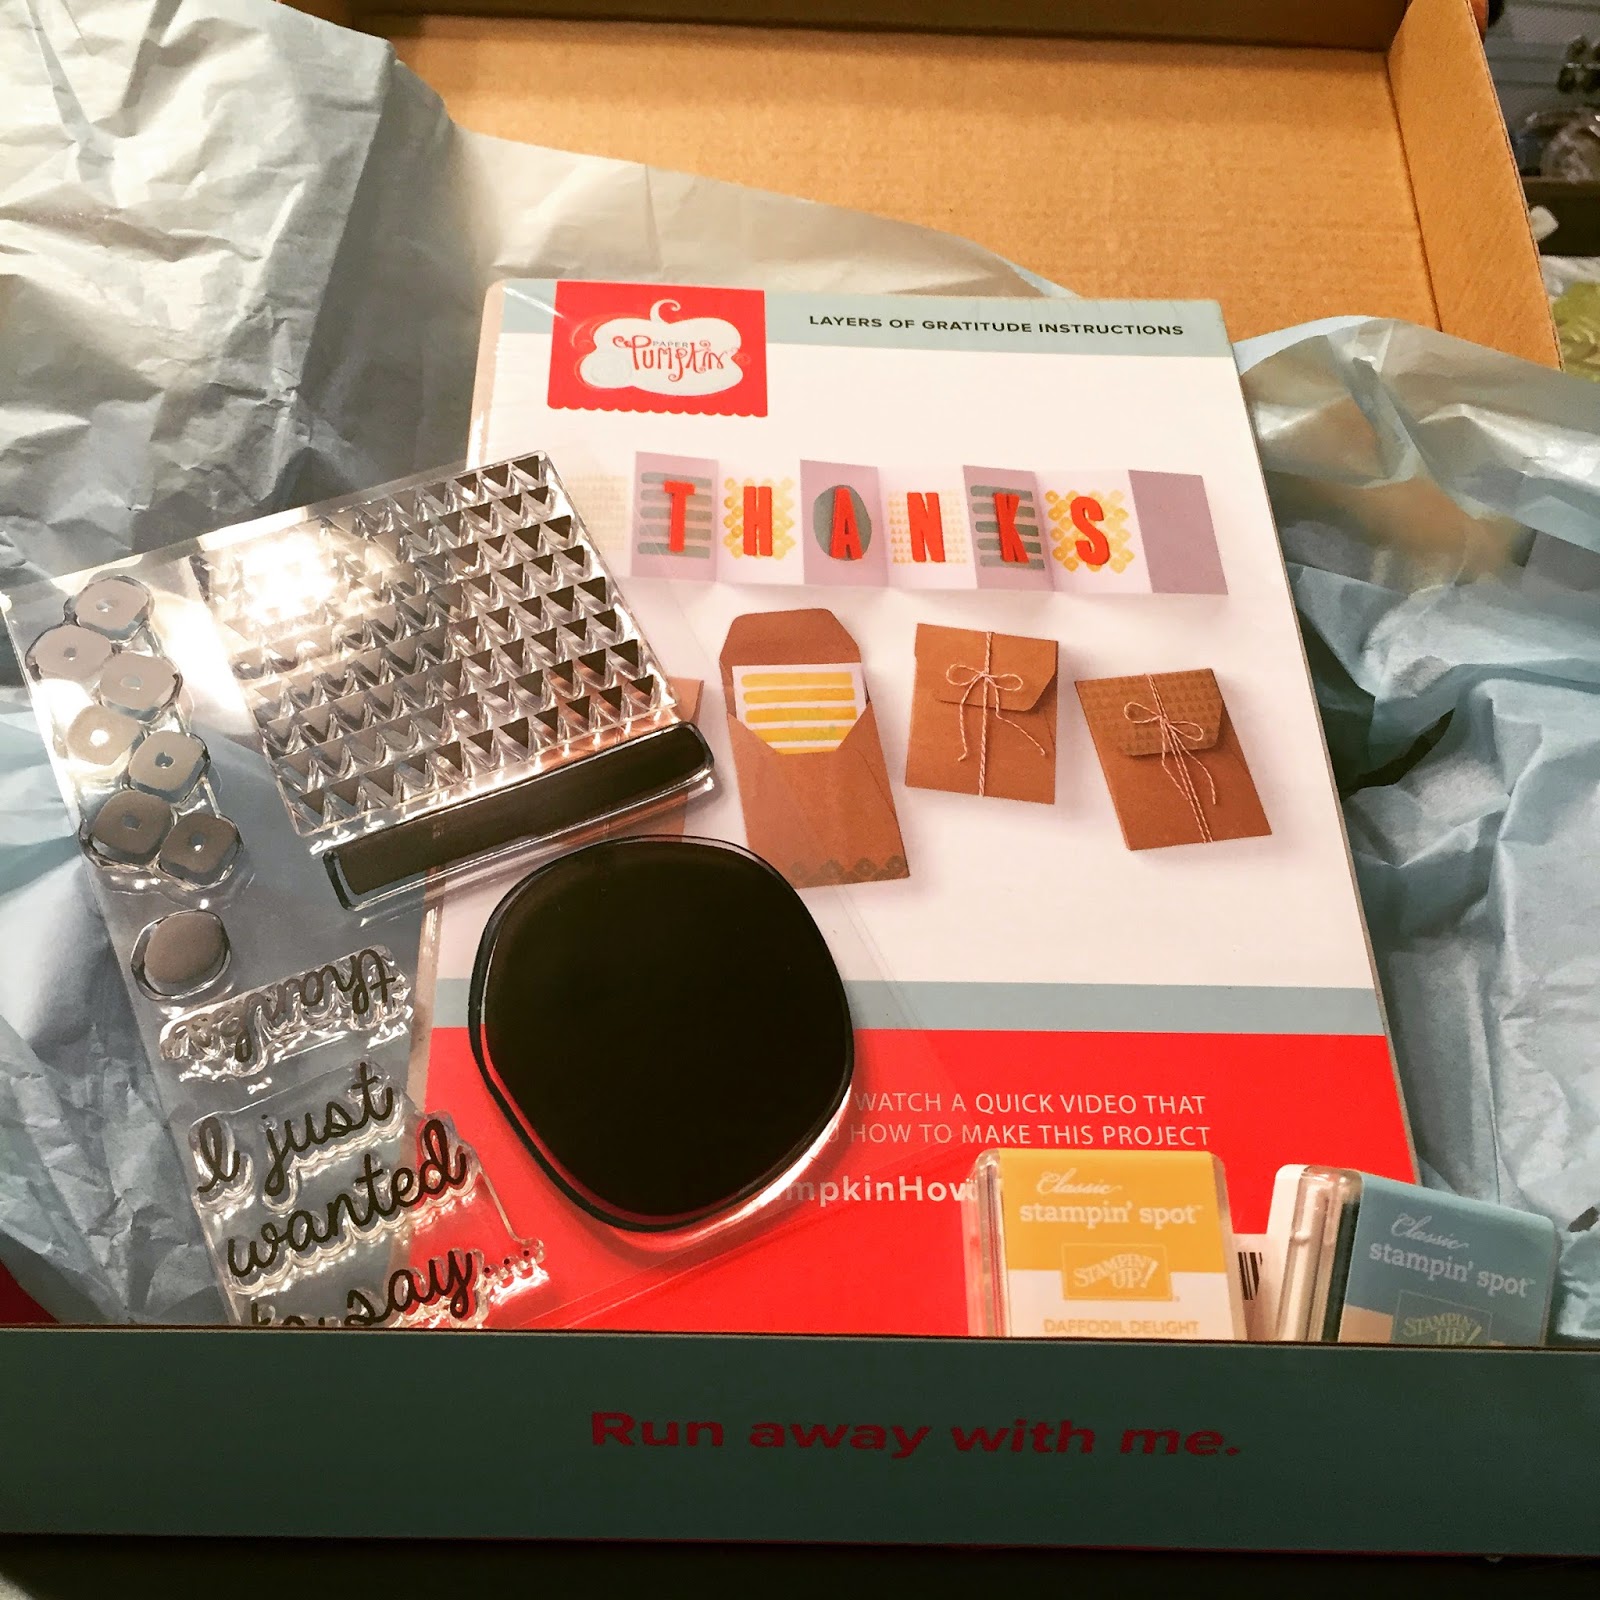
Ready to Run Away with Paper Pumpkin Feb 2015 Craft Subscription Box
Oh the #happymail day when that red box jumps out of my mailbox!
I purposely try not to look at all the other posts of lucky ducks getting theirs before me, so that I can enjoy that excitement and surprise of opening my own gift wrapped project!! And sometimes its a wait - I live in a pretty rural town. But I do love the surprise.
Bright Colors - Two new Stampin' Spots to add to your collection!
This month's kit is pretty interesting! Its bright, its going to give you some GREAT stamps, and I've got some great ideas to share with you on how you can use these fun Thank You cards!!
Modern patterns, happy colors, a great display card! They will LOVE it!!
Here is the quick video from Paper Pumpkin on YouTube showing how to assemble the project.
(There are instructions included in every kit, but the videos have little tips that really help - watch how they stamp the Lines and get the spacing right on!)
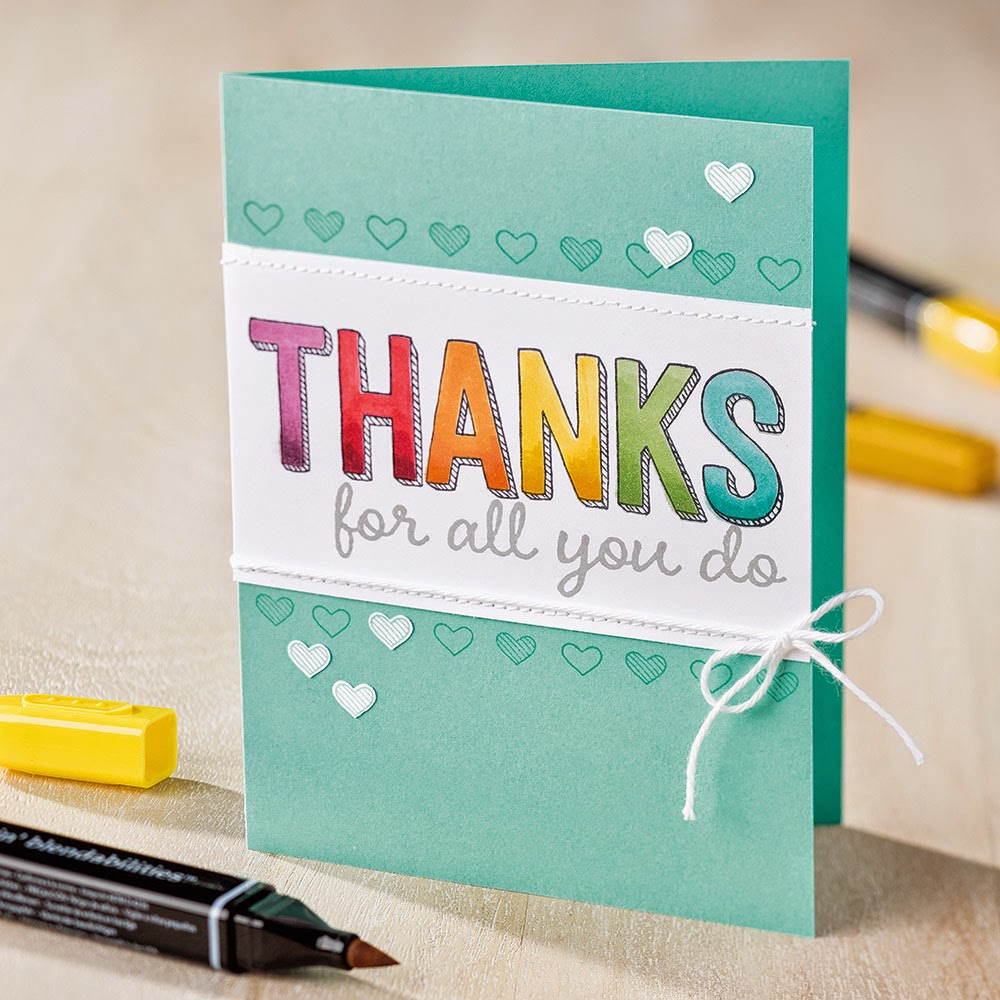
So, first of all, I love that there are 8 cards in this kit. I can definitely use them up between crossing guards, office staff, and teachers!! They are the PERFECT size to tuck a gift card on that last page!!
Gift Card holder - deluxe!! A display to remind them of the sincere appreciation, and a little treat tucked in there too!
Gift Card holder. Check!
Class gift to the teacher? Get your group to chip in for gift cards, and fill that sweet card up!! 8 panels on the back gives you room to really mix up the love.
What about Graduation? To your graduate - again, who doesn't like a nice assortment of gift cards?!
But what else can you do with this kit?!?
How about a Mini Scrapbook album??
The panels are about 2.5" x 3.75". Print some of those Instagram pics in a collage on 4x6 photo paper and you'll be able to fit 2 prints - 8 photos - worth onto the back of the card. Add captions, and a cute note at the end panel on the front. Priceless!
Teachers, parent helpers, youth group leaders, volunteers at your organization, donors to your event. Pictures are fun and really share a moment. I think it will make a great card to share appreciation for special moments.
From your graduate - graduation is quite the milestone. Friends, Coaches, Mentors, Family - could be special filled with photos, or just written memories you want to share.
Speaking of coaches - team thank you cards! Room for the whole group to sign!
Perfect for work - maybe a retirement, or a thank you to a coworker for some excellent help on a project or other event you need alot of room for folks to sign?
If you missed out this month, DO NOT WAIT to register for next months kit! You could be a few clicks away from some great fun, useful projects, and exclusive stamp sets! #justsayin
Order on a regular order - just add the items to your cart,
be sure to use the same email you use for your Paper pumpkin Kit subscription
when checking out! Members Only! ;-)
I'm off to play with some alternate project ideas to share with you, but really... The ideas above could use up a few kits just on their own!
No kidding, skip to the fun with this all inclusive craft subscription! You can use a break, right? ;-)
Happy Crafting!
-Angie
Occasions 2015 Catalog - Artisan Embellishment Kit with Simply Wonderful Stamps from Sale-A-Bration 2015
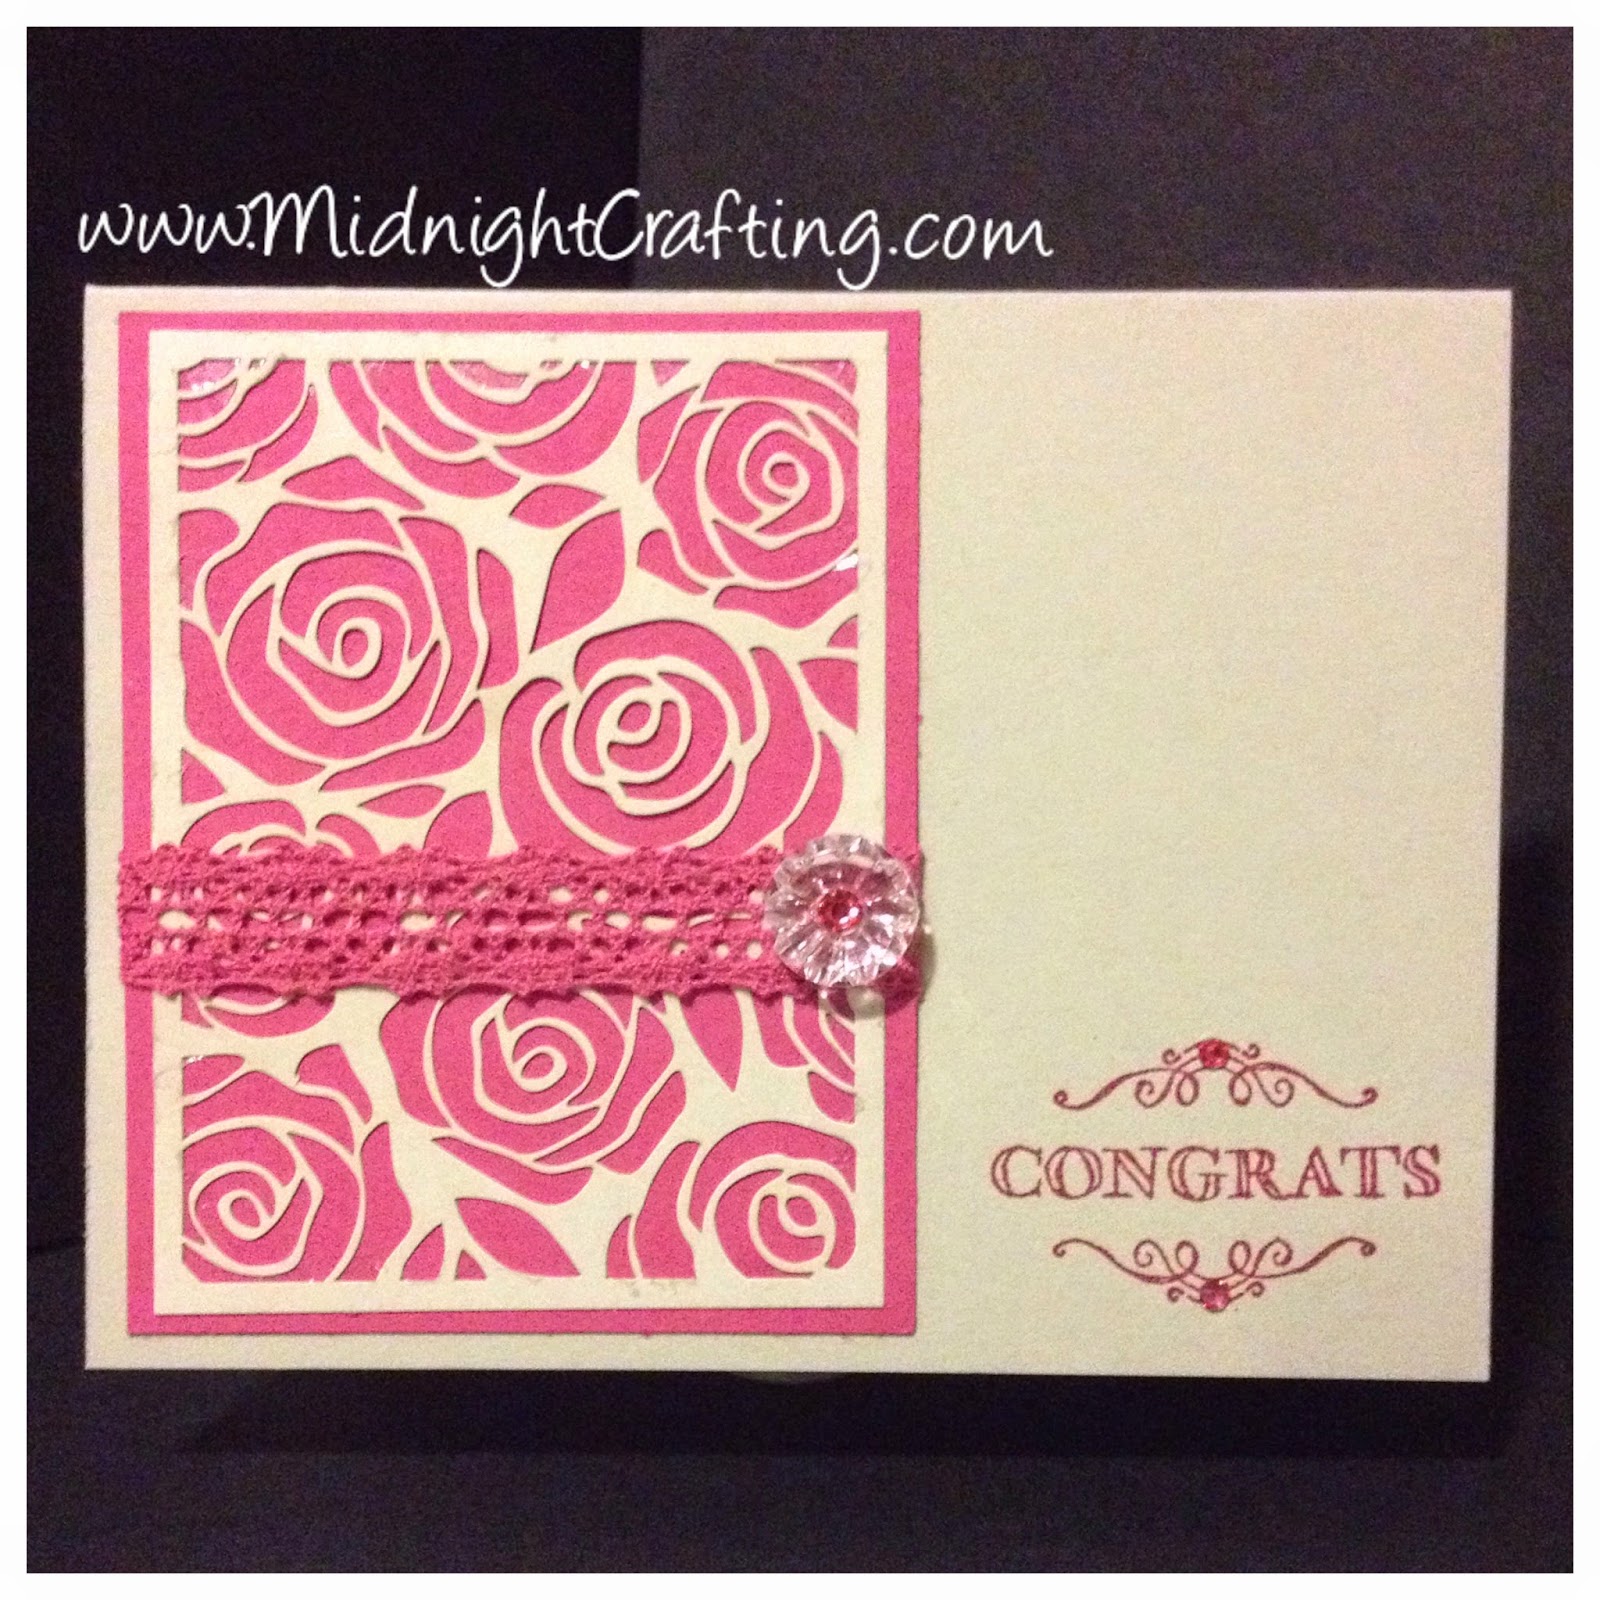
Simply Wonderful Artisan Embellishments - Beautiful Rose Diecut piece from the kit in the Occasions 2015 catalog, with Sale-A-Bration 2015 stamps. I love how easy these cards are!!
The layout is very fun too - change out the die cut for a pretty patterned Designer Series Paper, a stamped image, or another die-cut accent. Maybe some of those pretty Flower Patch flowers? Or the delicate Butterfly Thinlits over the Butterfly Basics stamp set? Lots of options to play with in this layout.
Simple. Simply Wonderful! ;-)
The Sale-A-Bration set Simply Wonderful has seven stamps, six sentiments and an accent flower. A great greeting set to have in your collection. Only available as a Sale-A-Bration FREE item when you spend $50 from any current catalog, and only available through March 31st. Buy now - once it sells out it won't be restocked!
Artisan Embellishments die cut piece - Occasions 2015 Change the mood and occasion by changing your color scheme.
Combine the die-cut pieces from the Artisan Embellishments Kit in the 2015 Occasions Catalog with a solid color background cardstock, and Wow! Your mom's favorite roses? Sweet Yellow Roses for your friends? Color Coordinated to the school Graduation card?? Red Roses for a wedding or anniversary? Coordinate colors to a special event? Could be the most beautiful easy-peasy card you've made!!
Soft Color combinations, or go bright for big impact. This Artisian Embellishments die cut piece is very versatile!
This lovely piece from the kit will coordinate with any number of sentiments, from birthday to sympathy, graduation to new babies! But hurry, only available in the Occasions Catalog.
Vintage Valentine -
One of those creations you REALLY don't want to send off,
but sent it was -- with lots of Love! :-)
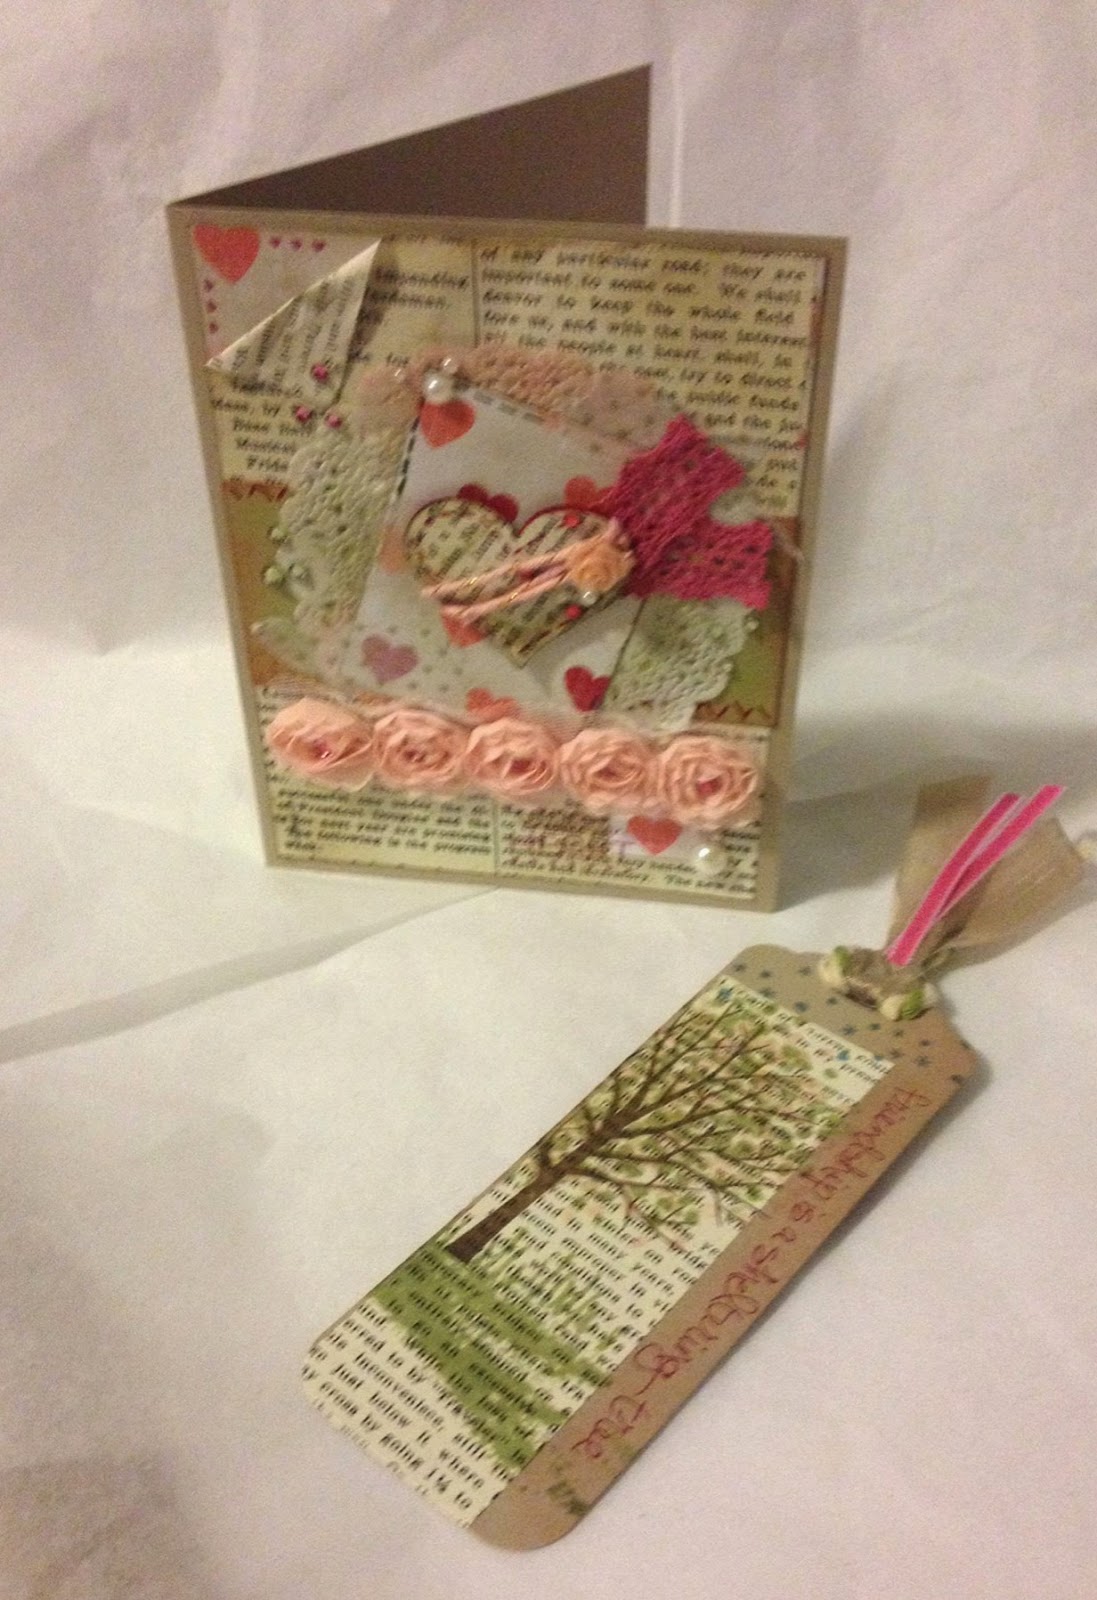
On Instagram, I found a cool little swap project through @TaraLee.Peace. You send out a package of love, handmade gifts, to someone else in the international swap. My gift recipient likes vintage, and I thought it would be a good stretch of the ol' creativity muscles to try "Vintage". I included in my package to her this card and bookmark:
Included in my #ShareLoveProject2015 package
Now you may have noticed, I'm not much of a vintage card girl, being that they usually involve **7000** layers, lace, sparkle, interesting little details, and Altogether too much fuss for me! BUT! I've been working on that, and I've been trying new styles.
And, I'm just going to put it out there: I should probably try more of this fussy stuff.
It was actually pretty FUN.
Sheltering Tree Bookmark
I'll start with the bookmark - its much easier to share than the card. :-)
Typeset paper over a Crumbcake base, punched with the tag punch, and beribboned with Natural and Old Olive Two Tone Trim, Melon Mambo 1/8" ribbon, and Crumbcake Seam Binding. I stamped the leaves of the tree in Blushing bride, with more of the Pear Pizazz over the top. The grass is pear also. The sentiment, Friendship is a Sheltering Tree, is done in Rose Red. (Totally looks like Melon, right?! wink, wink). The "snow" stamp I used as Stars across the top of the tag in Marina Mist. Simply sweet, I thought.
The card though.
This was a work of Heart!!
I knew I would use the Artisan Embellishments Kit, its just very vintage out of the box. I also wanted a heart, and I thought the Typeset DSP lent itself to an 'aged' look. The Stacked with Love paper added more hearts and pink to the Vanilla and Crumbcake, but I sponged the Stacked with Love pieces in Crumbcake, and ran the edges through the ink pad, to mute their very white base to better match the ivory tones.
Its subtle (or, ahem, not well photographed) but the center strip is Pear Pizazz, sponged in brown. It makes the card and bookmark go together well. In real life. Not so much here, I guess...
I added Faux Stitching on several layers with my Stampin' Write Markers. The doily (sponged in brown and pink) and the lacy roses are from the embellishment kit, but I added rhinestones colored with my Blendabilities for some pink sparkle. Then, I added other rhinestones colored pink and green. And then, some pearls. And then, some Washi Tape - Stacked with Love just at the edges of the center heart layer. And then a bit more lace for the heart. And then, some stamps from the January Paper Pumpkin kit, and the gold and pink bakers twine from that as well. And THEN...
Then, I said "Self, that is fussy enough!!" And it was finished.
{Closing Credits Roll Here}
I wrapped it up with my package o'Love, and sent it off into the sunset, as I fell onto my fainting couch, lost in sorrow at saying goodbye.
#ShareLoveProject2015
Share the love, send your heART out into the world.
Happy Crafting!
-Angie